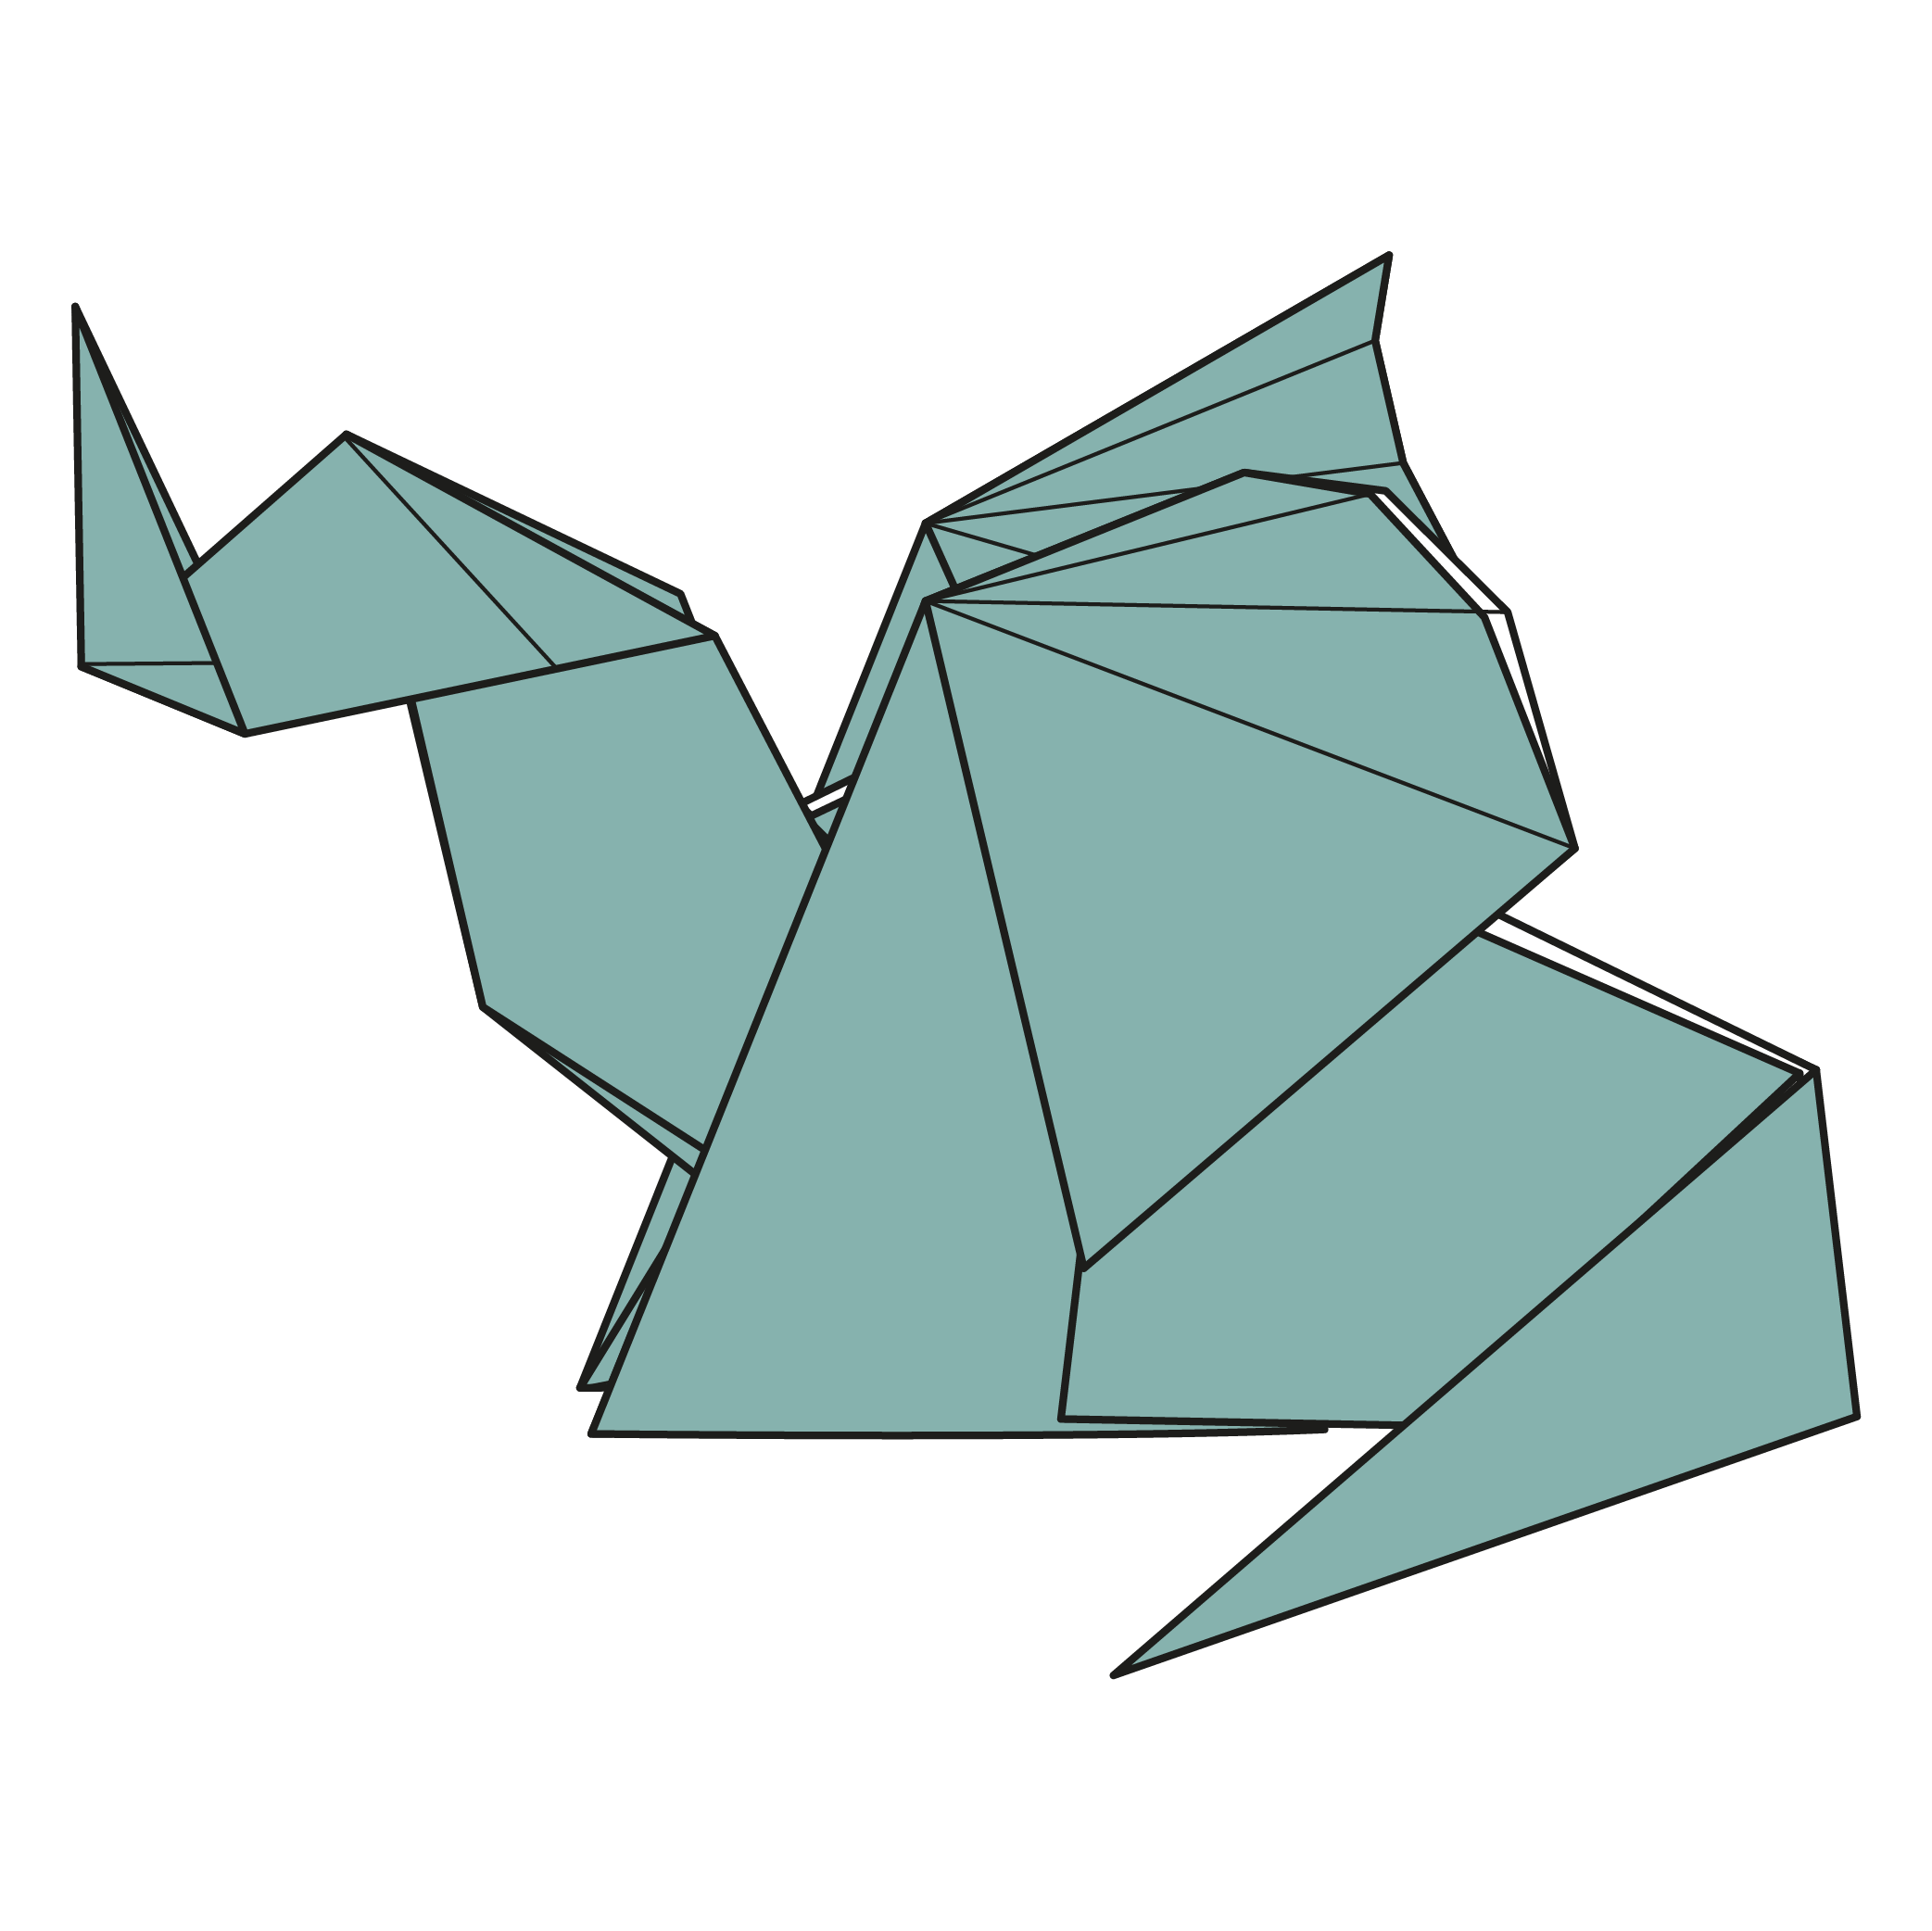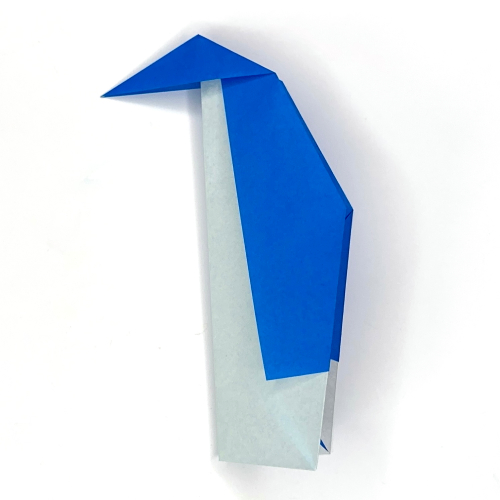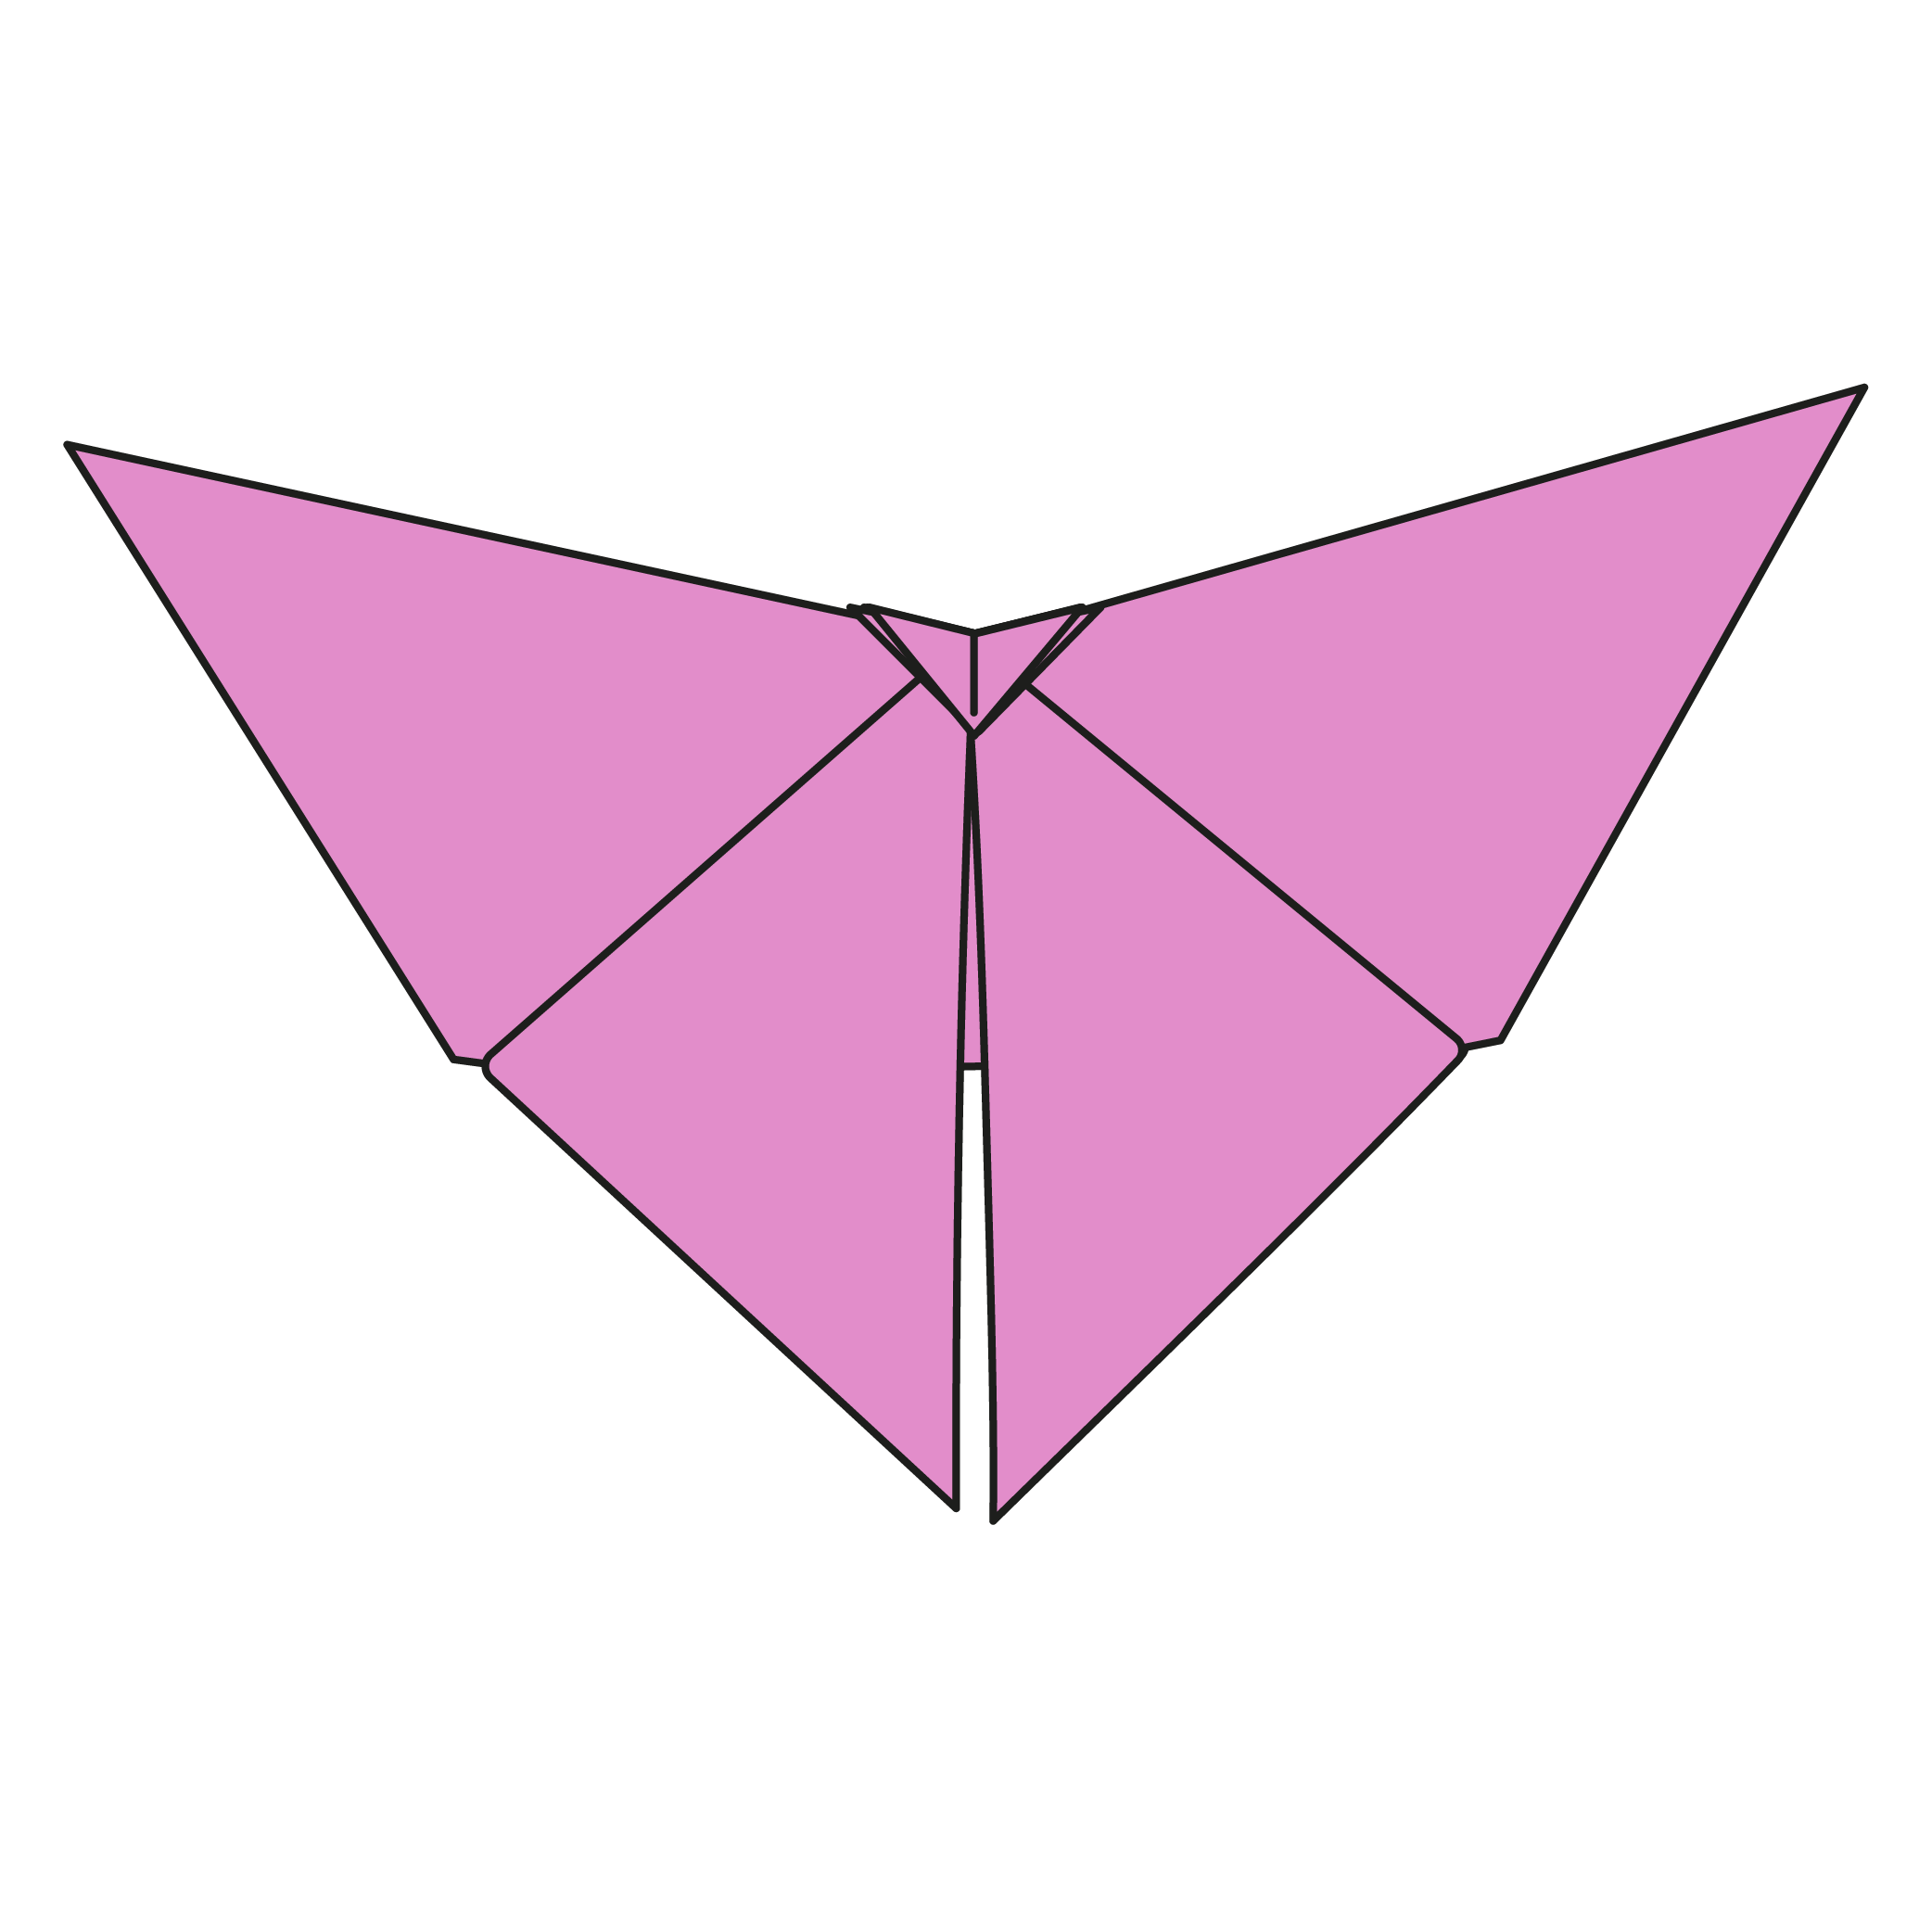

Giraffe
A tall, geometric giraffe with clean lines and graceful proportions — an elegant model with one satisfying sink fold.
Introduction
This tutorial walks you through folding a giraffefrom a single square sheet of paper. Follow each step in order, take your time with the creases, and you'll have a finished giraffe in about 10 min.
Step by Step
 1
1Step 1
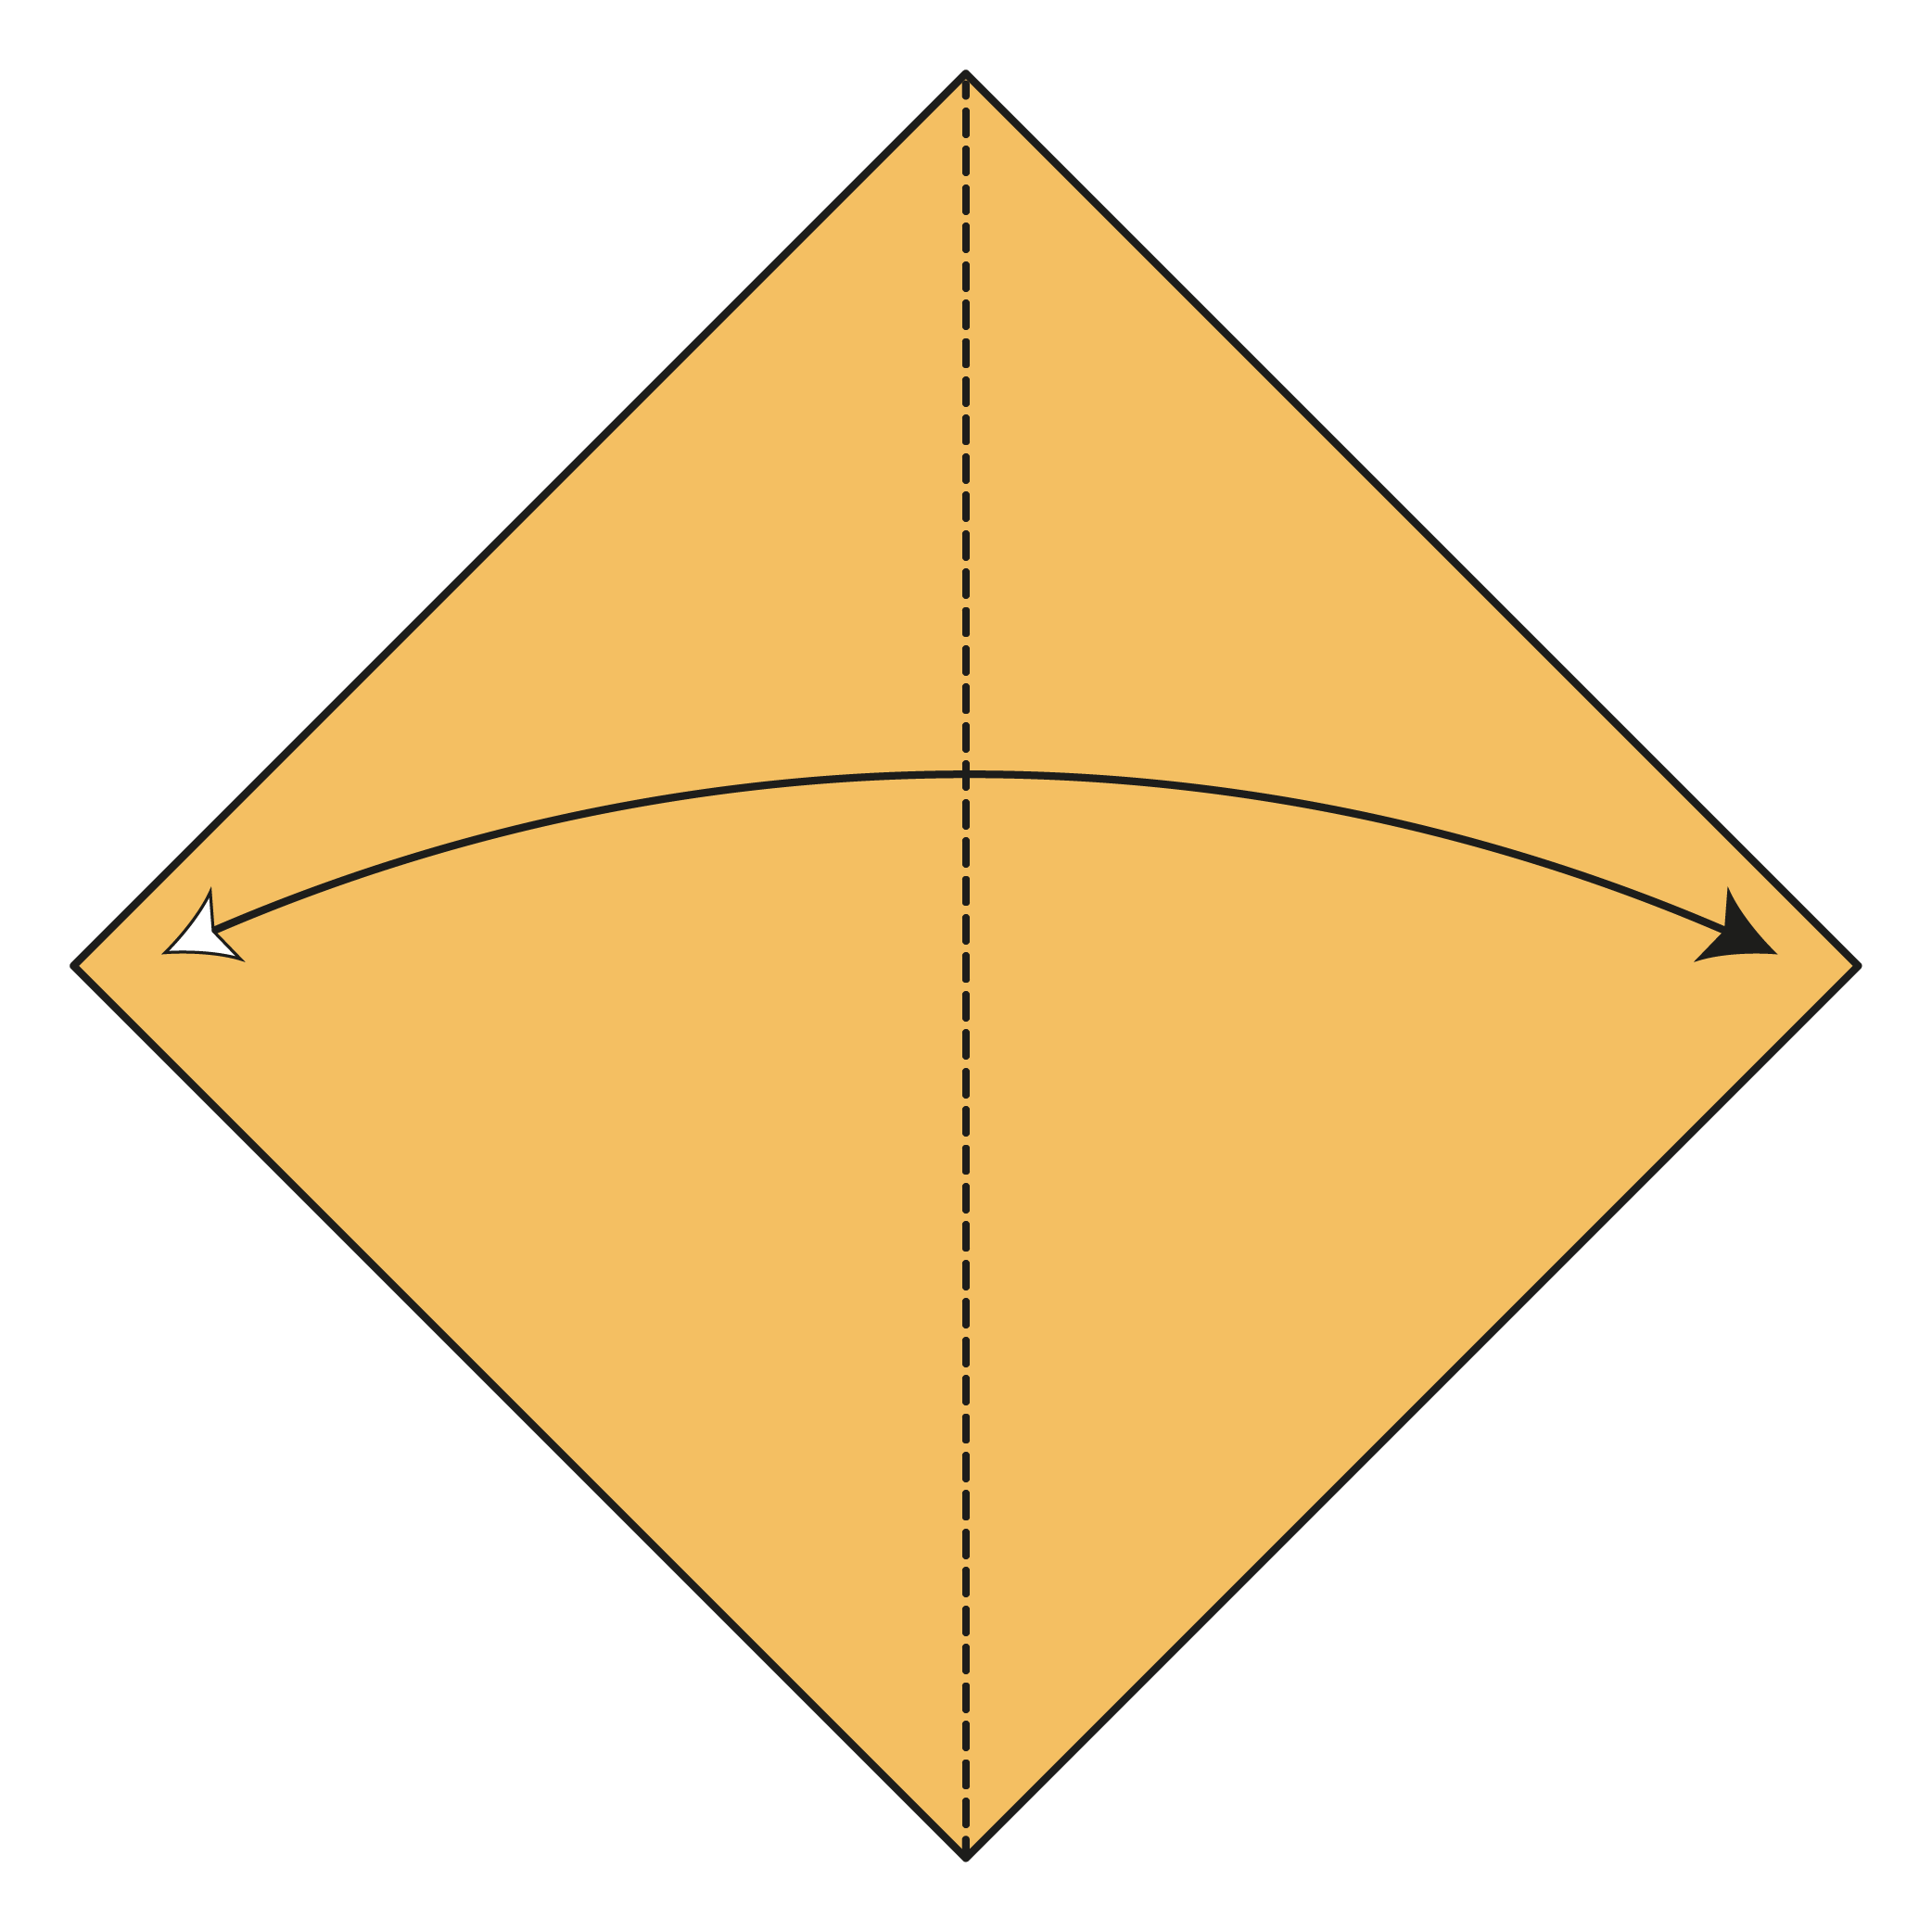
Start with the colored side facing up in a diamond position. Fold along the vertical diagonal, then unfold.
 2
2Step 2
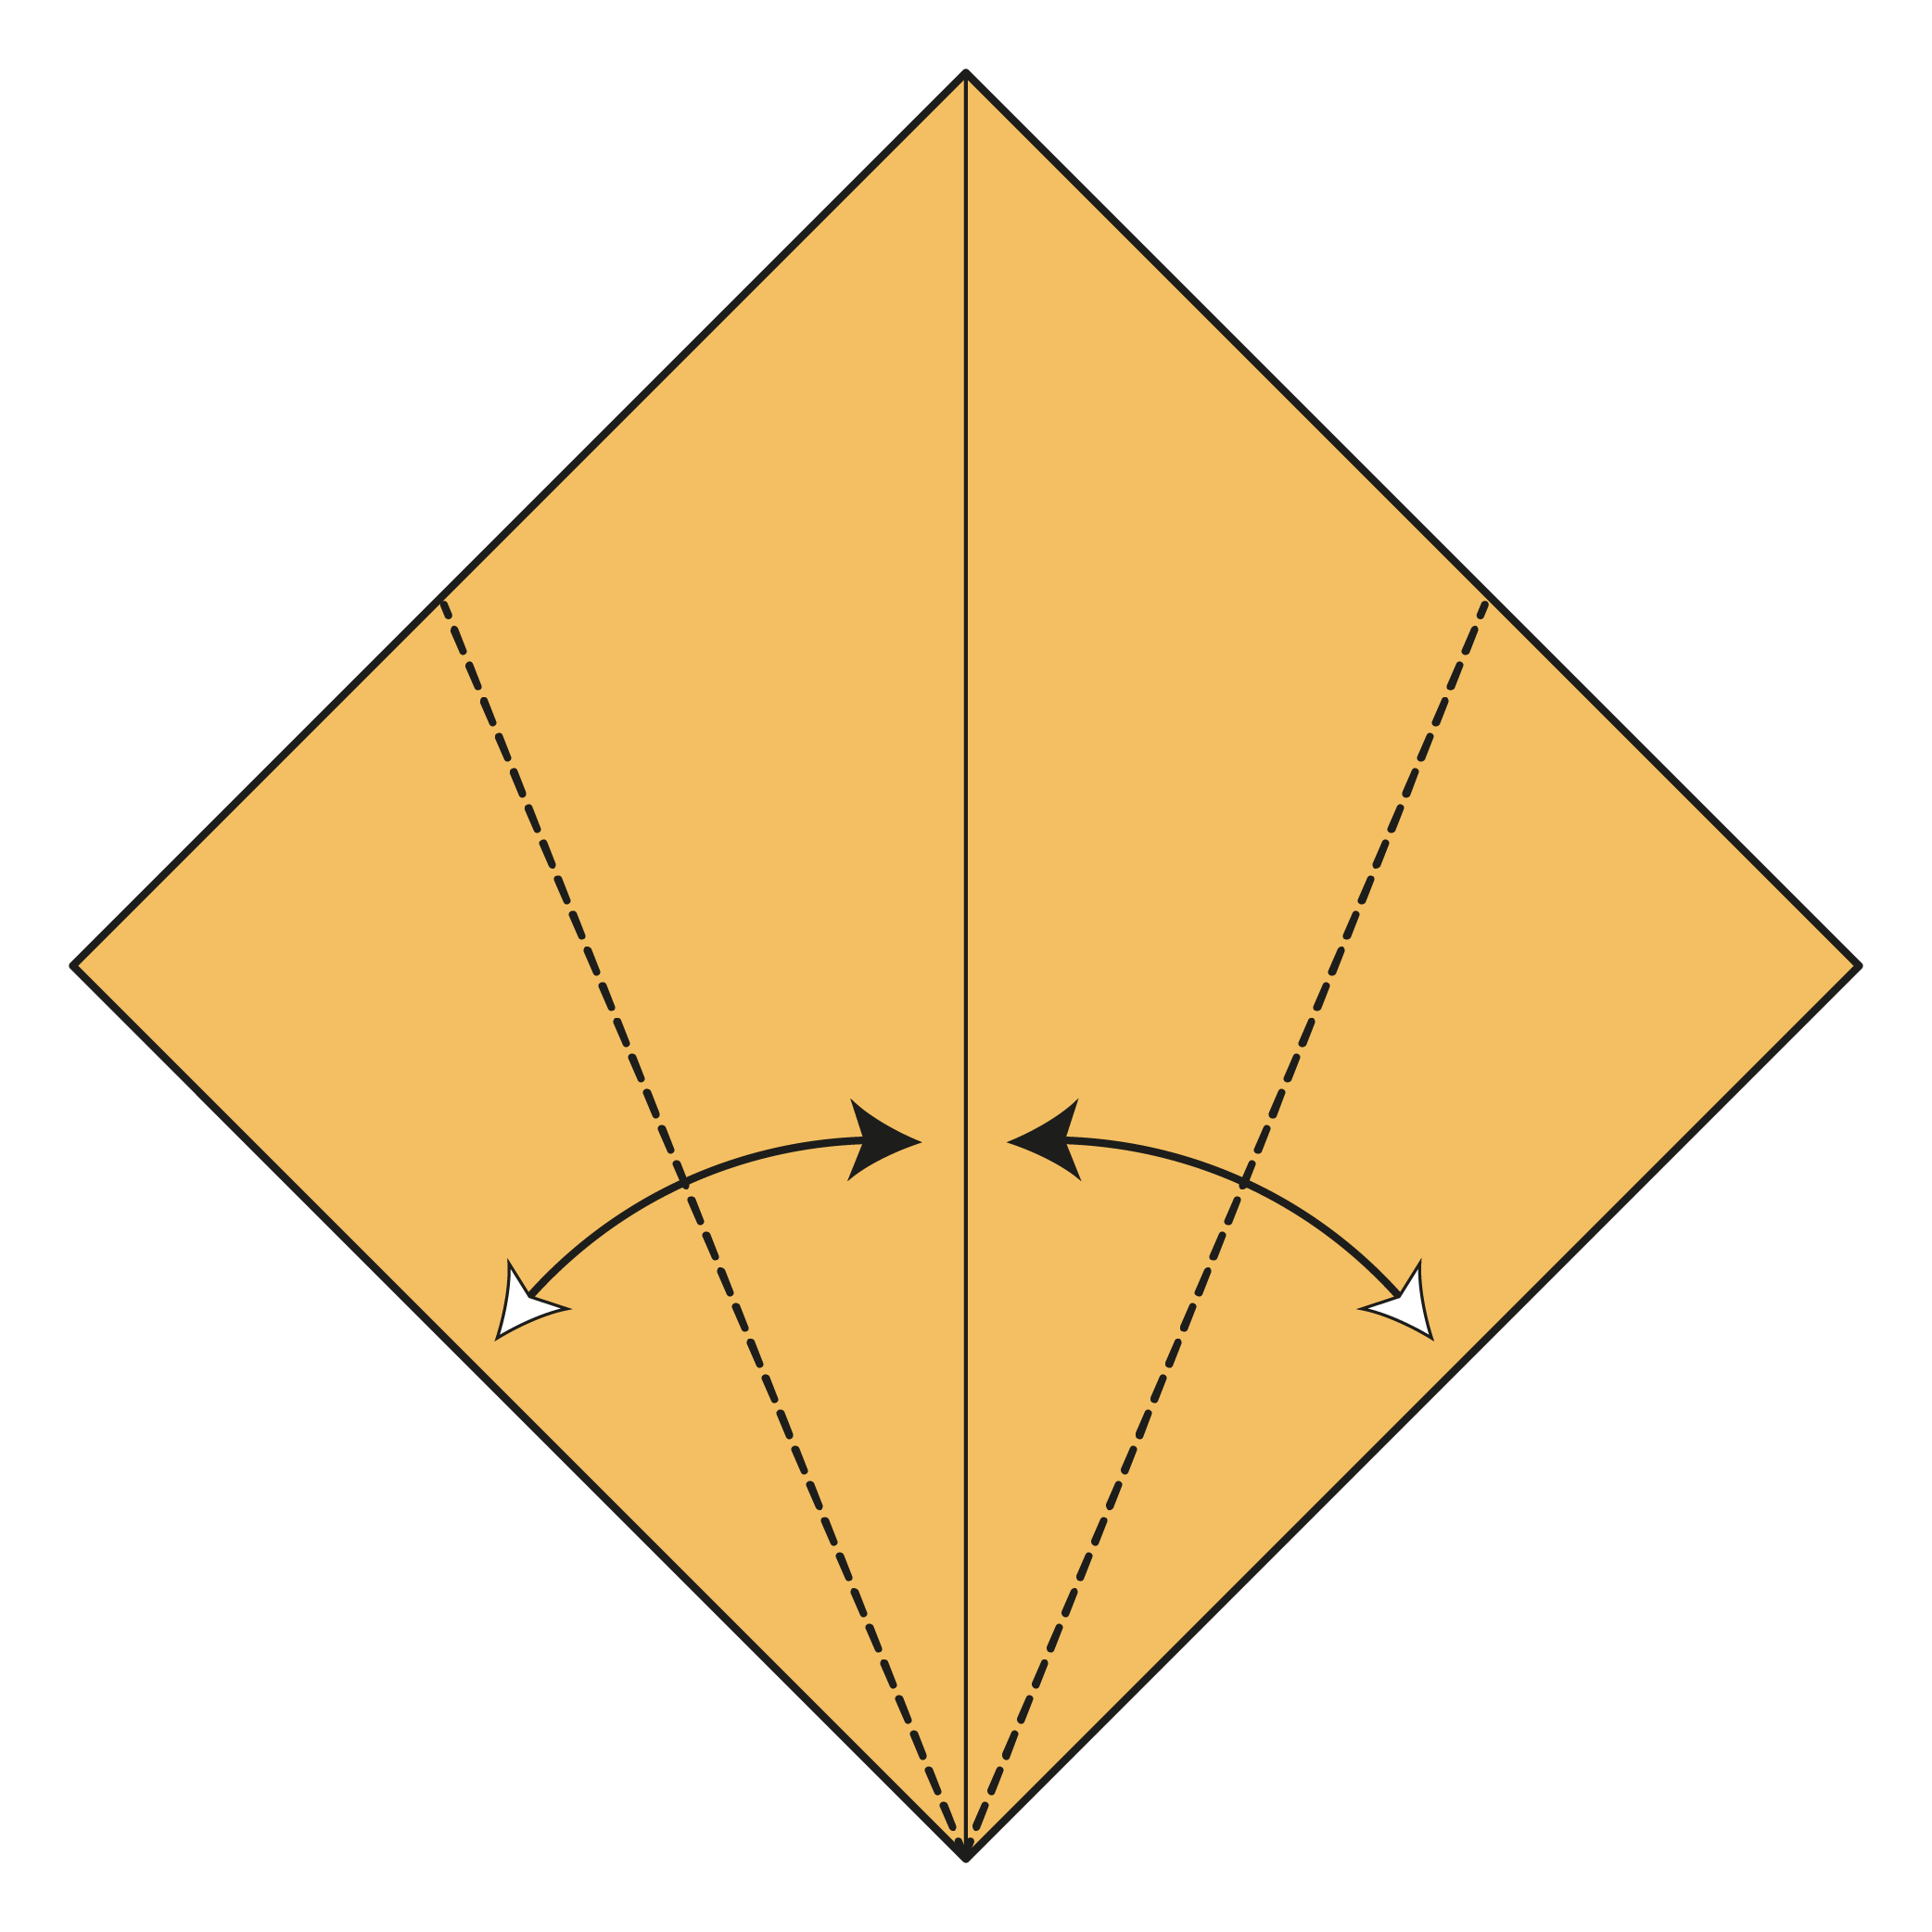
Fold the bottom left and right edges to the centerline.
 3
3Step 3
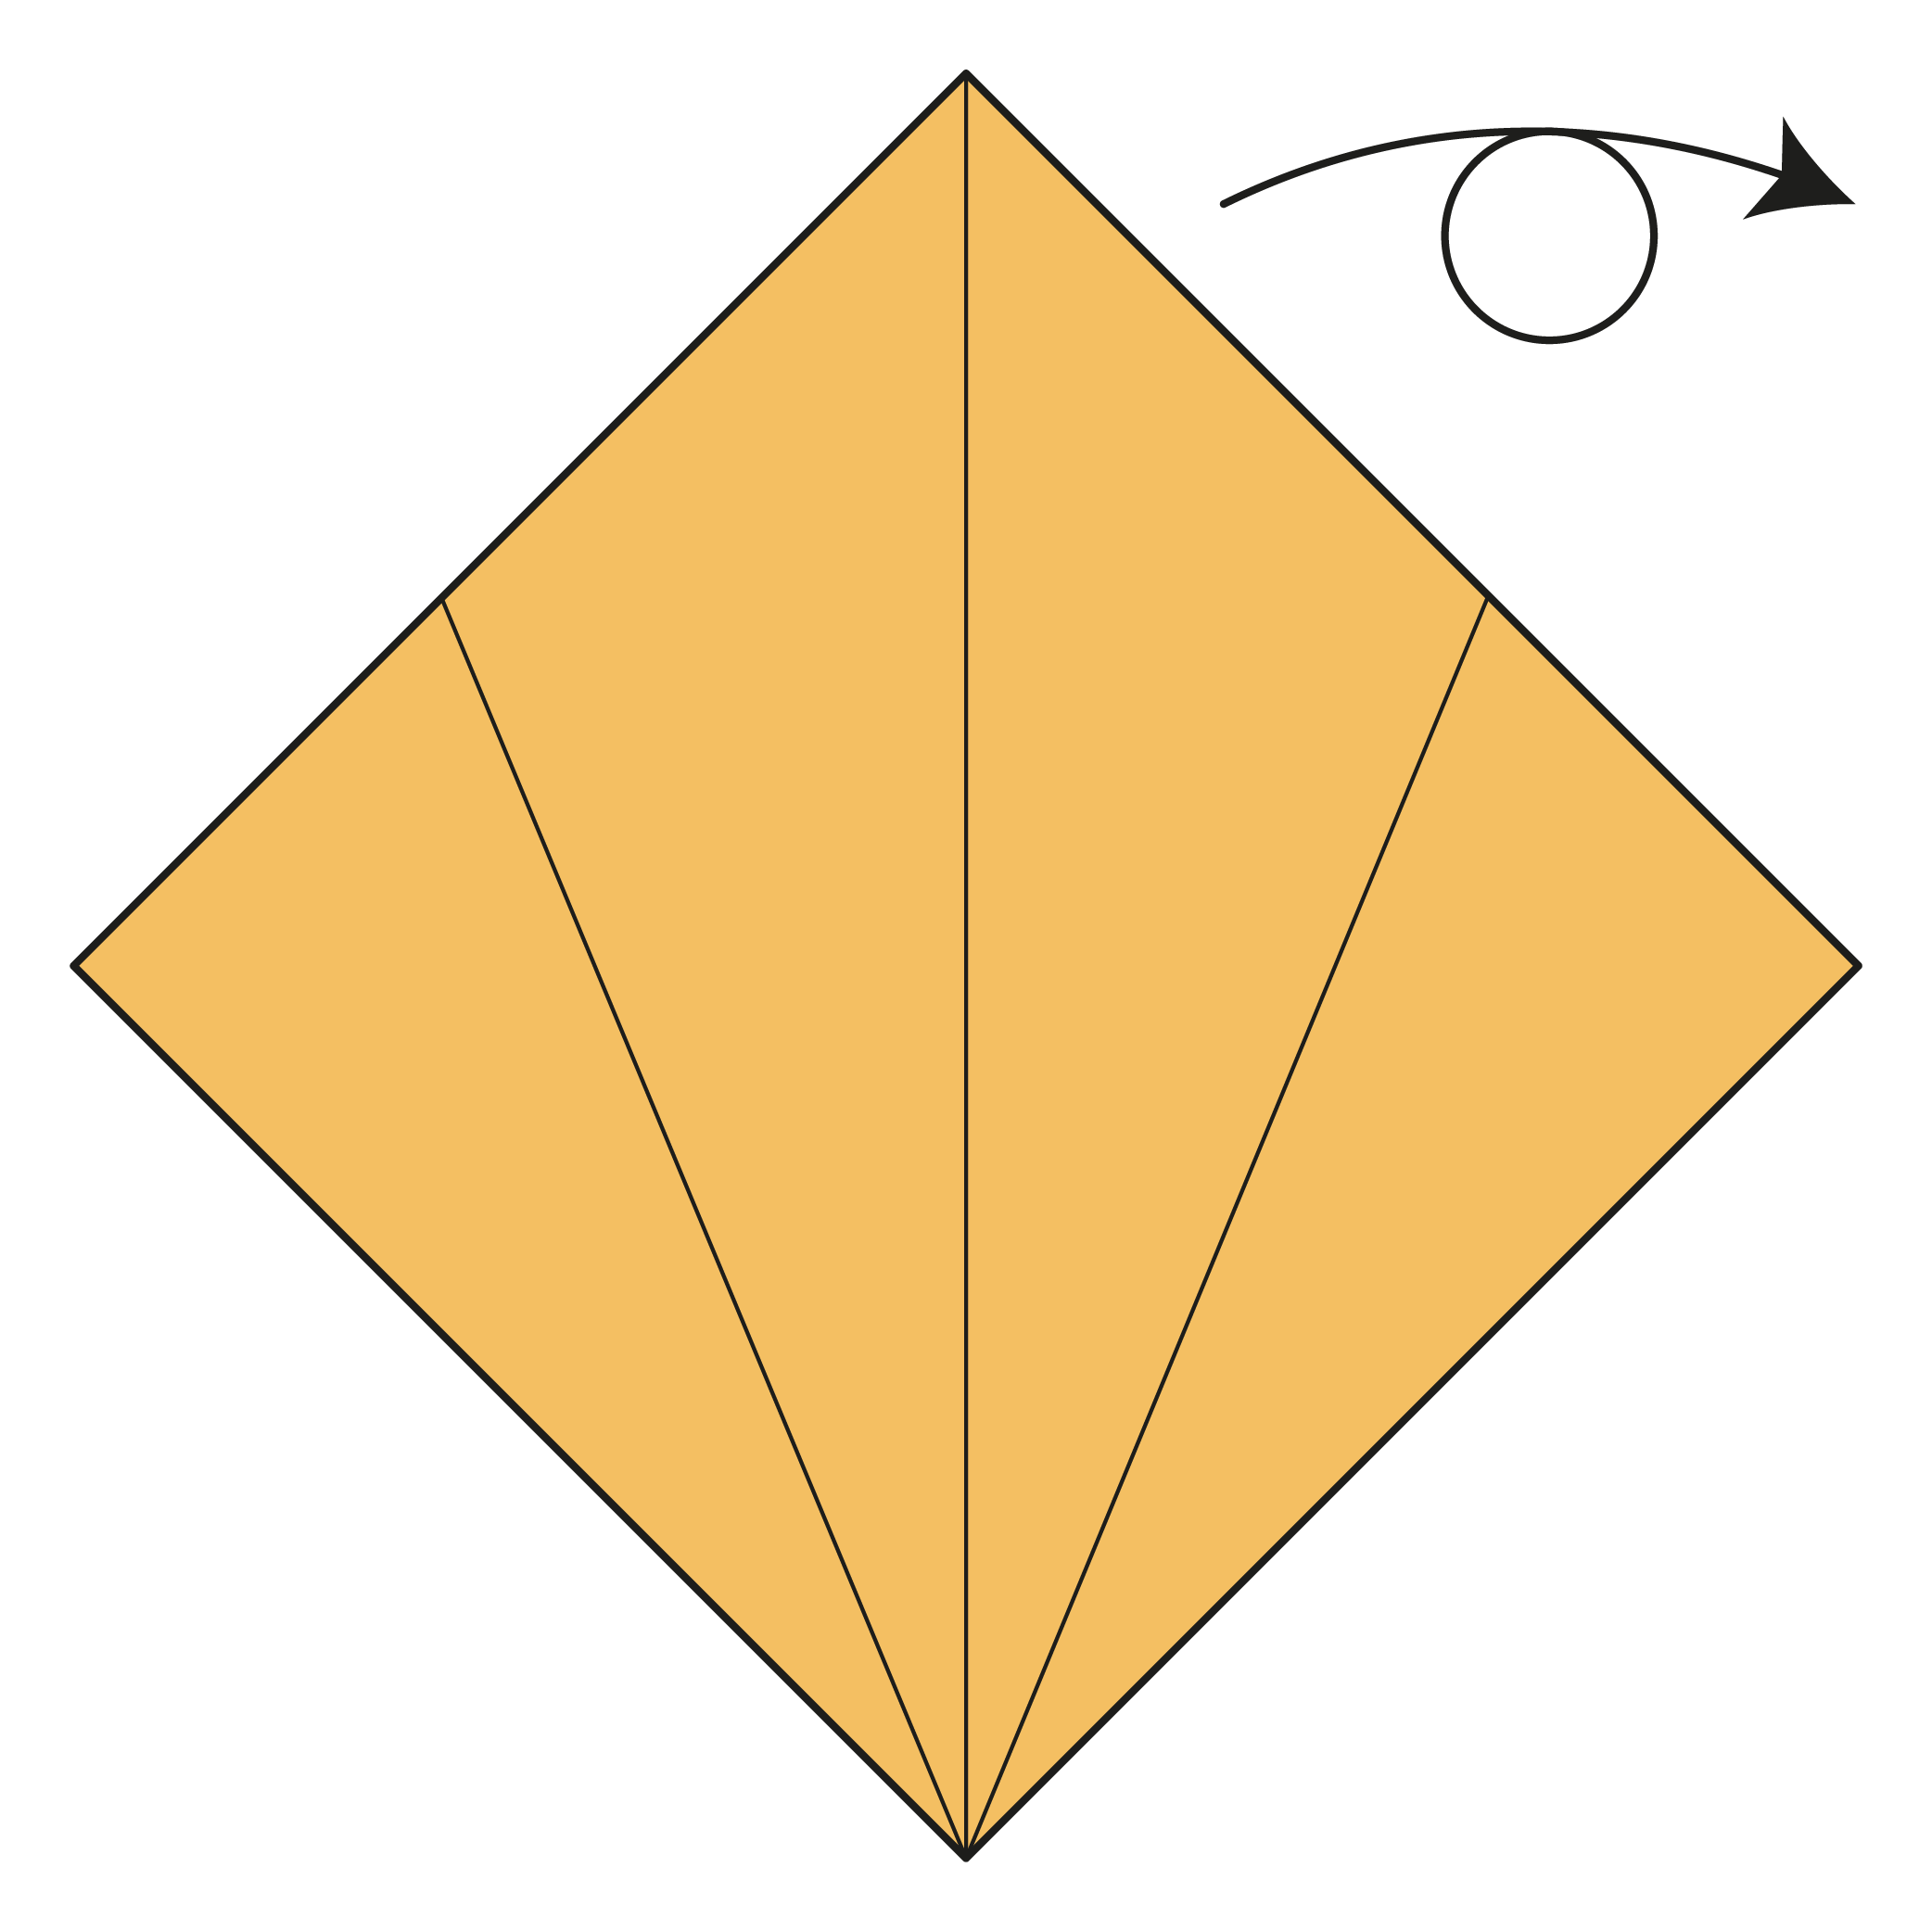
Turn the paper over.
 4
4Step 4
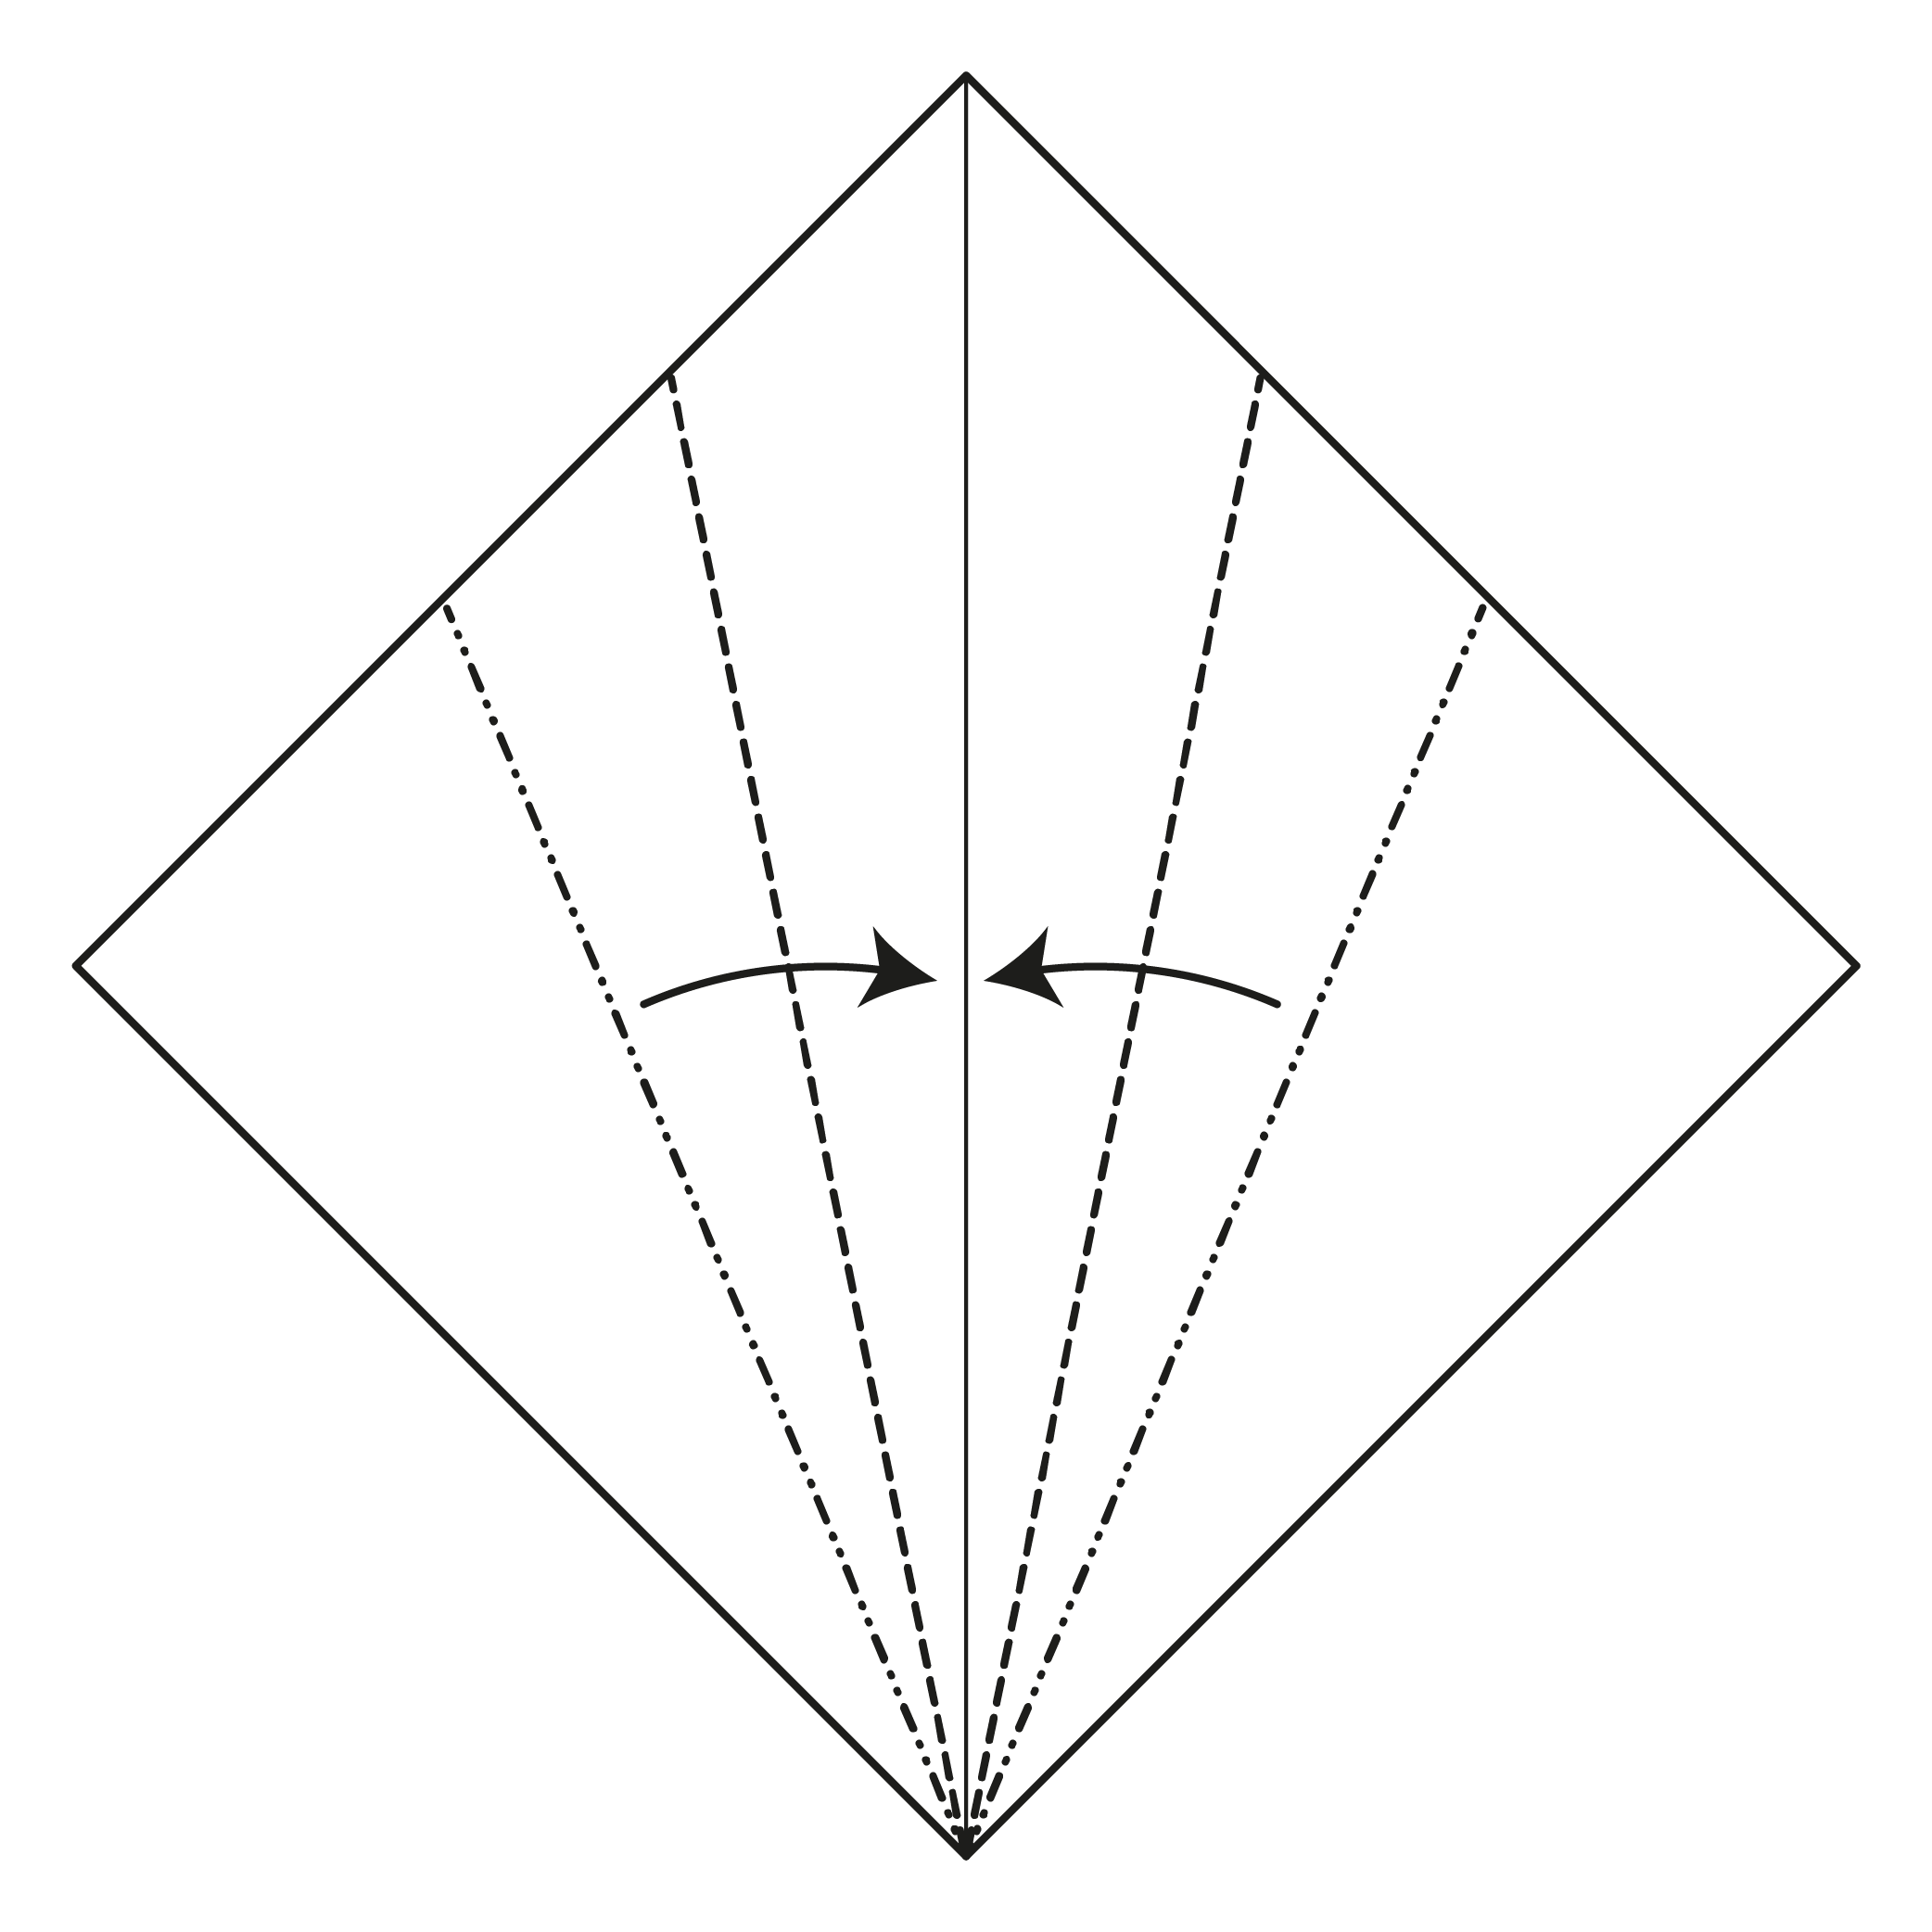
Fold the two creases from Step 2 to the centerline.
 5
5Step 5
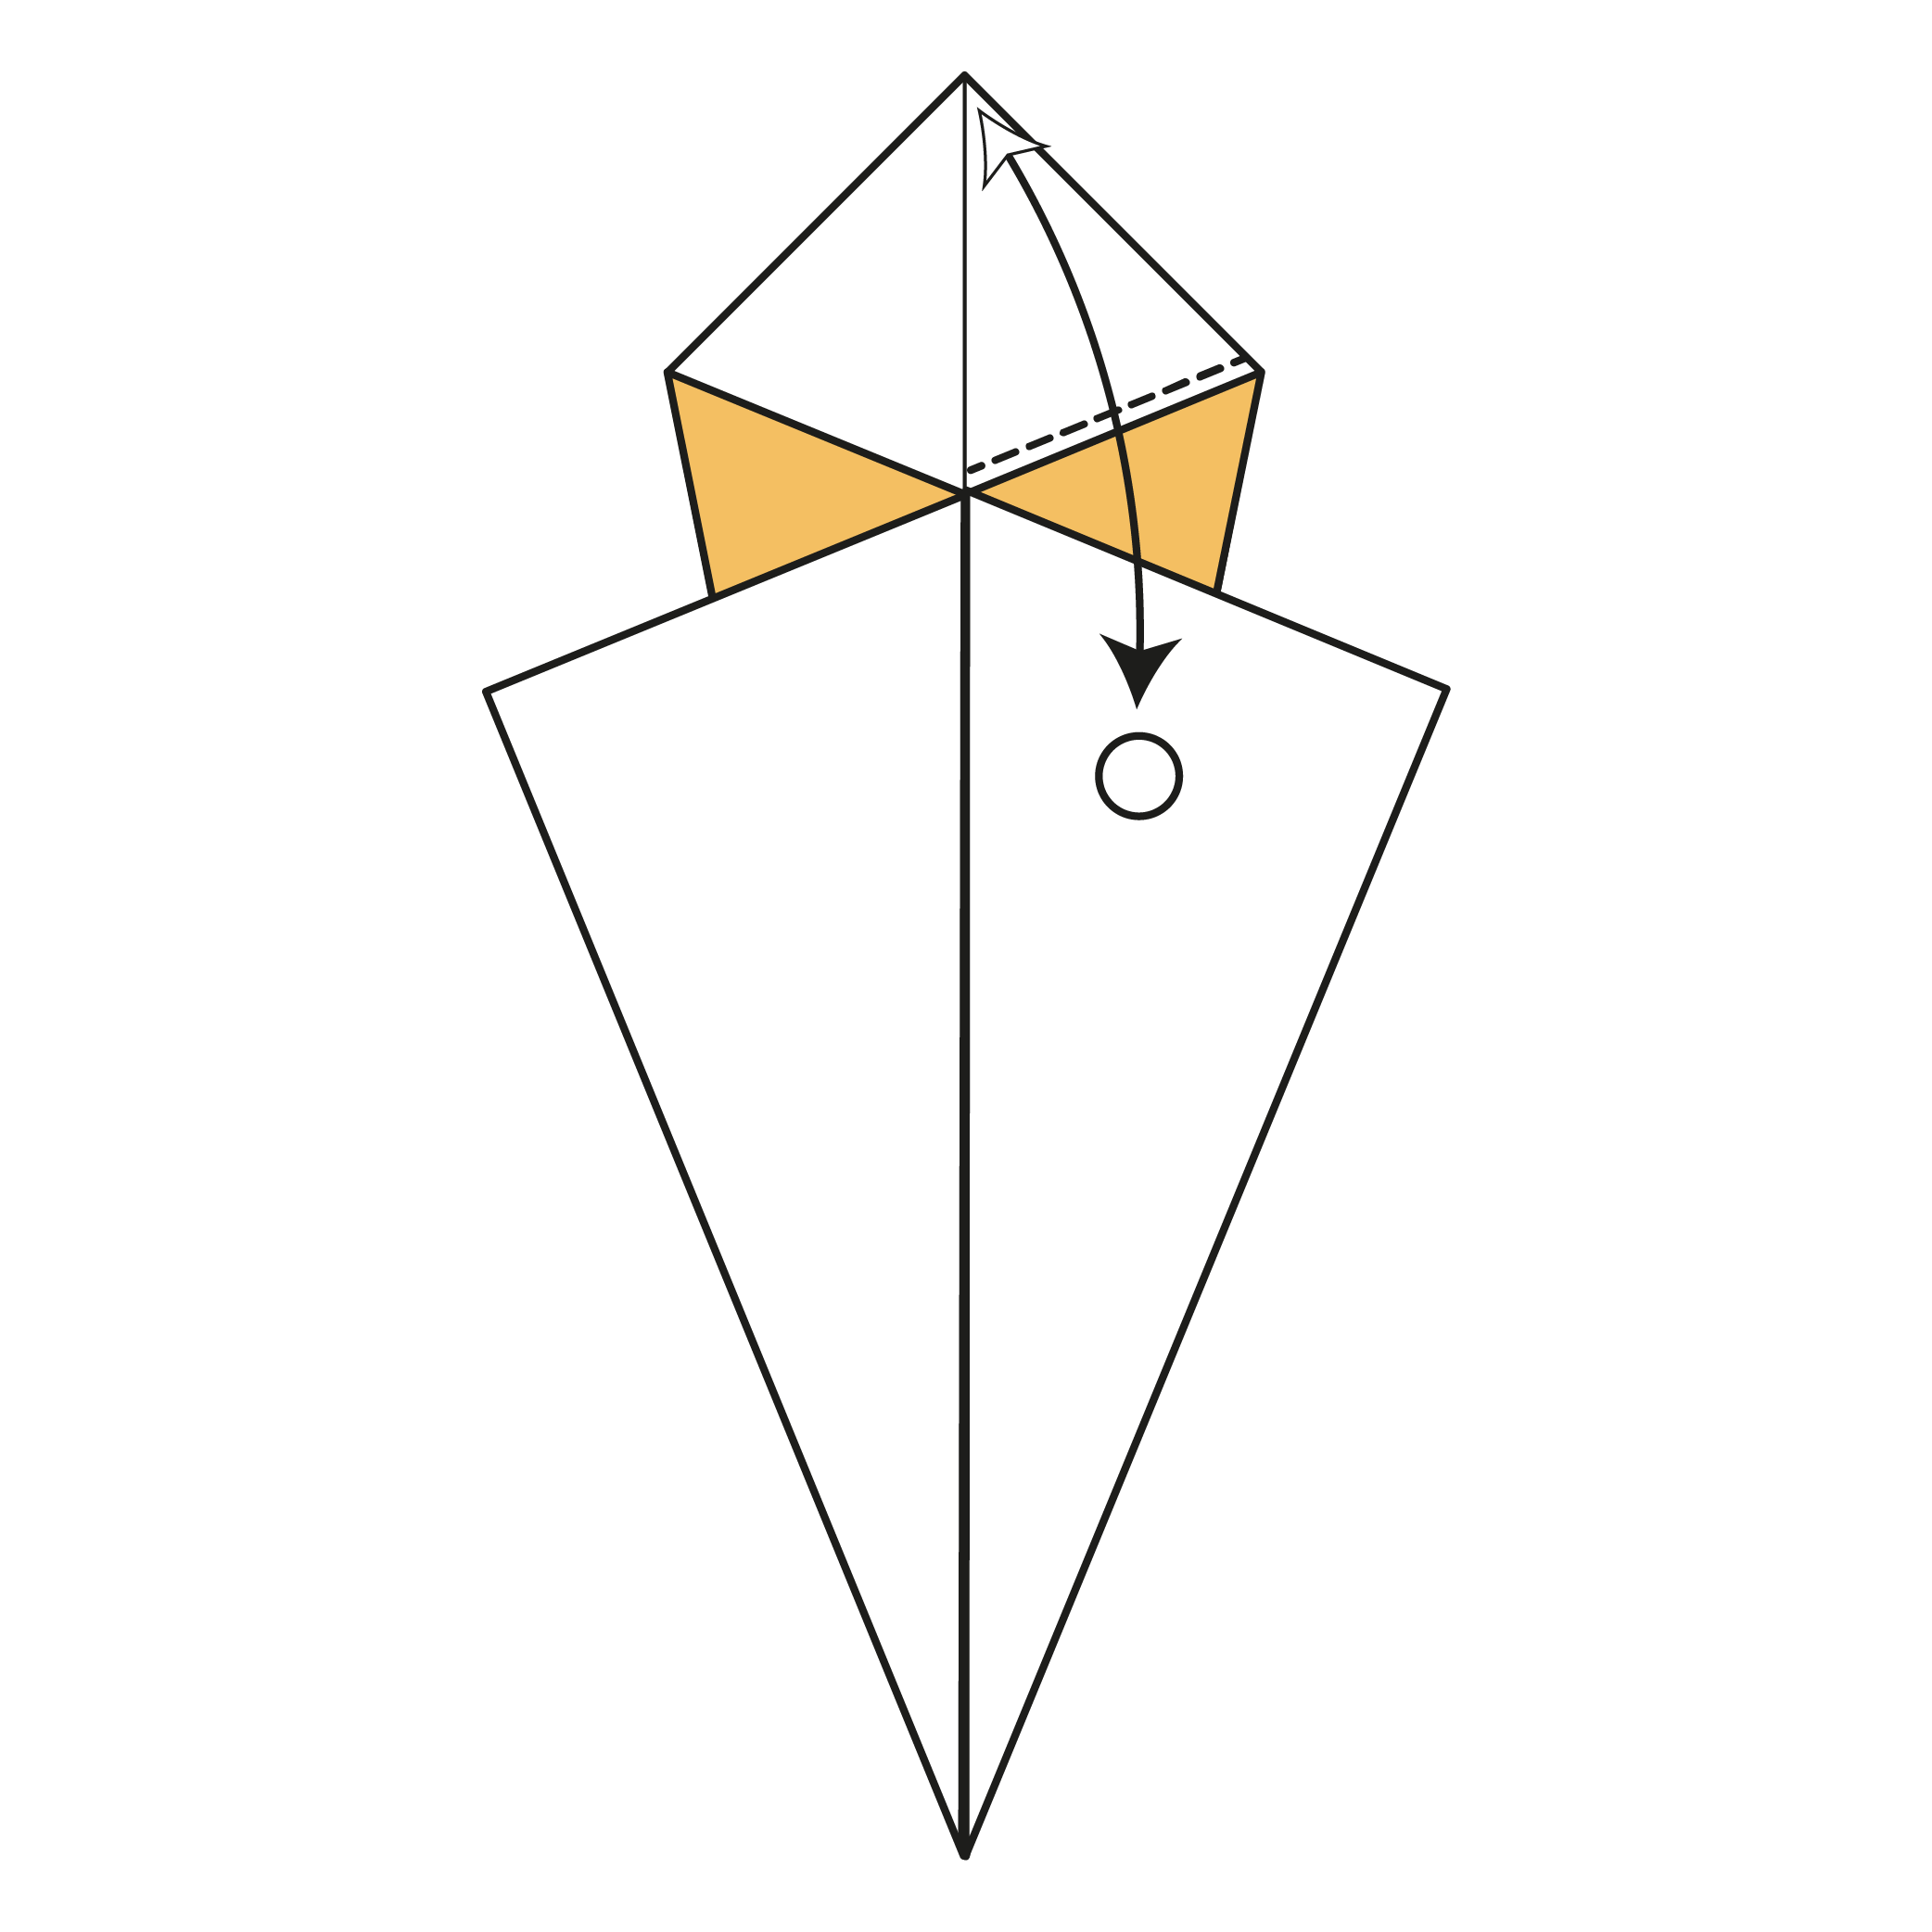
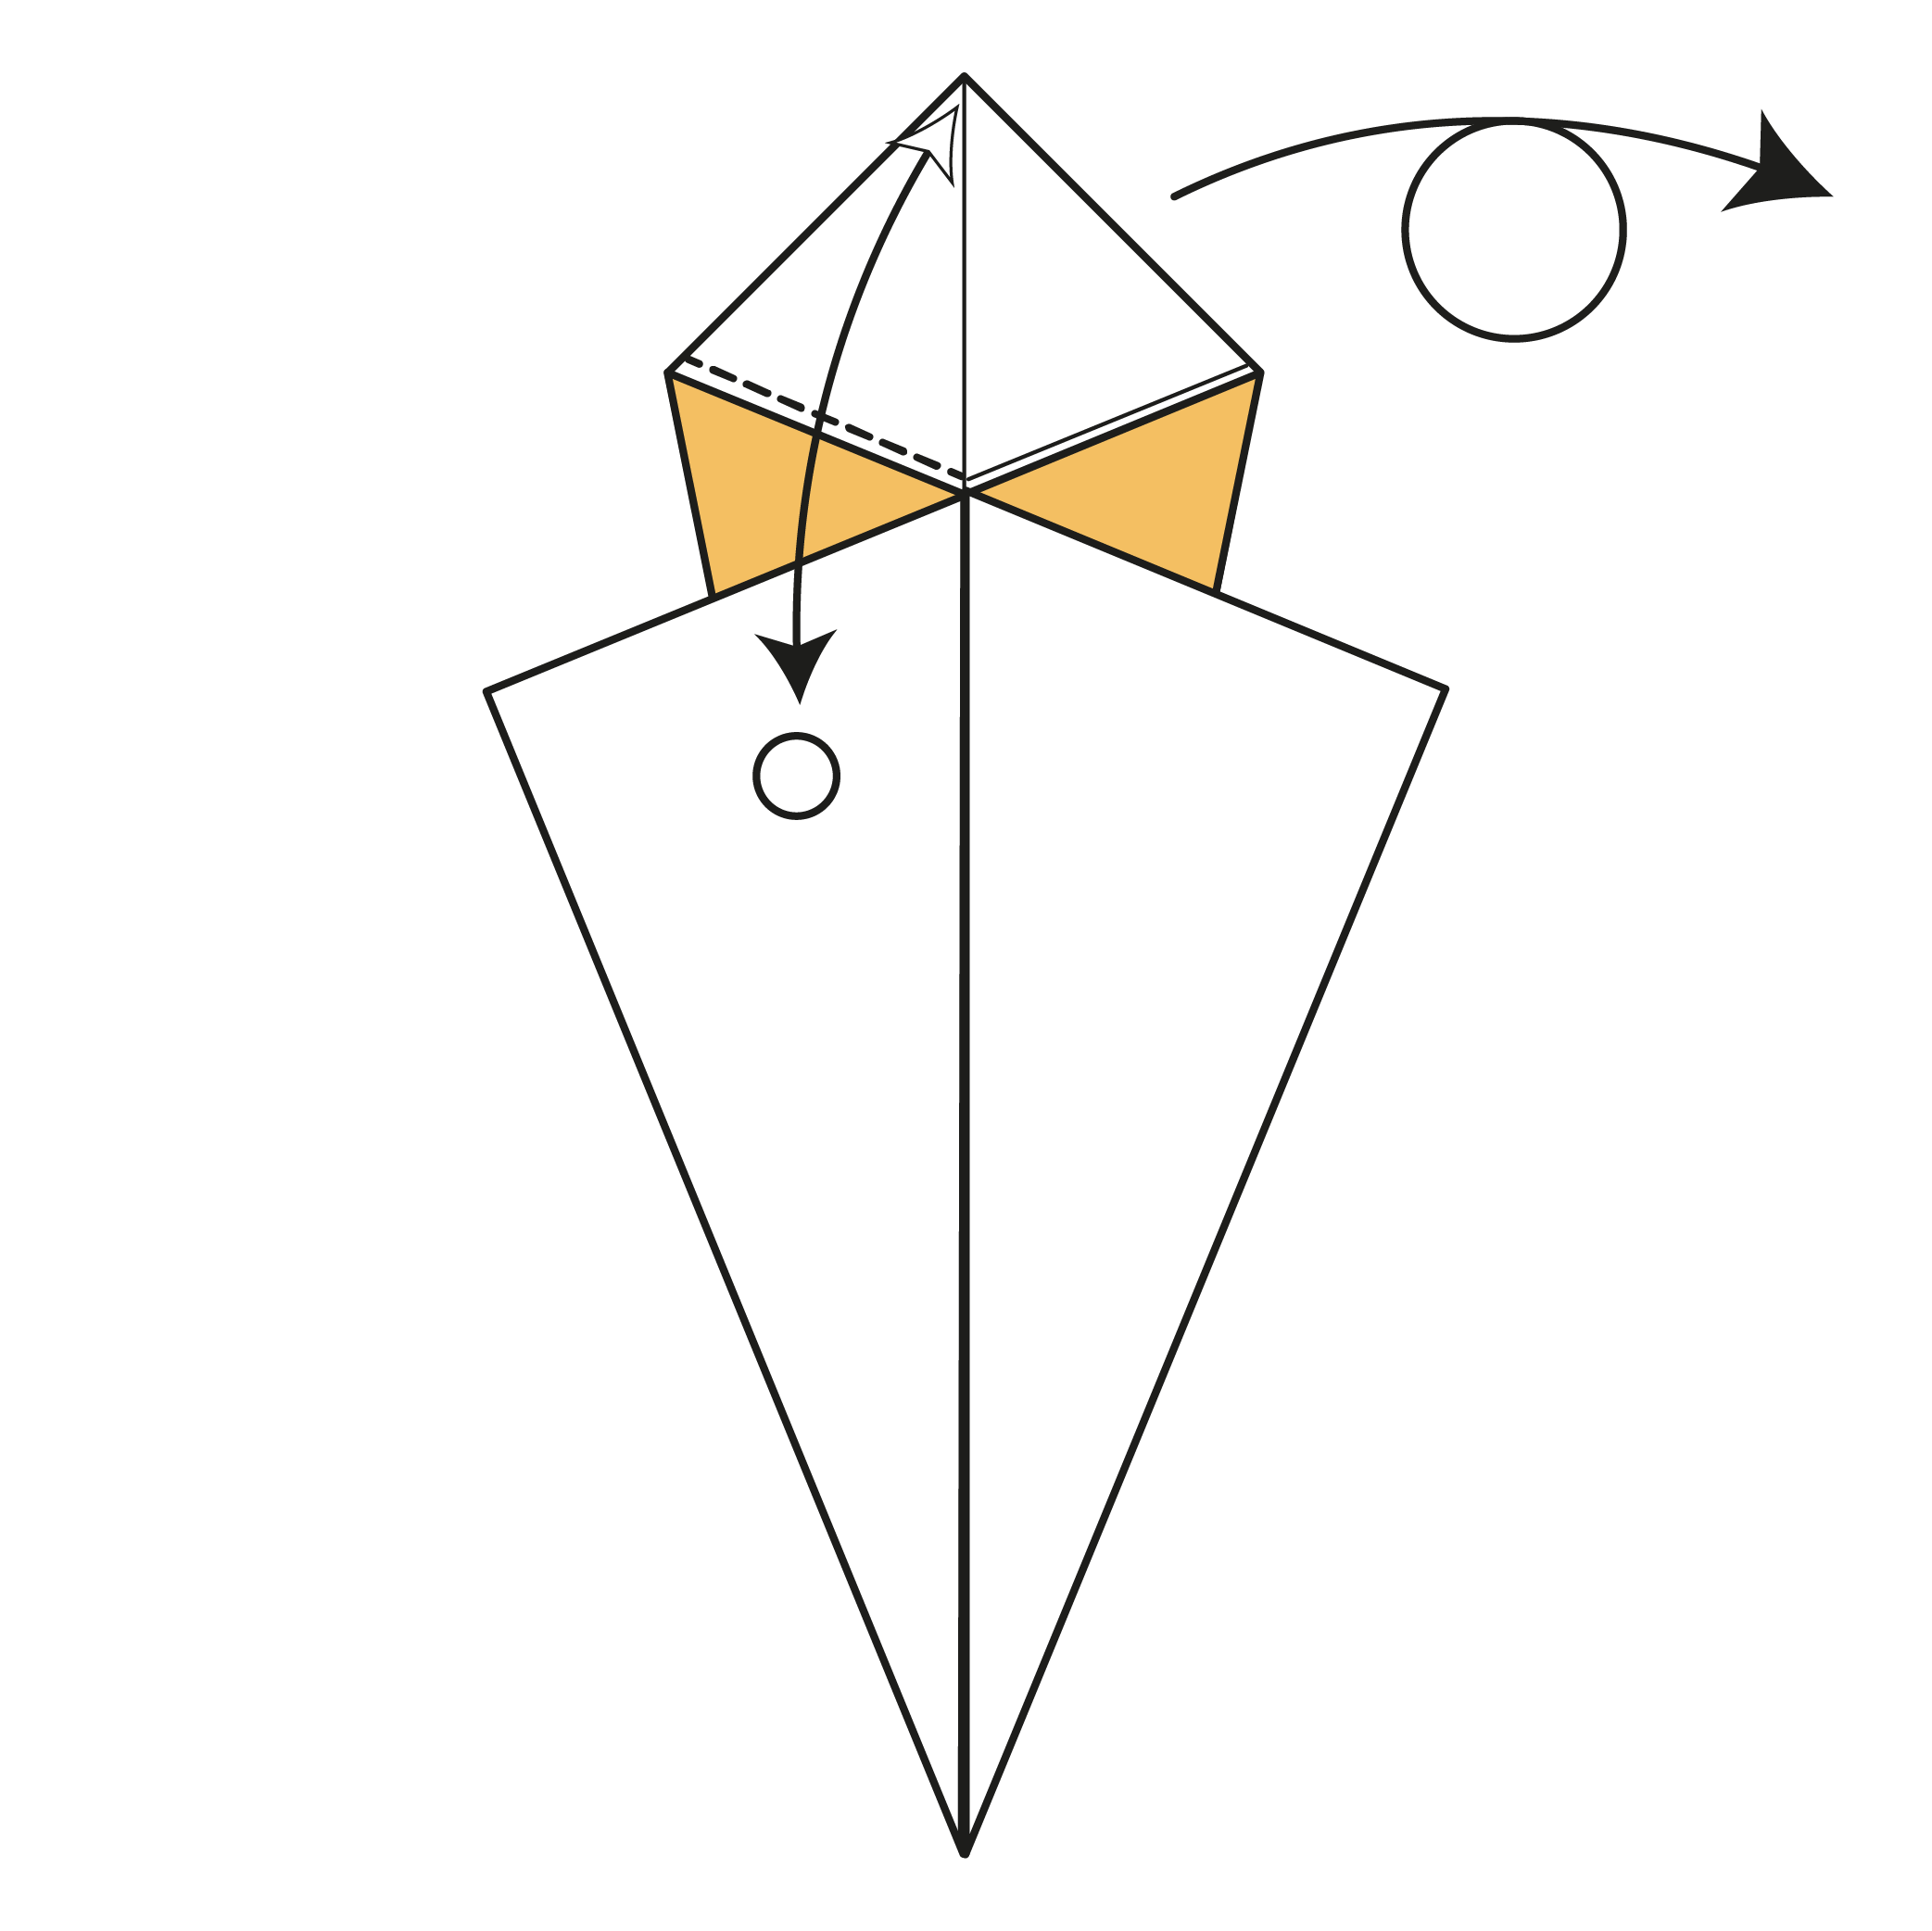
Fold the top corner down along the dotted line where the white and colored sides meet. Then, unfold.
 6
6Step 6
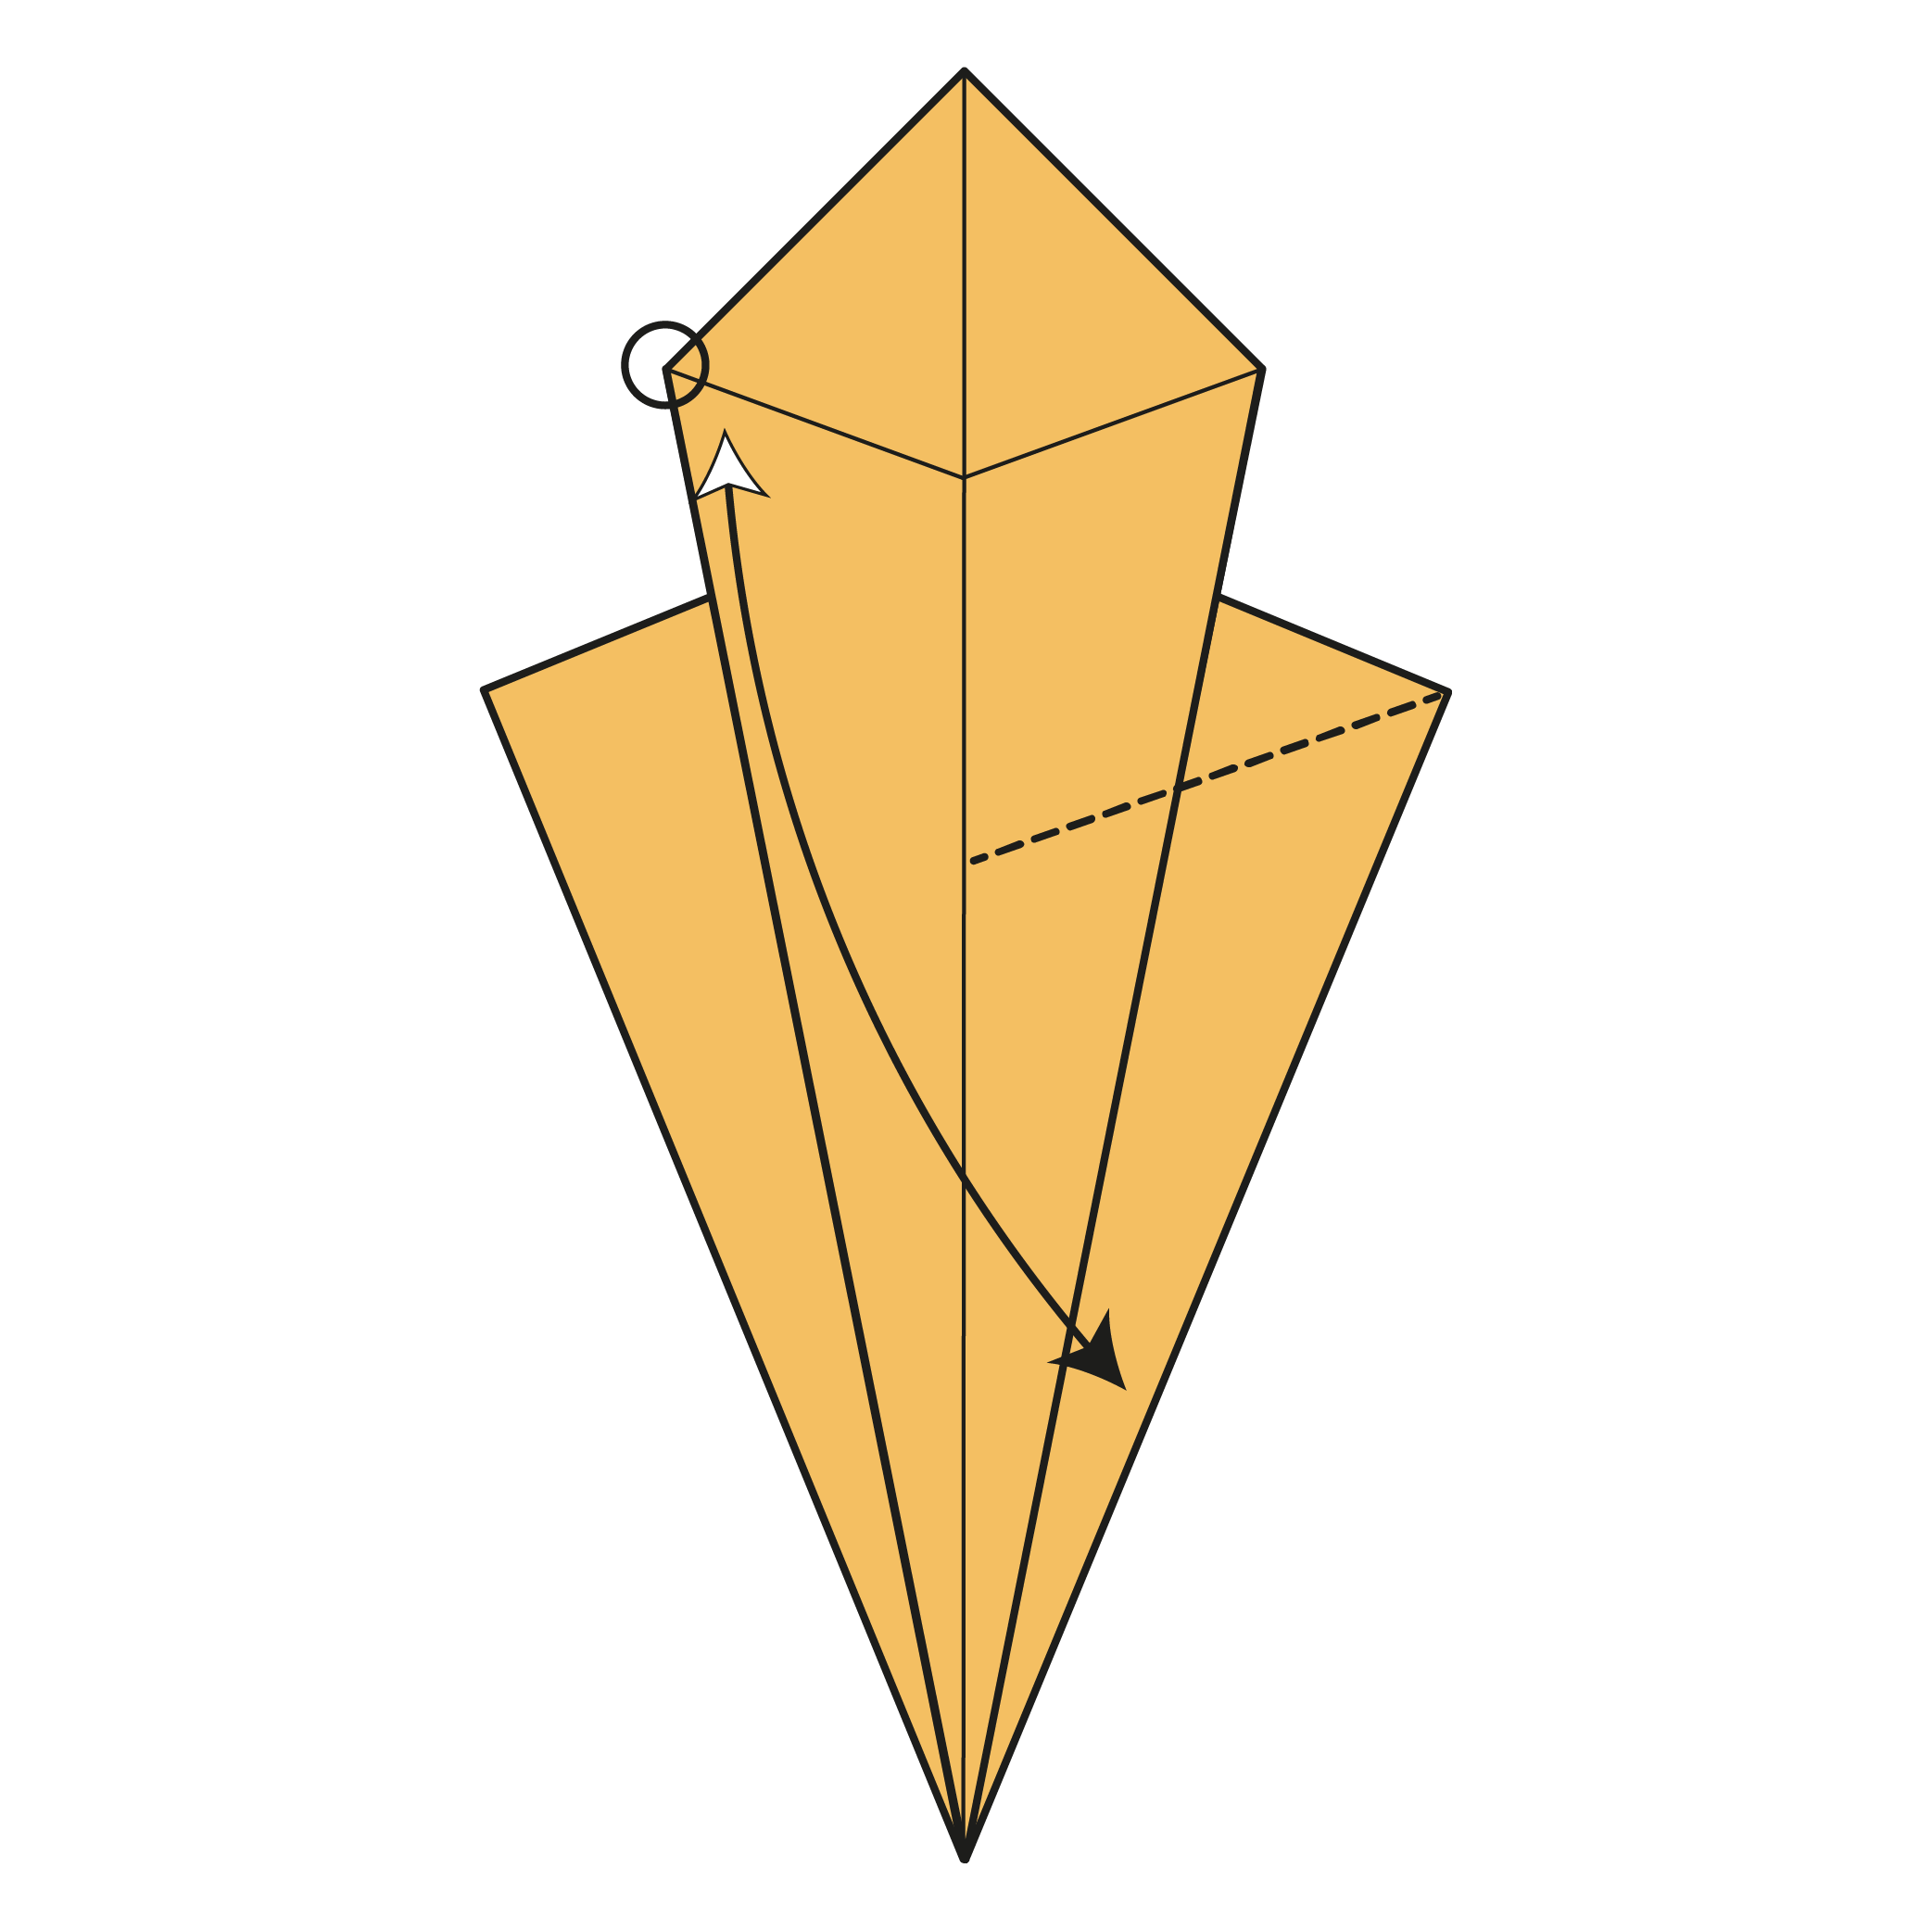
Repeat on the left side. Then, turn the model over.
 7
7Step 7
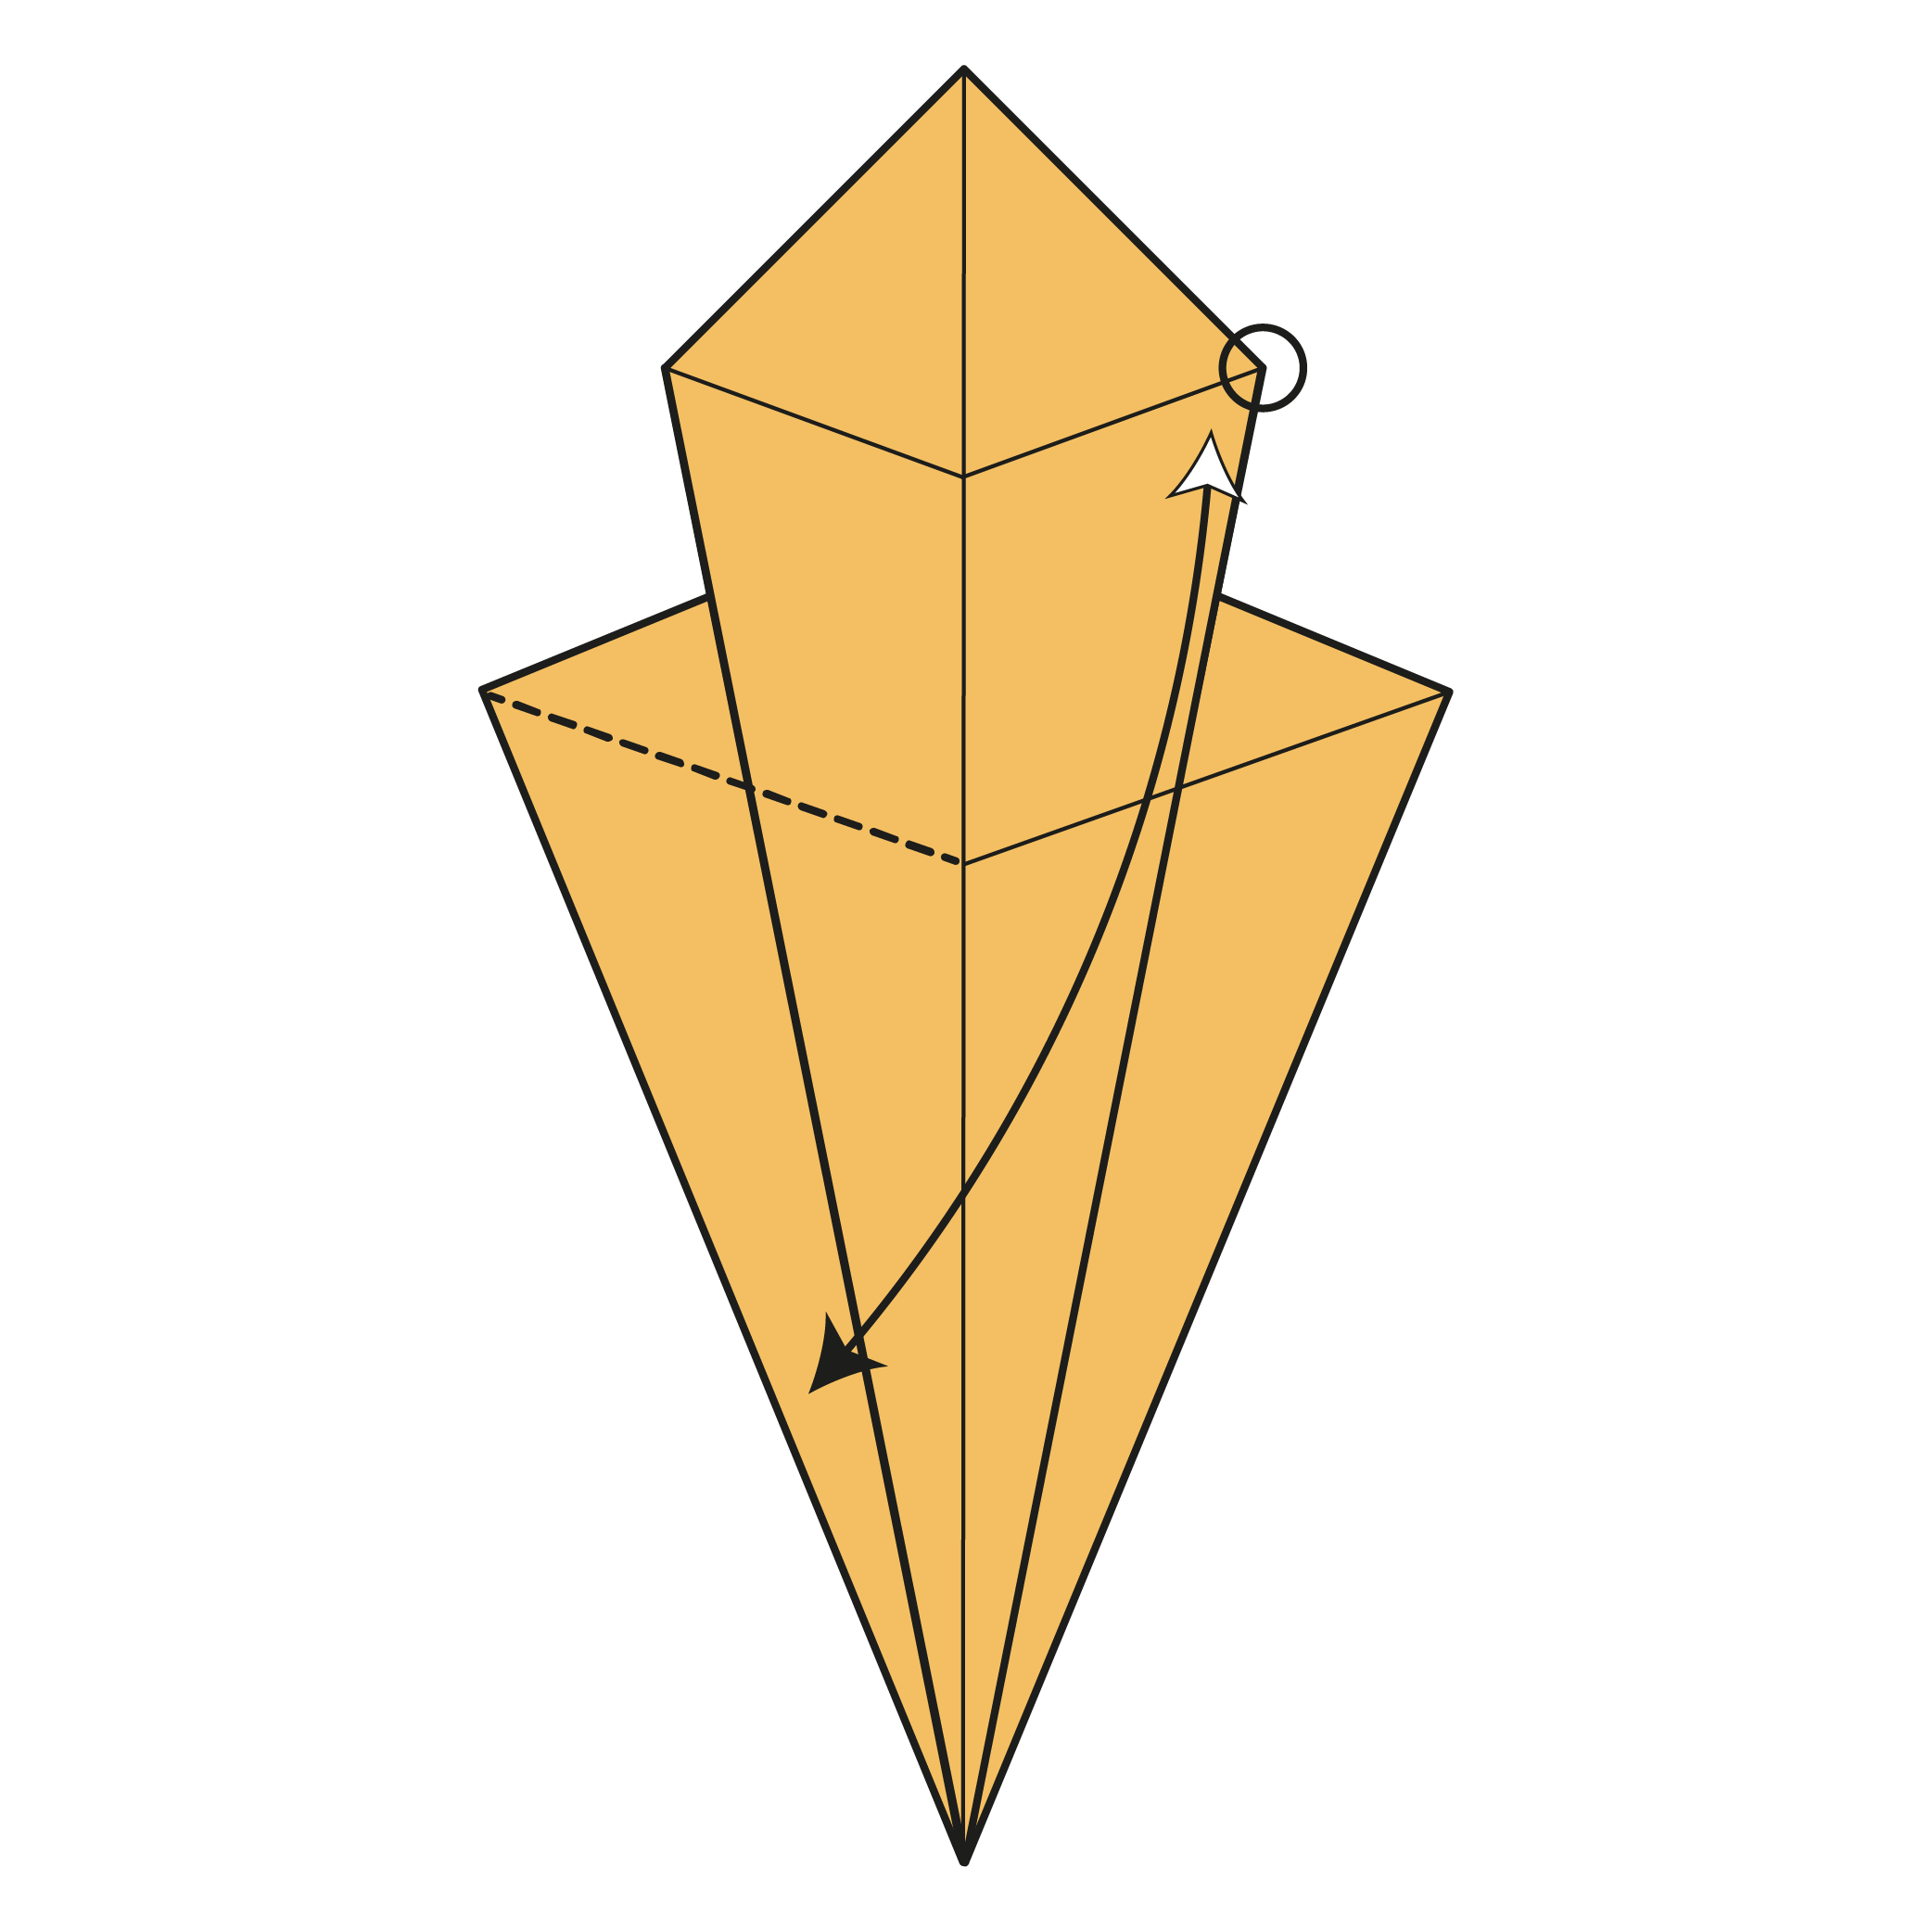
Fold the top left corner down to meet the bottom right edge. The edges on both sides of the corner should align. Only crease from the top corner to the centerline.
 8
8Step 8
Repeat on the left side.
 9
9Step 9
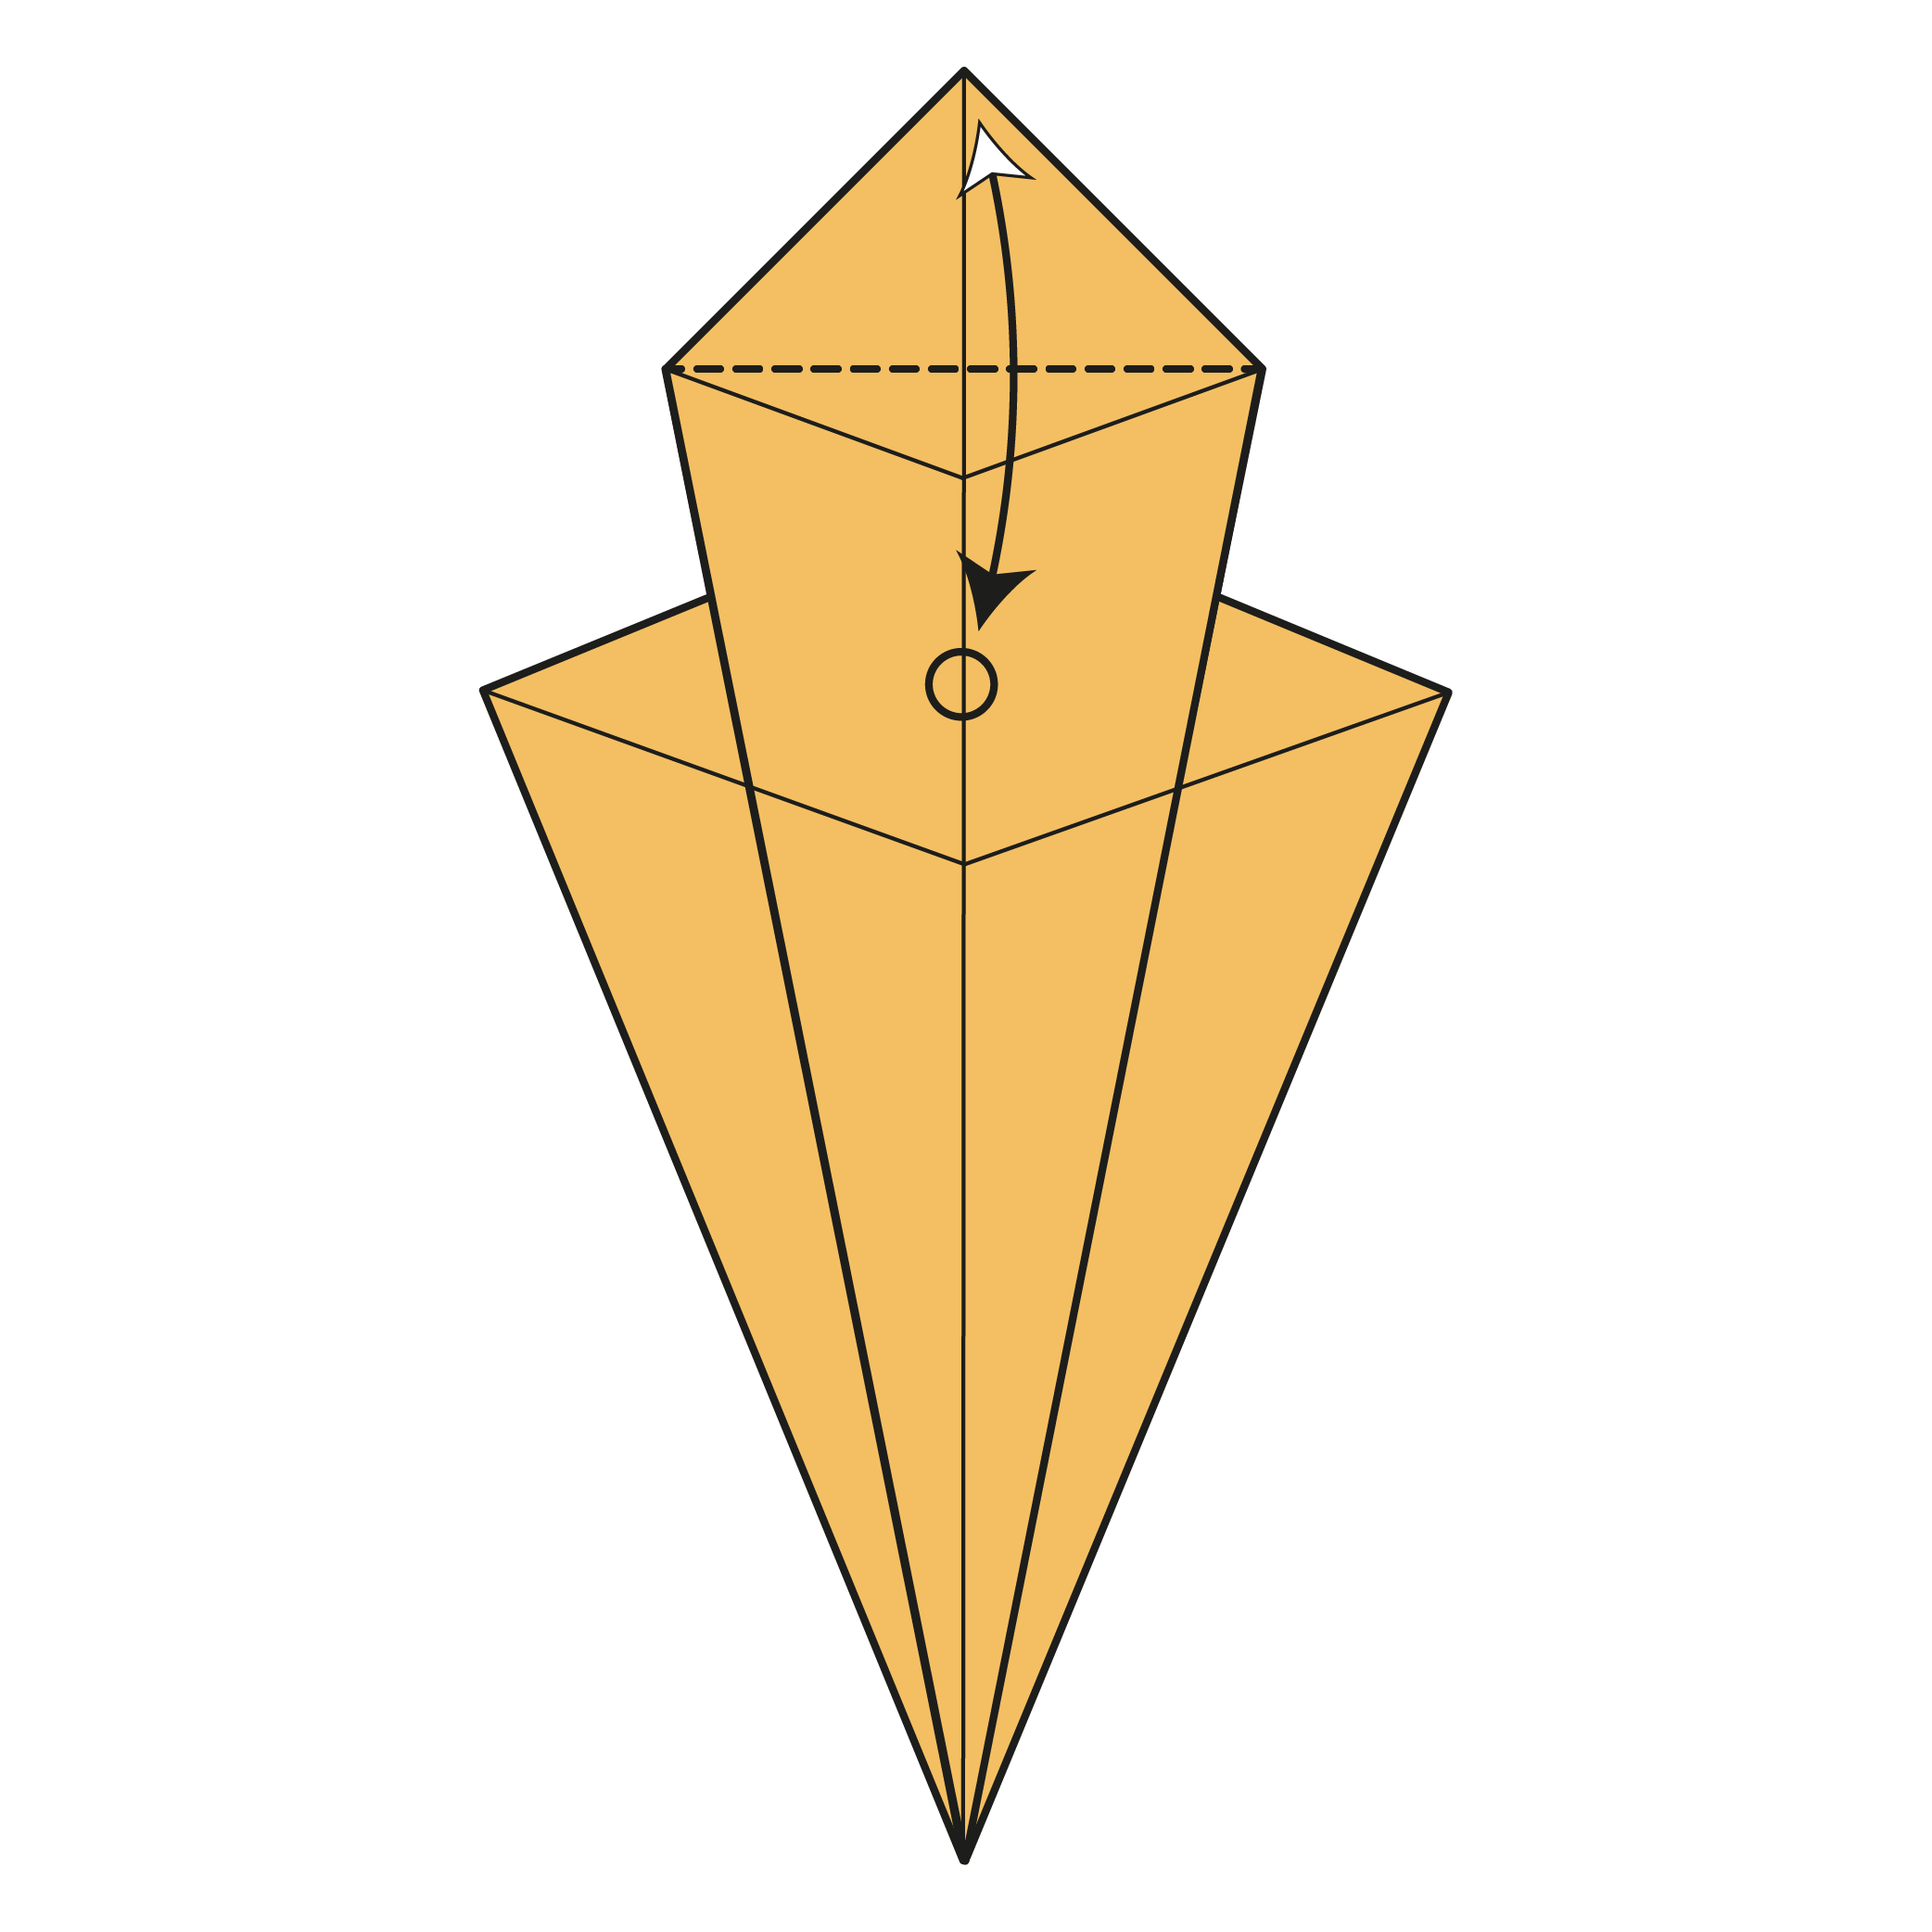
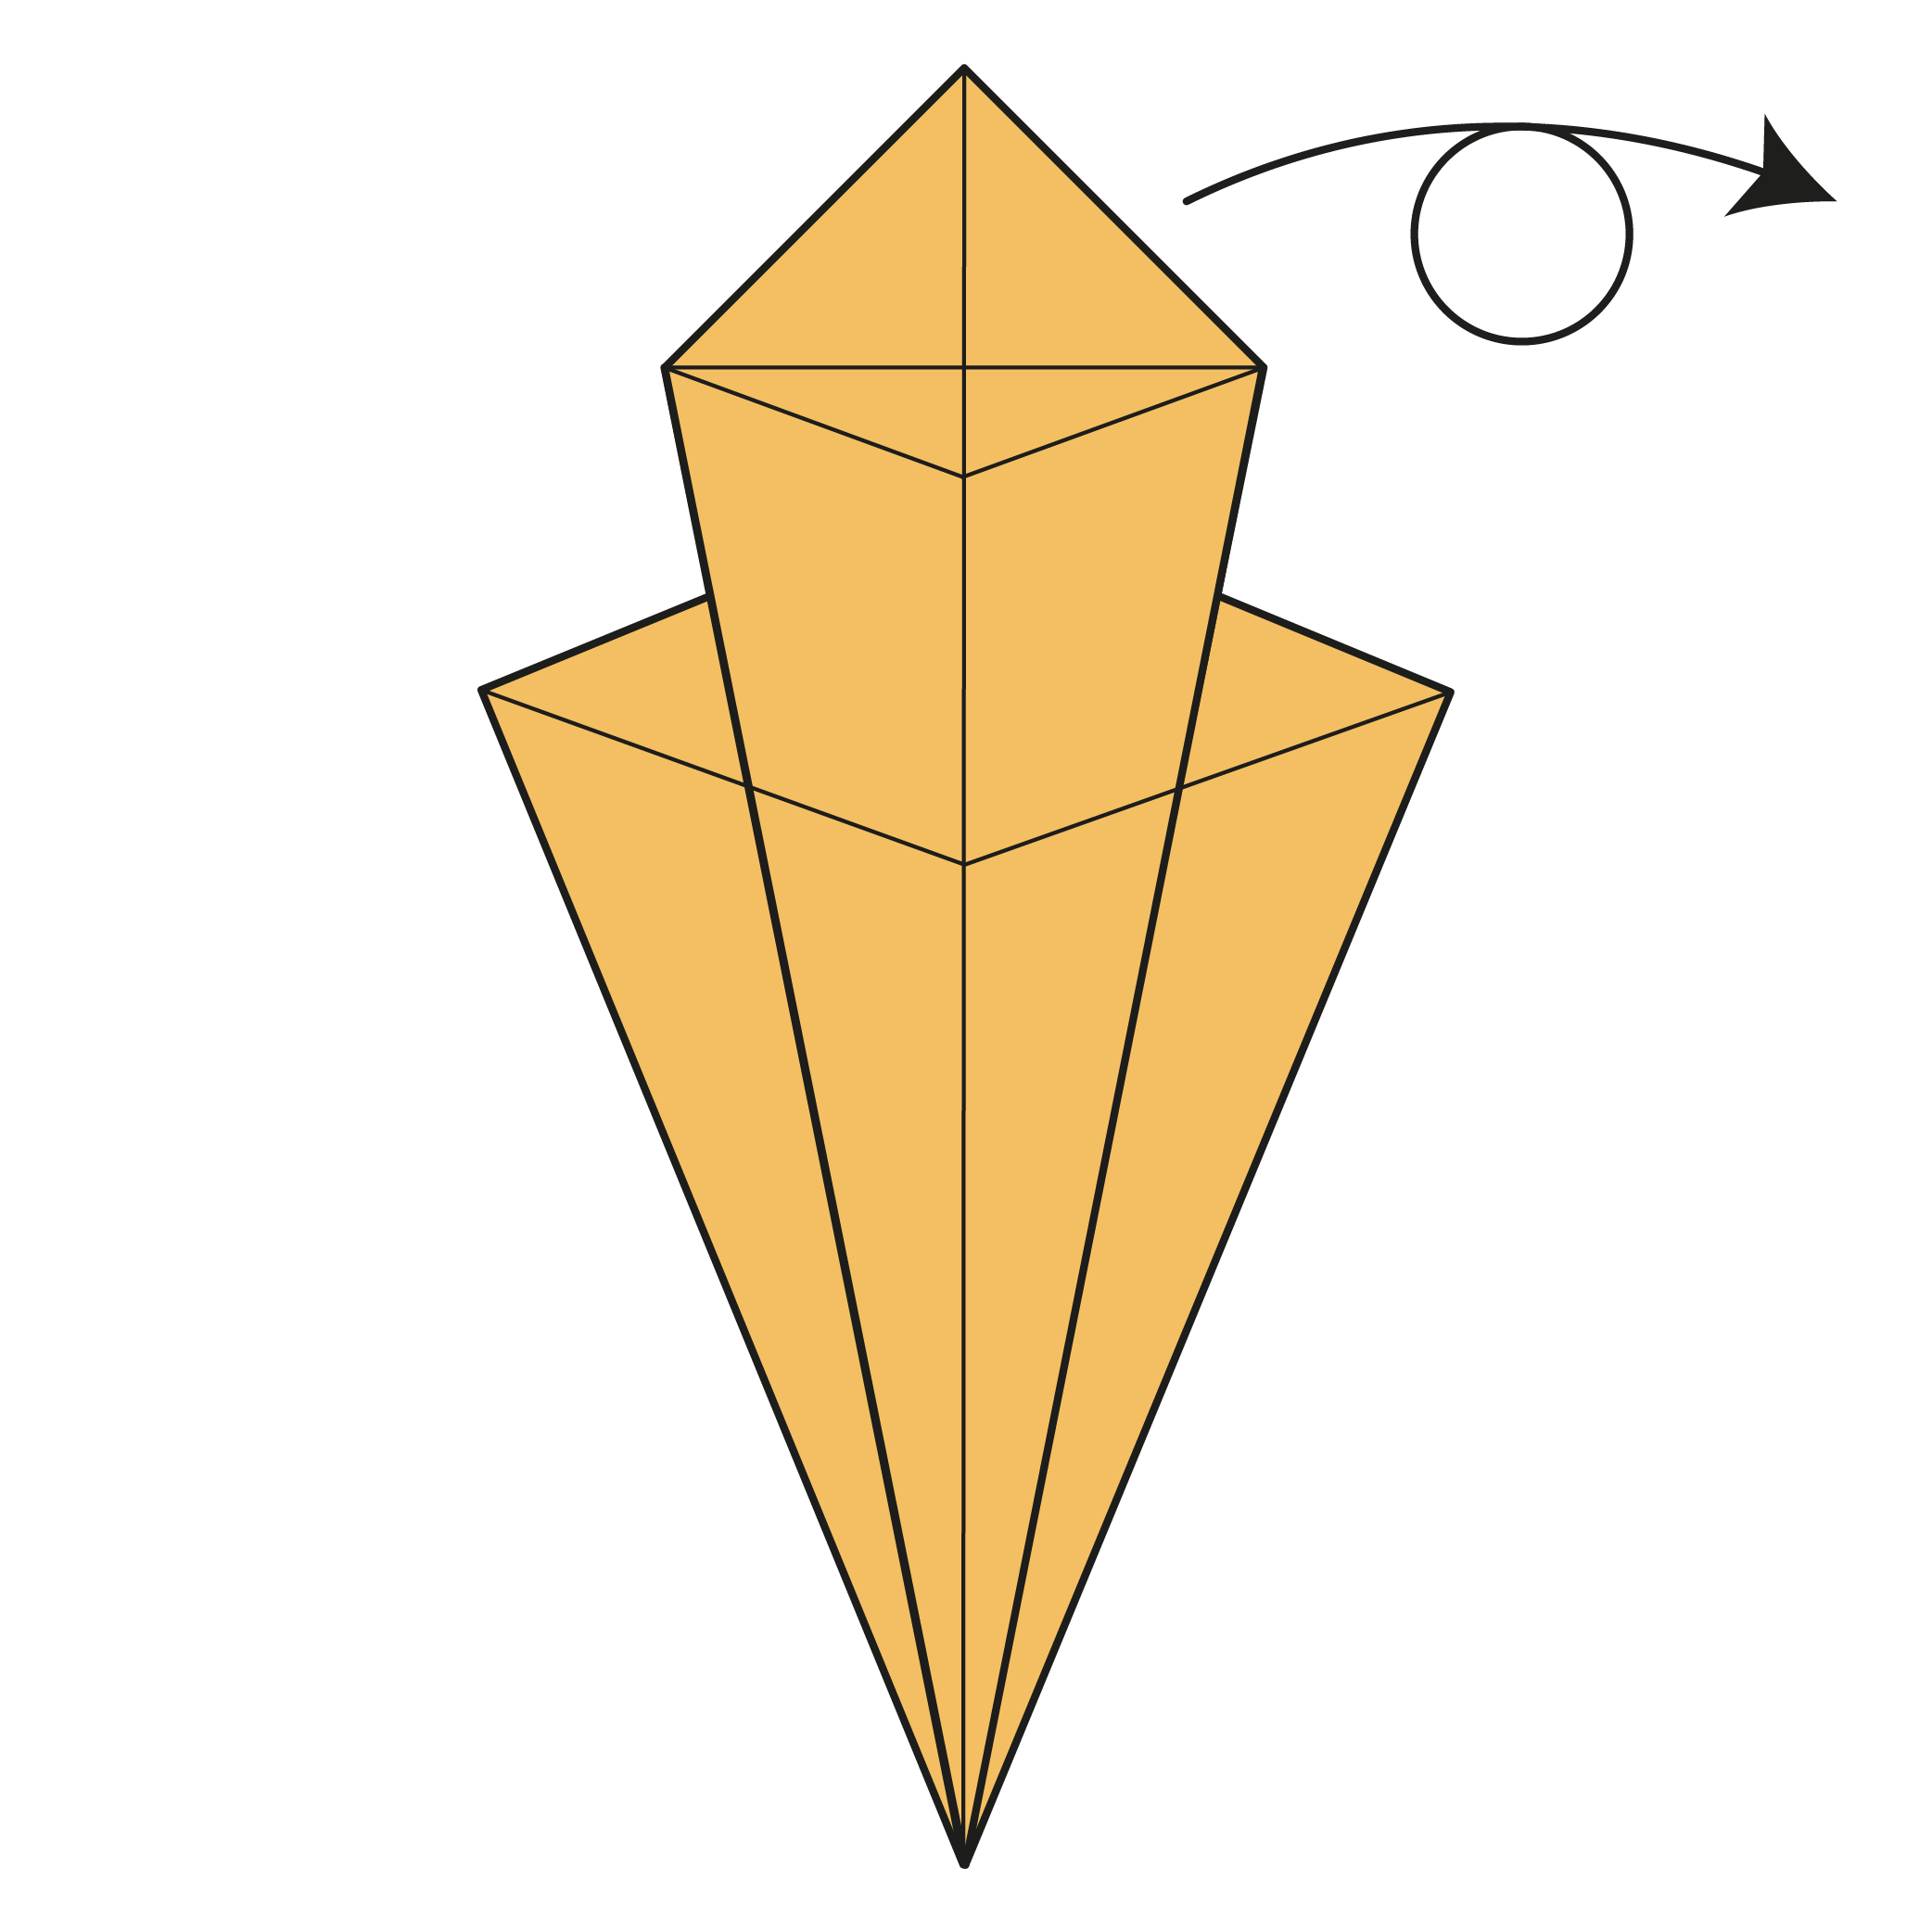
Fold the top corner down along the dotted line from the left to the right corner. Then, unfold.
 10
10Step 10
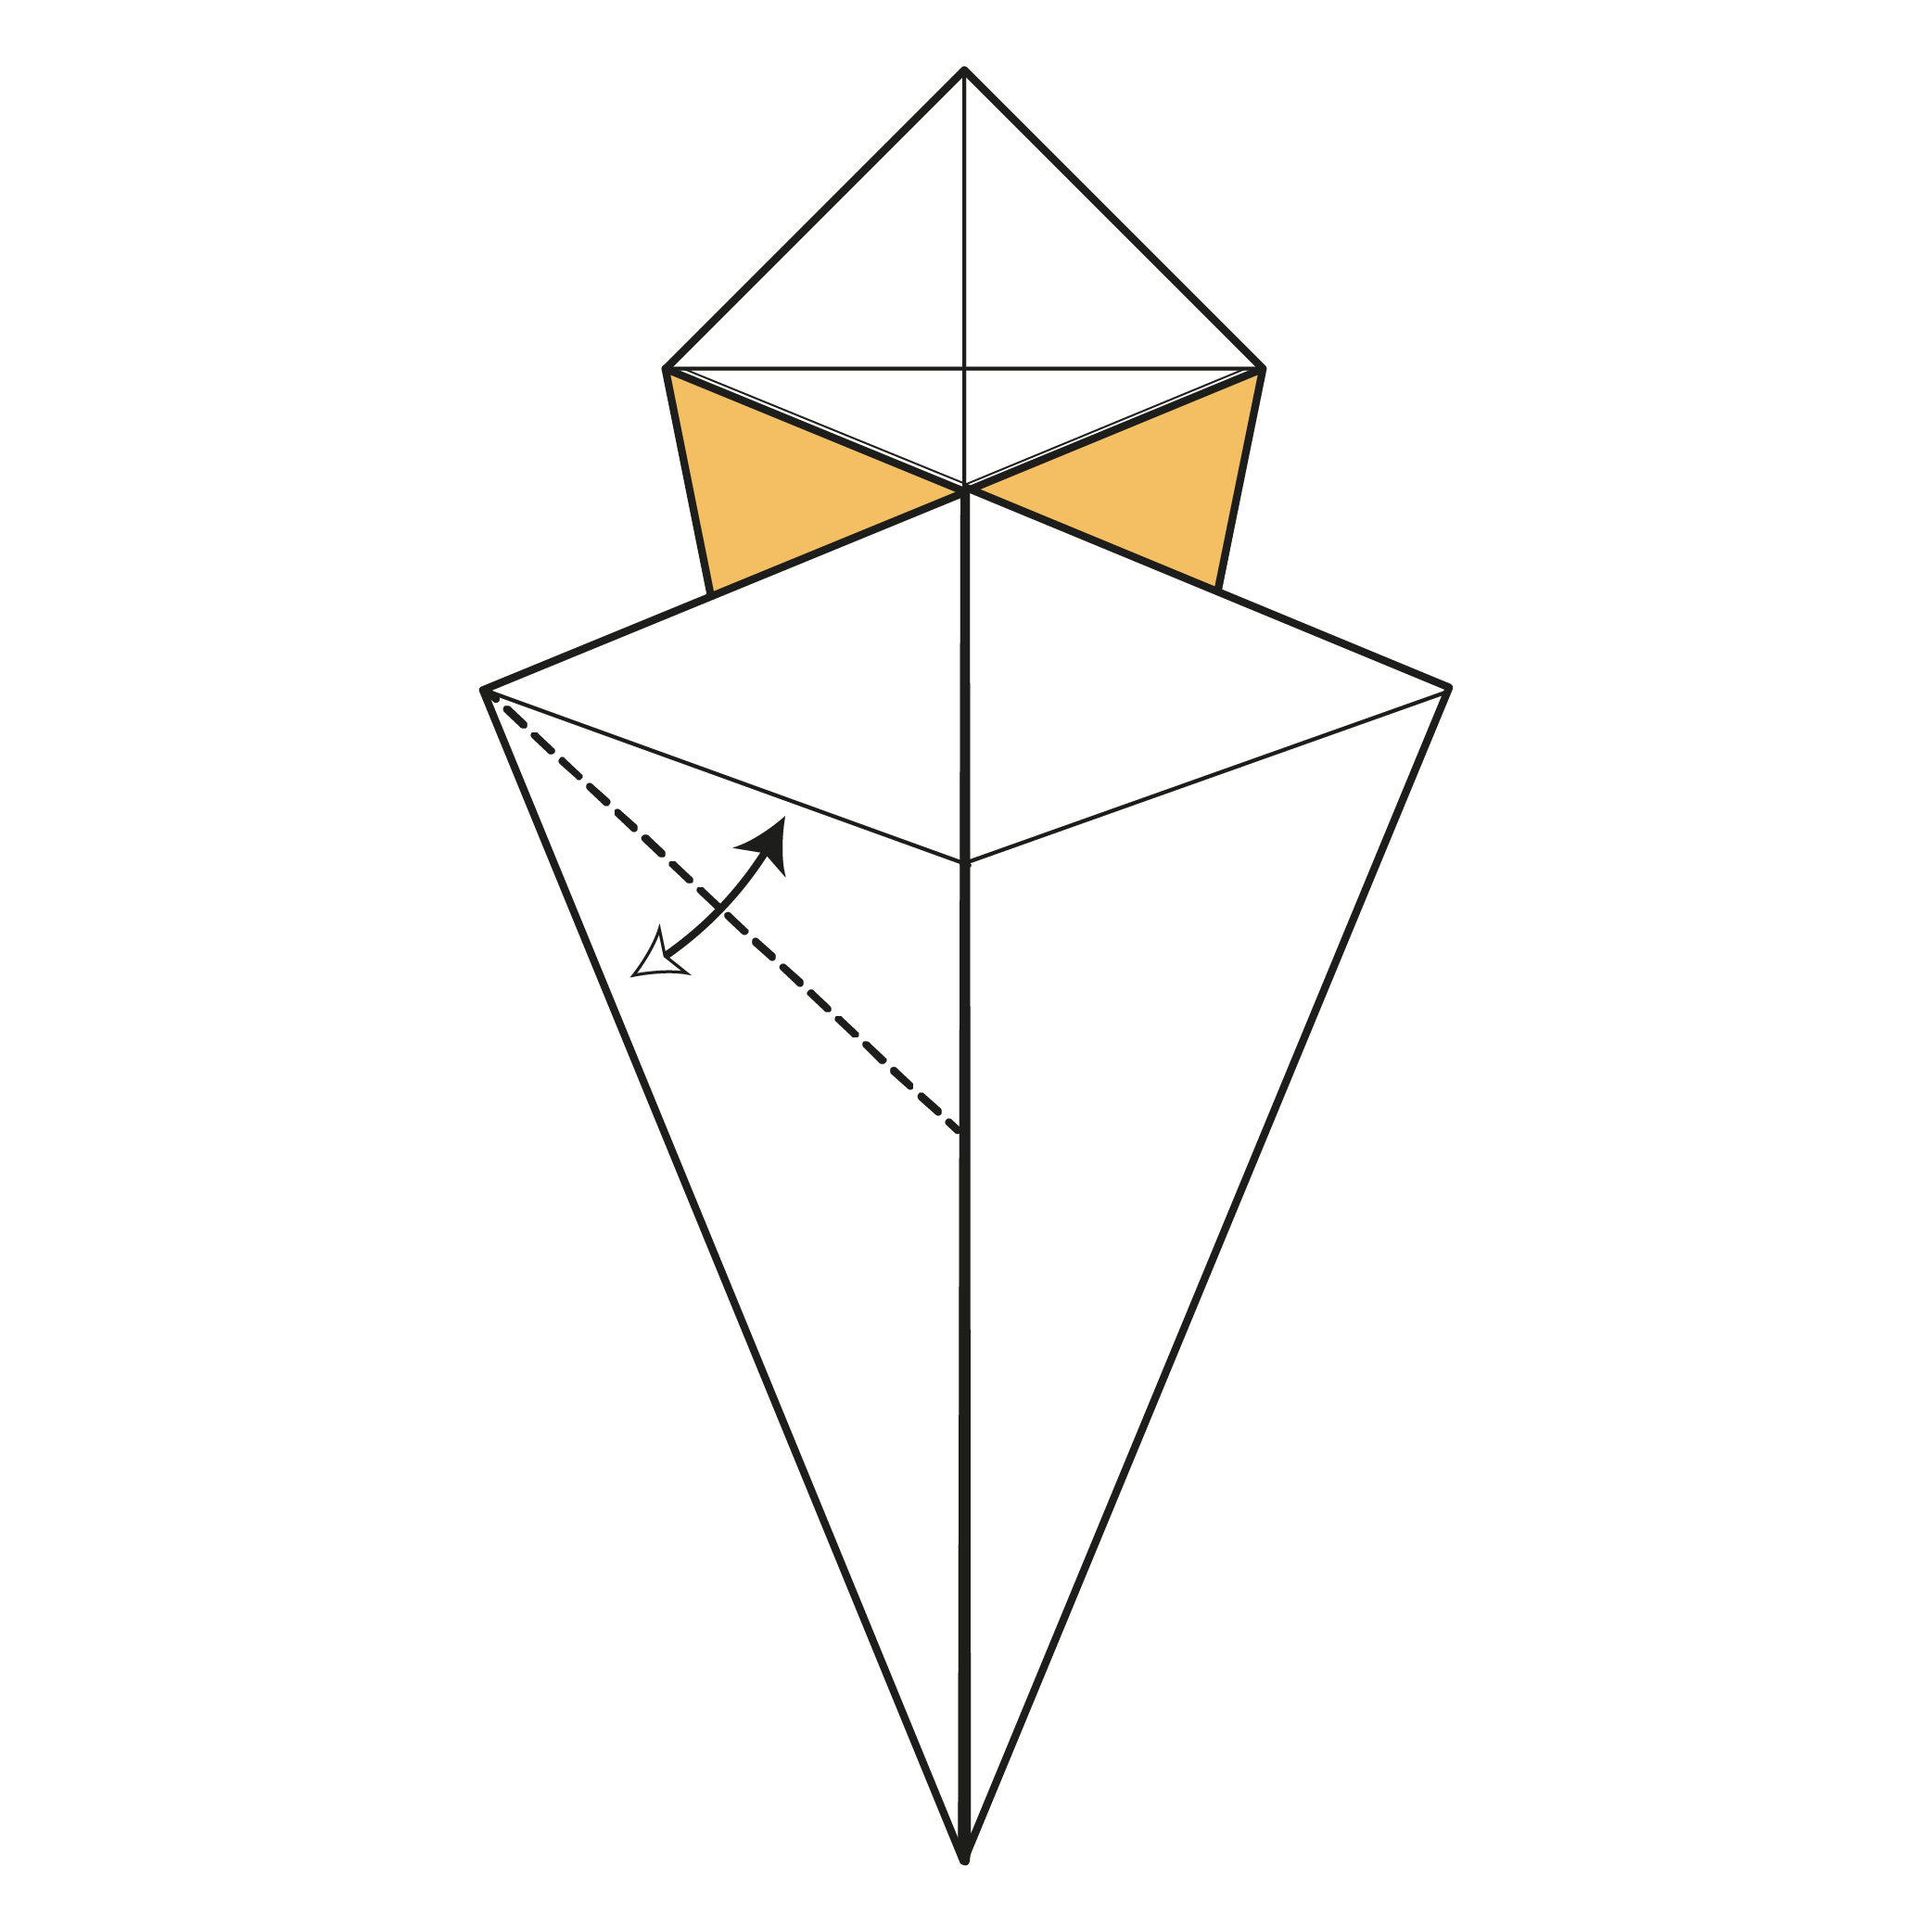
Turn the model over.
 11
11Step 11
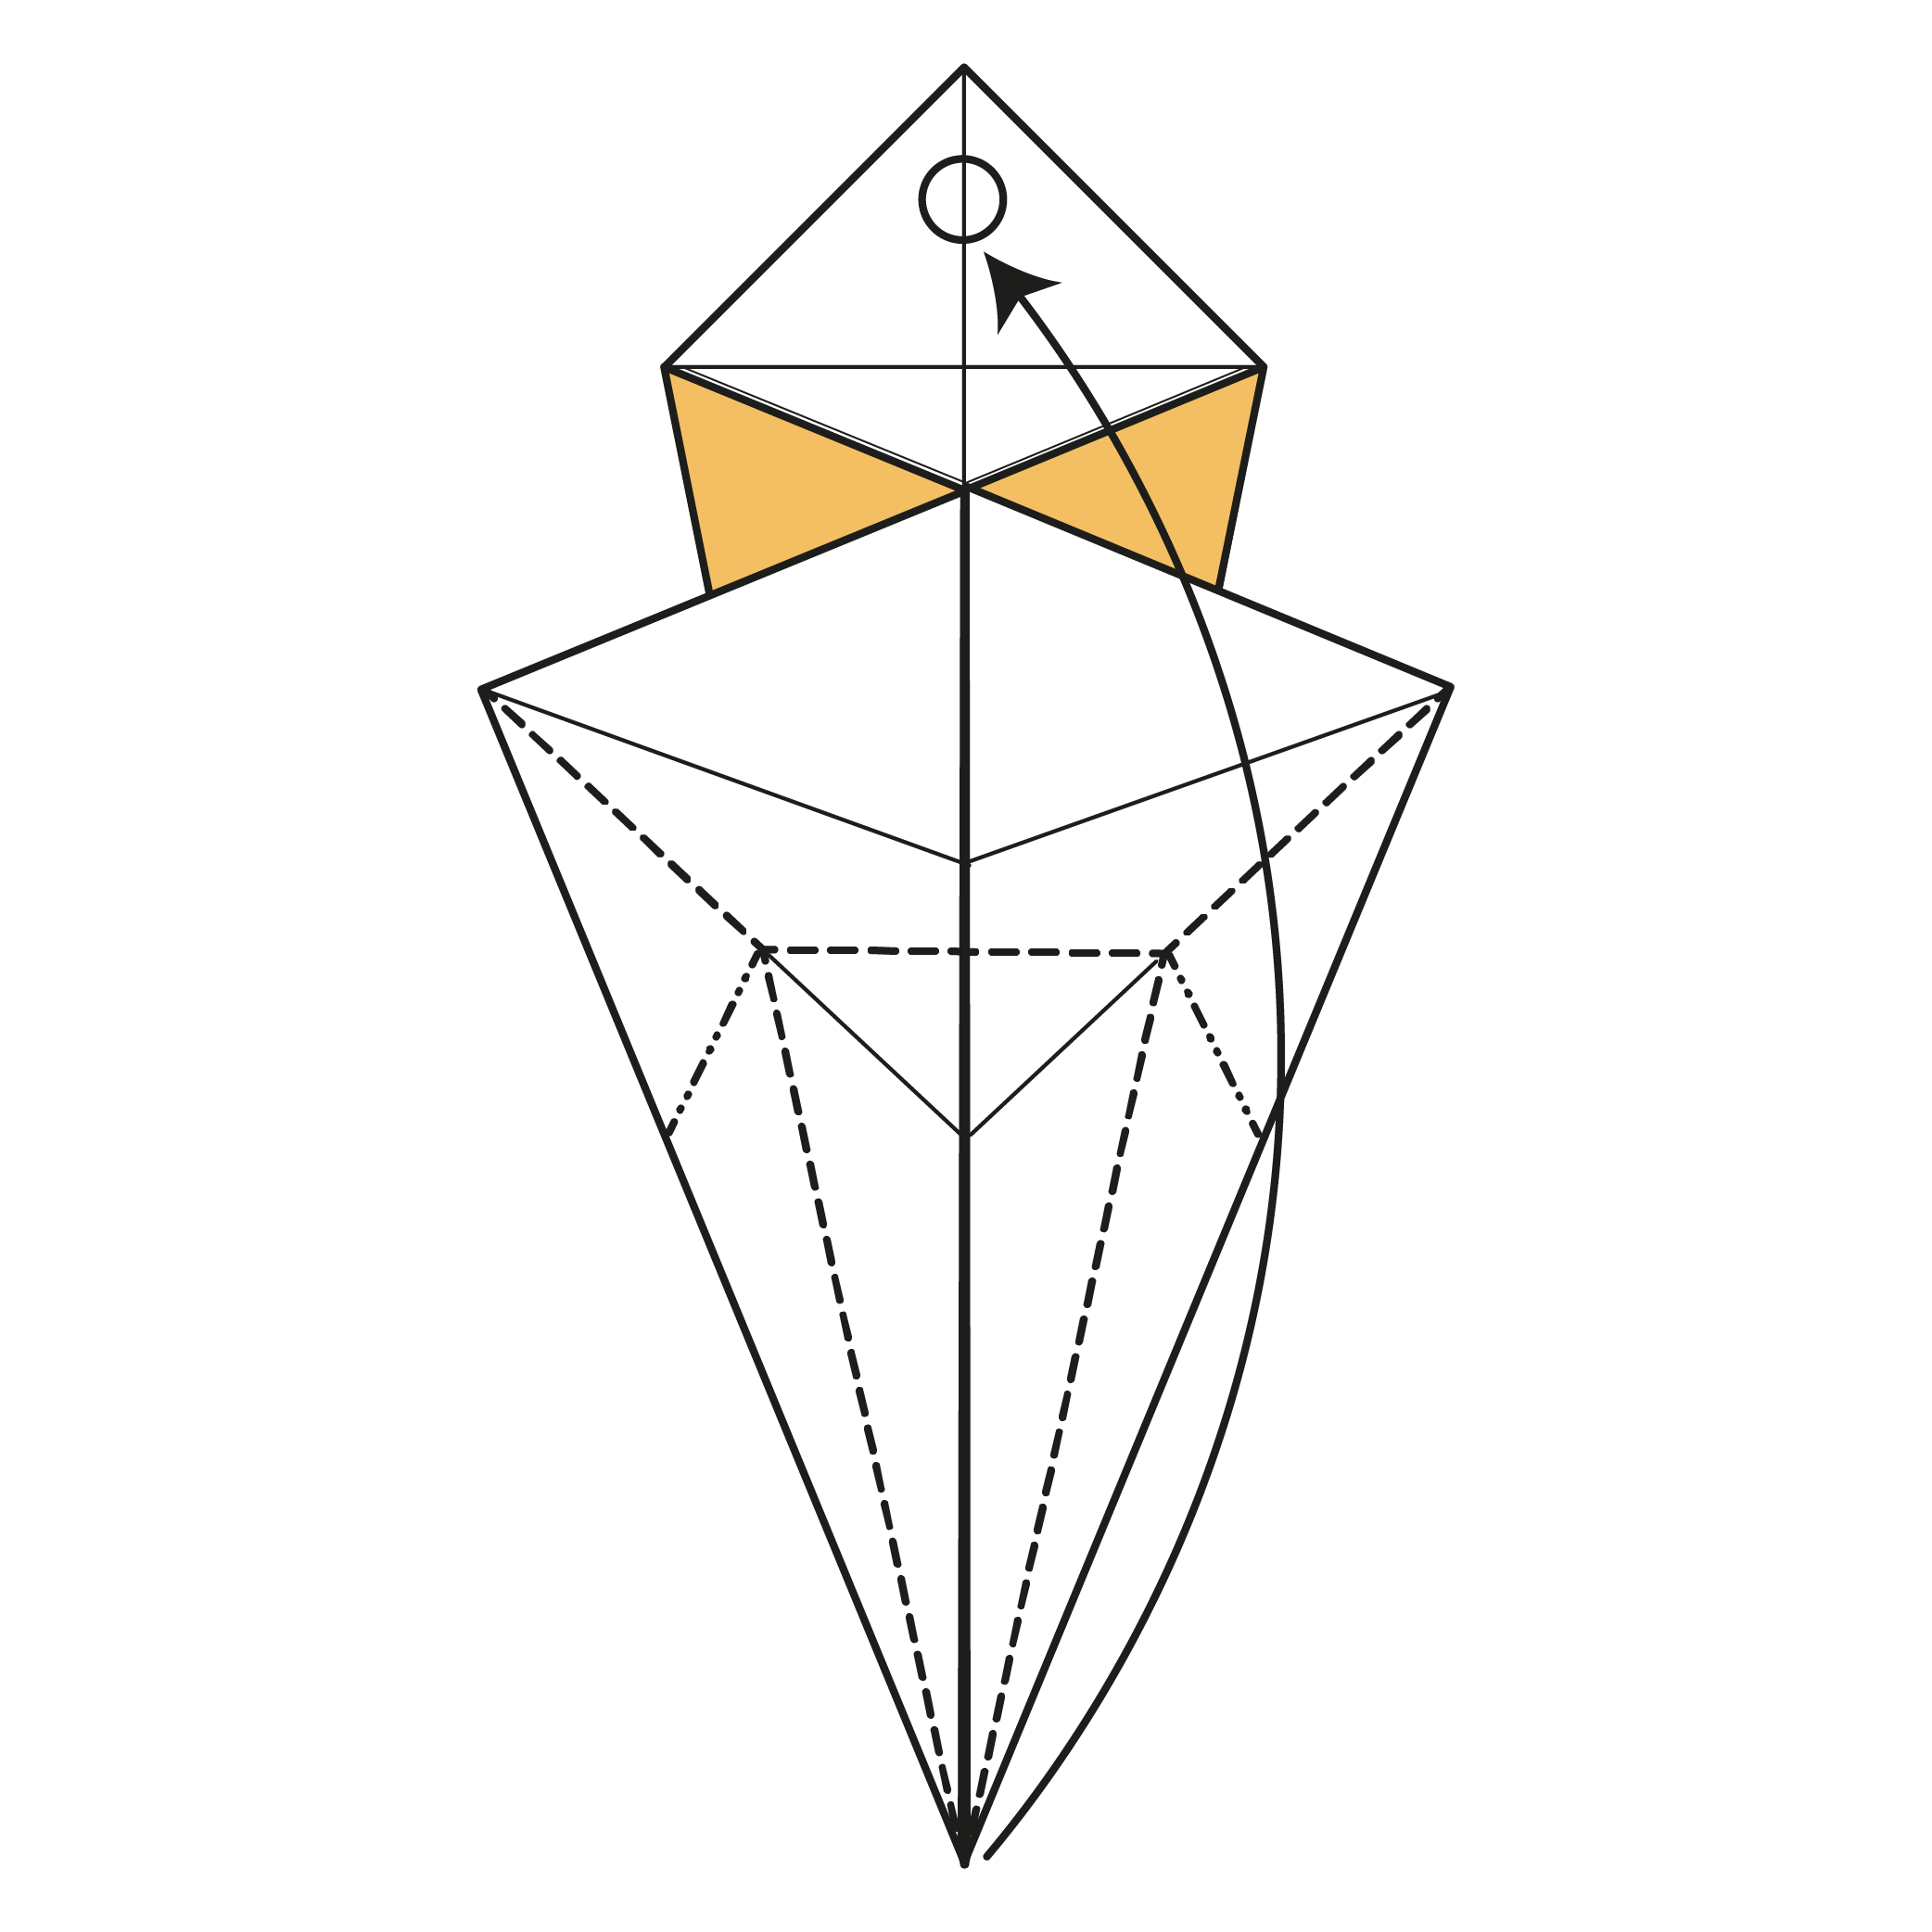
Fold the bottom left edge up (top layer only) to the nearest line. Only crease from the corner to the centerline.
 12
12Step 12
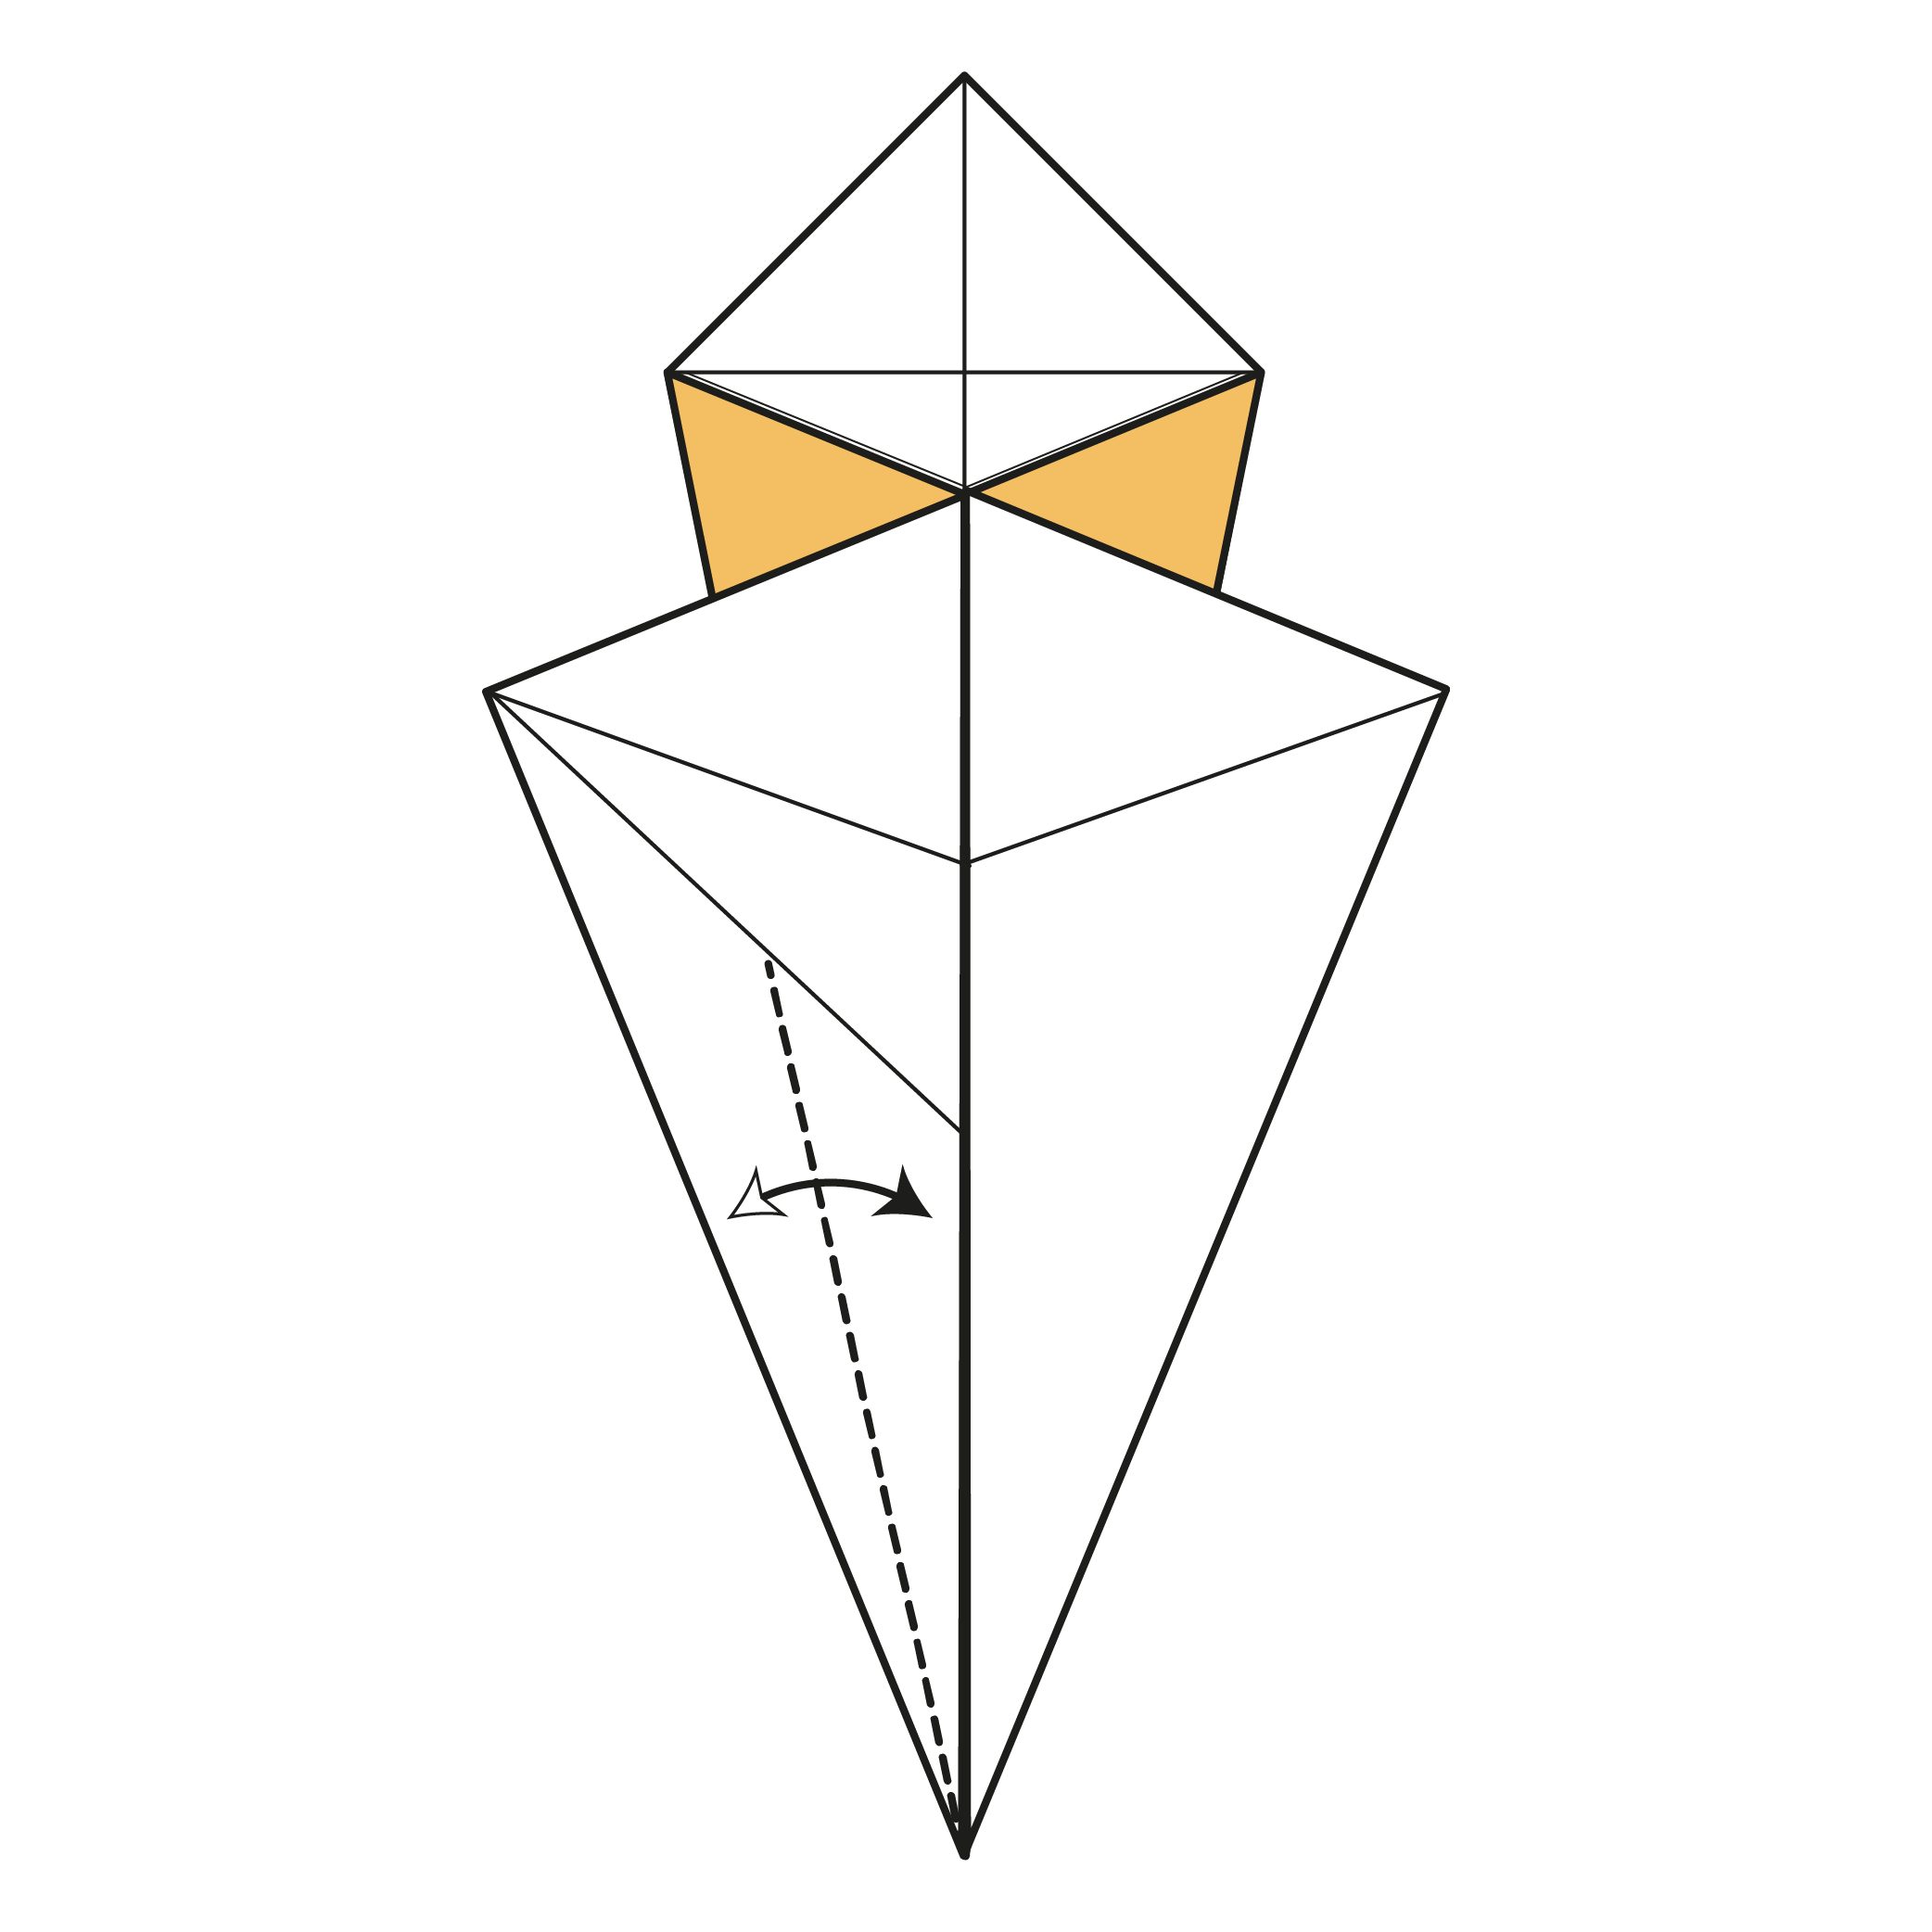
Now fold that same edge to the centerline, but only crease from the Step 11 crease to the bottom corner.
 13
13Step 13
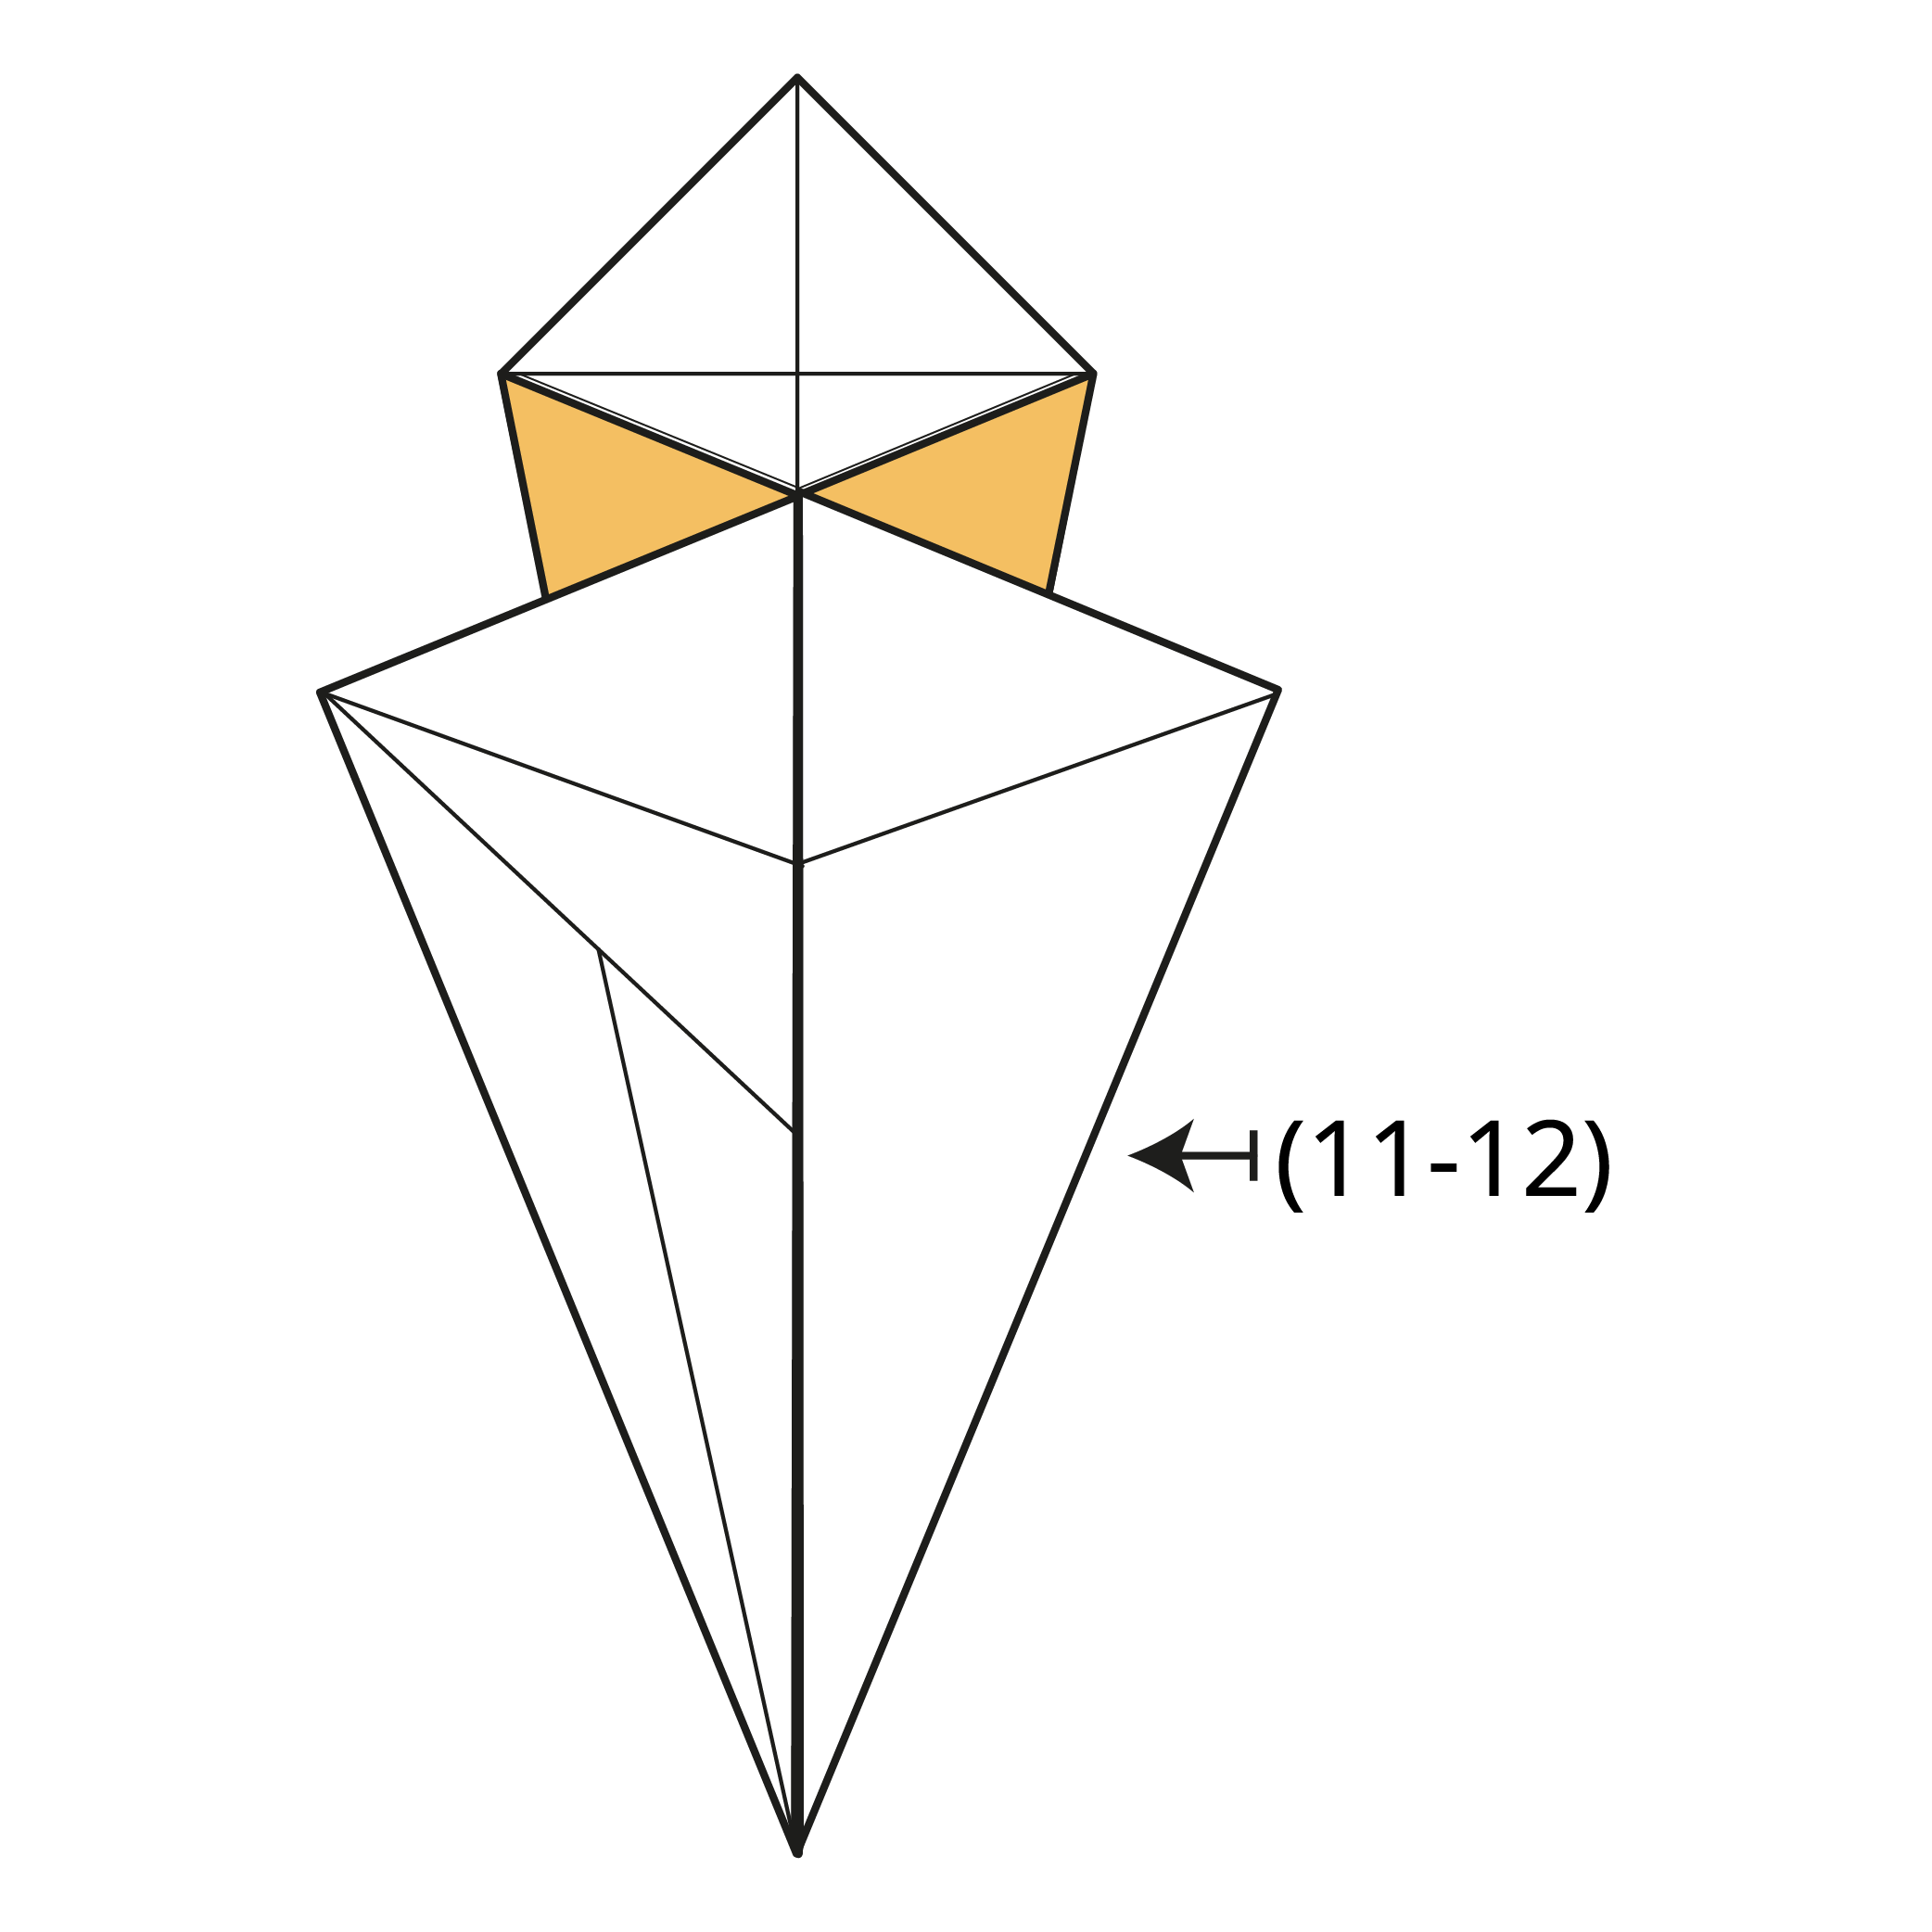
Repeat Steps 11 and 12 on the right side.
 14
14Step 14
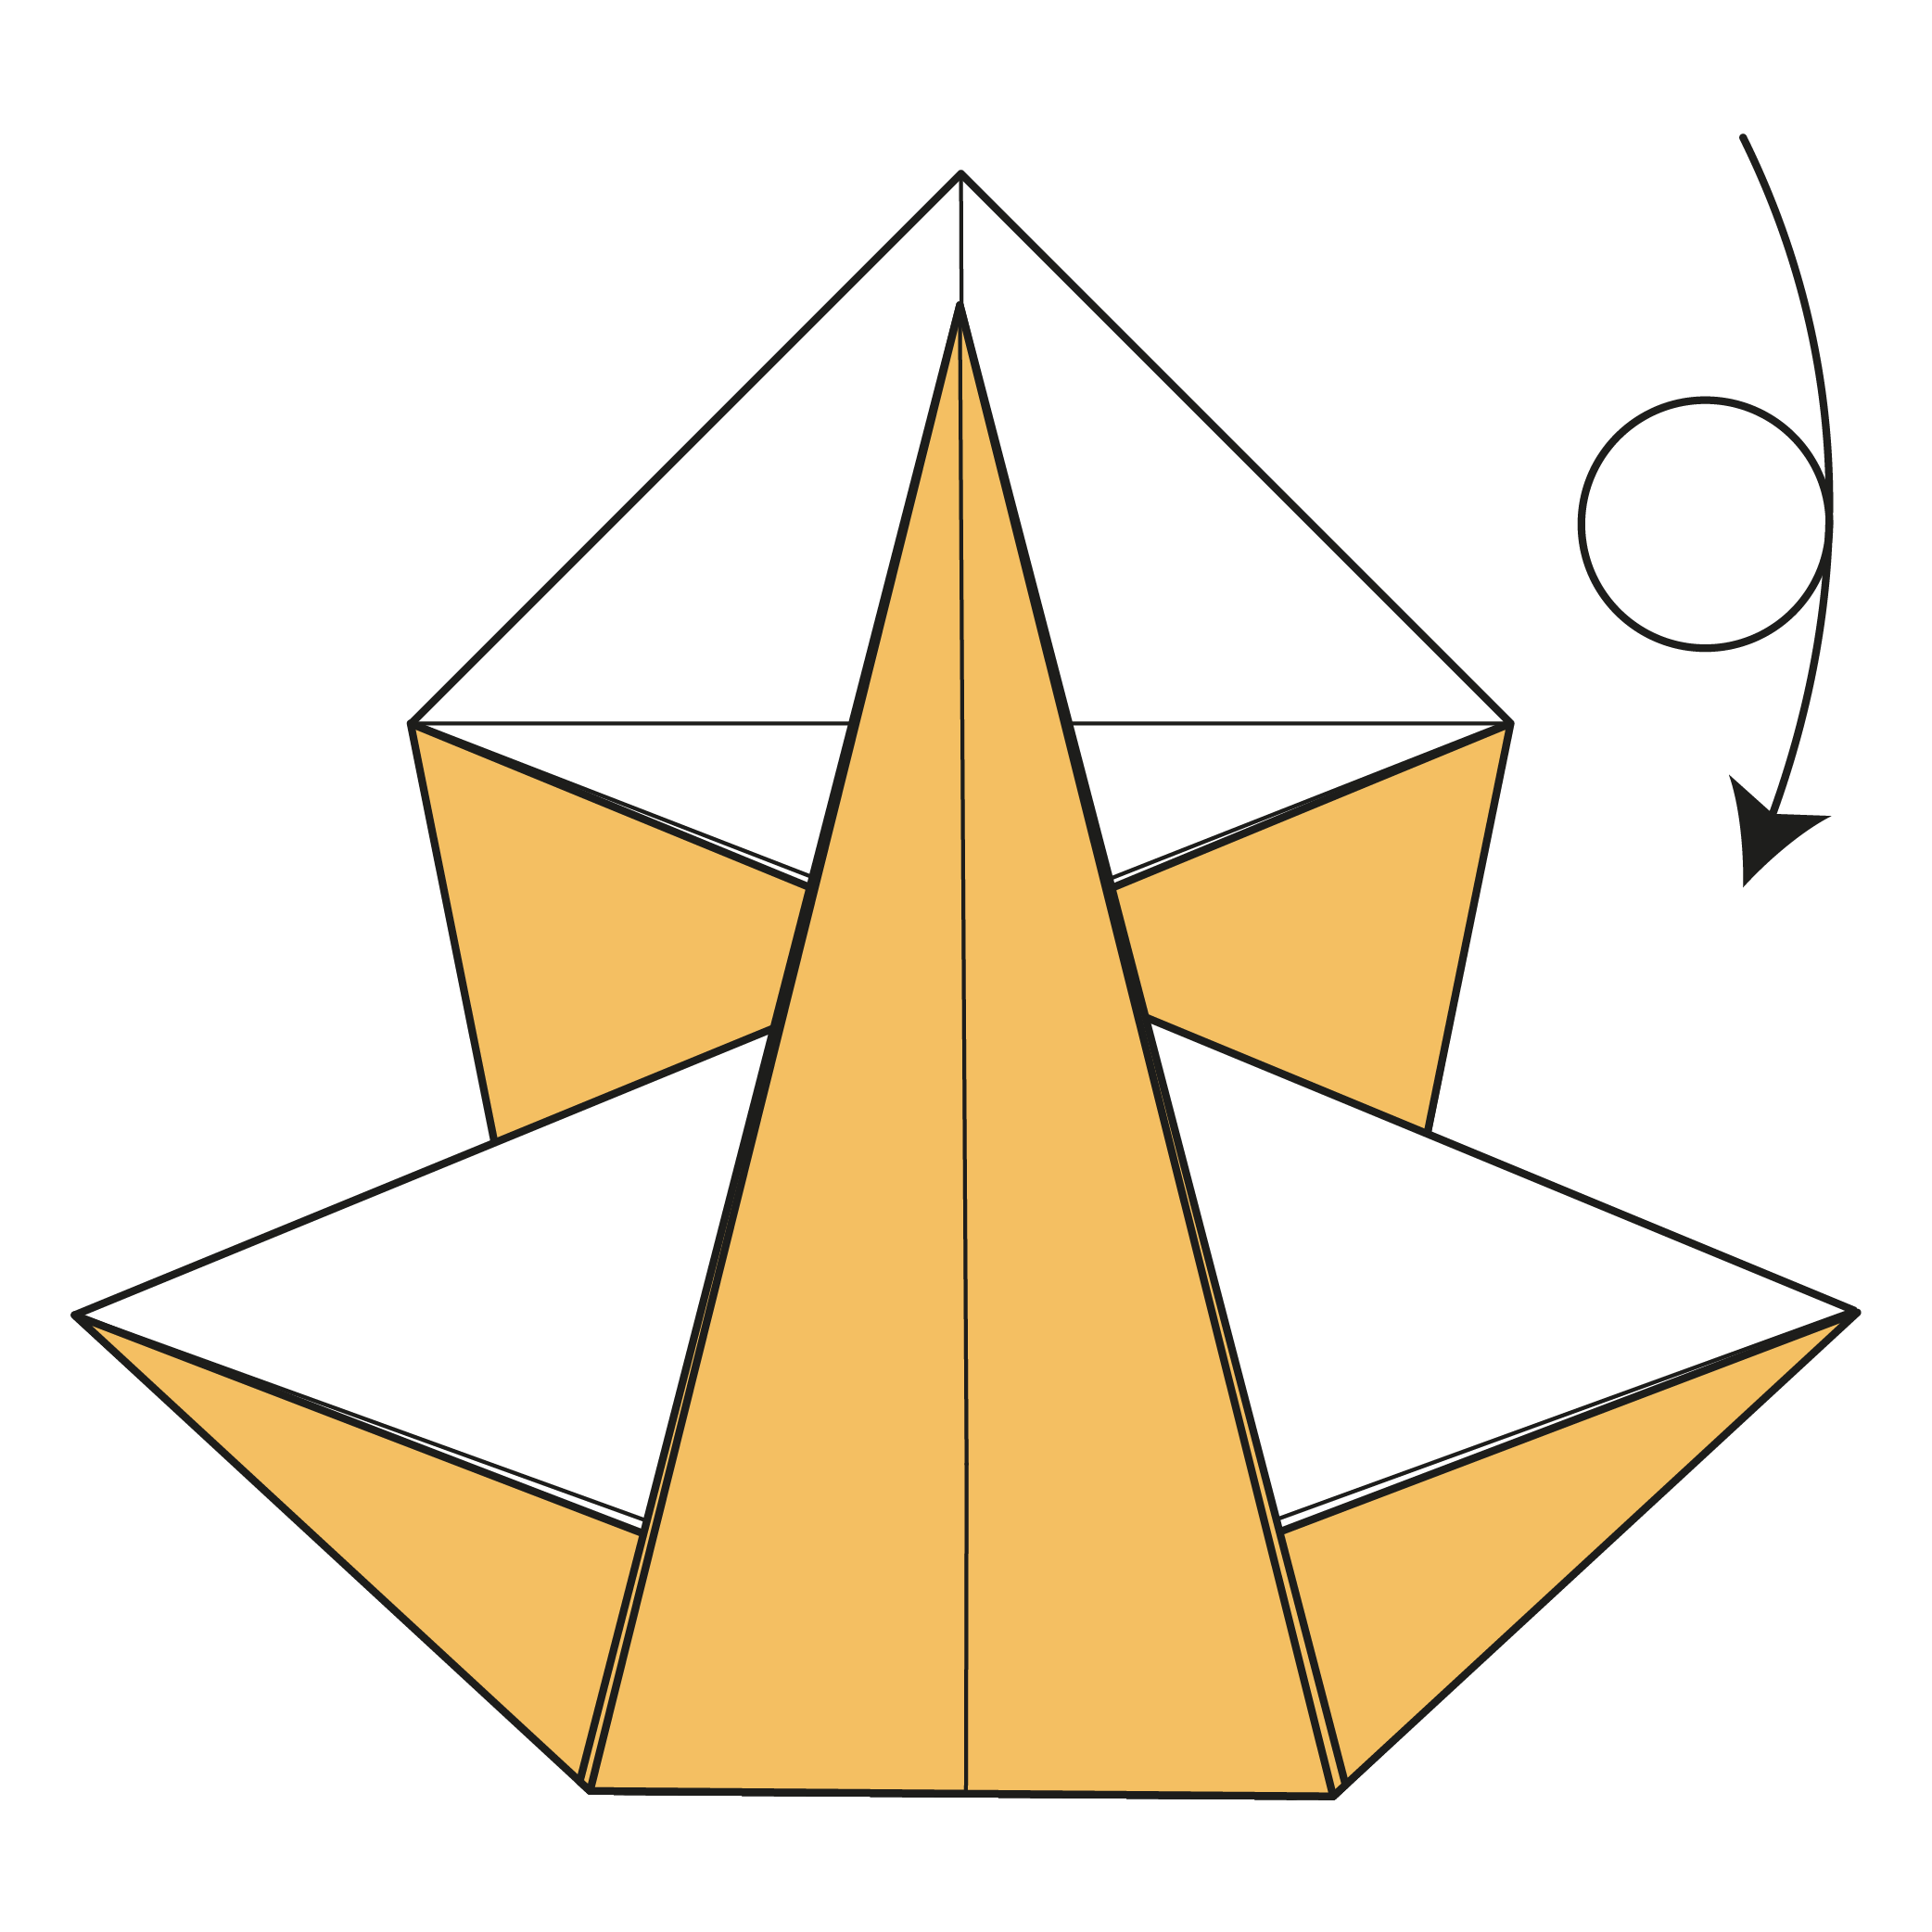
Fold the bottom corner up and collapse the model along the creases made in Steps 11 to 13.
 15
15Step 15
Flip the model over, top to bottom.
 16
16Step 16
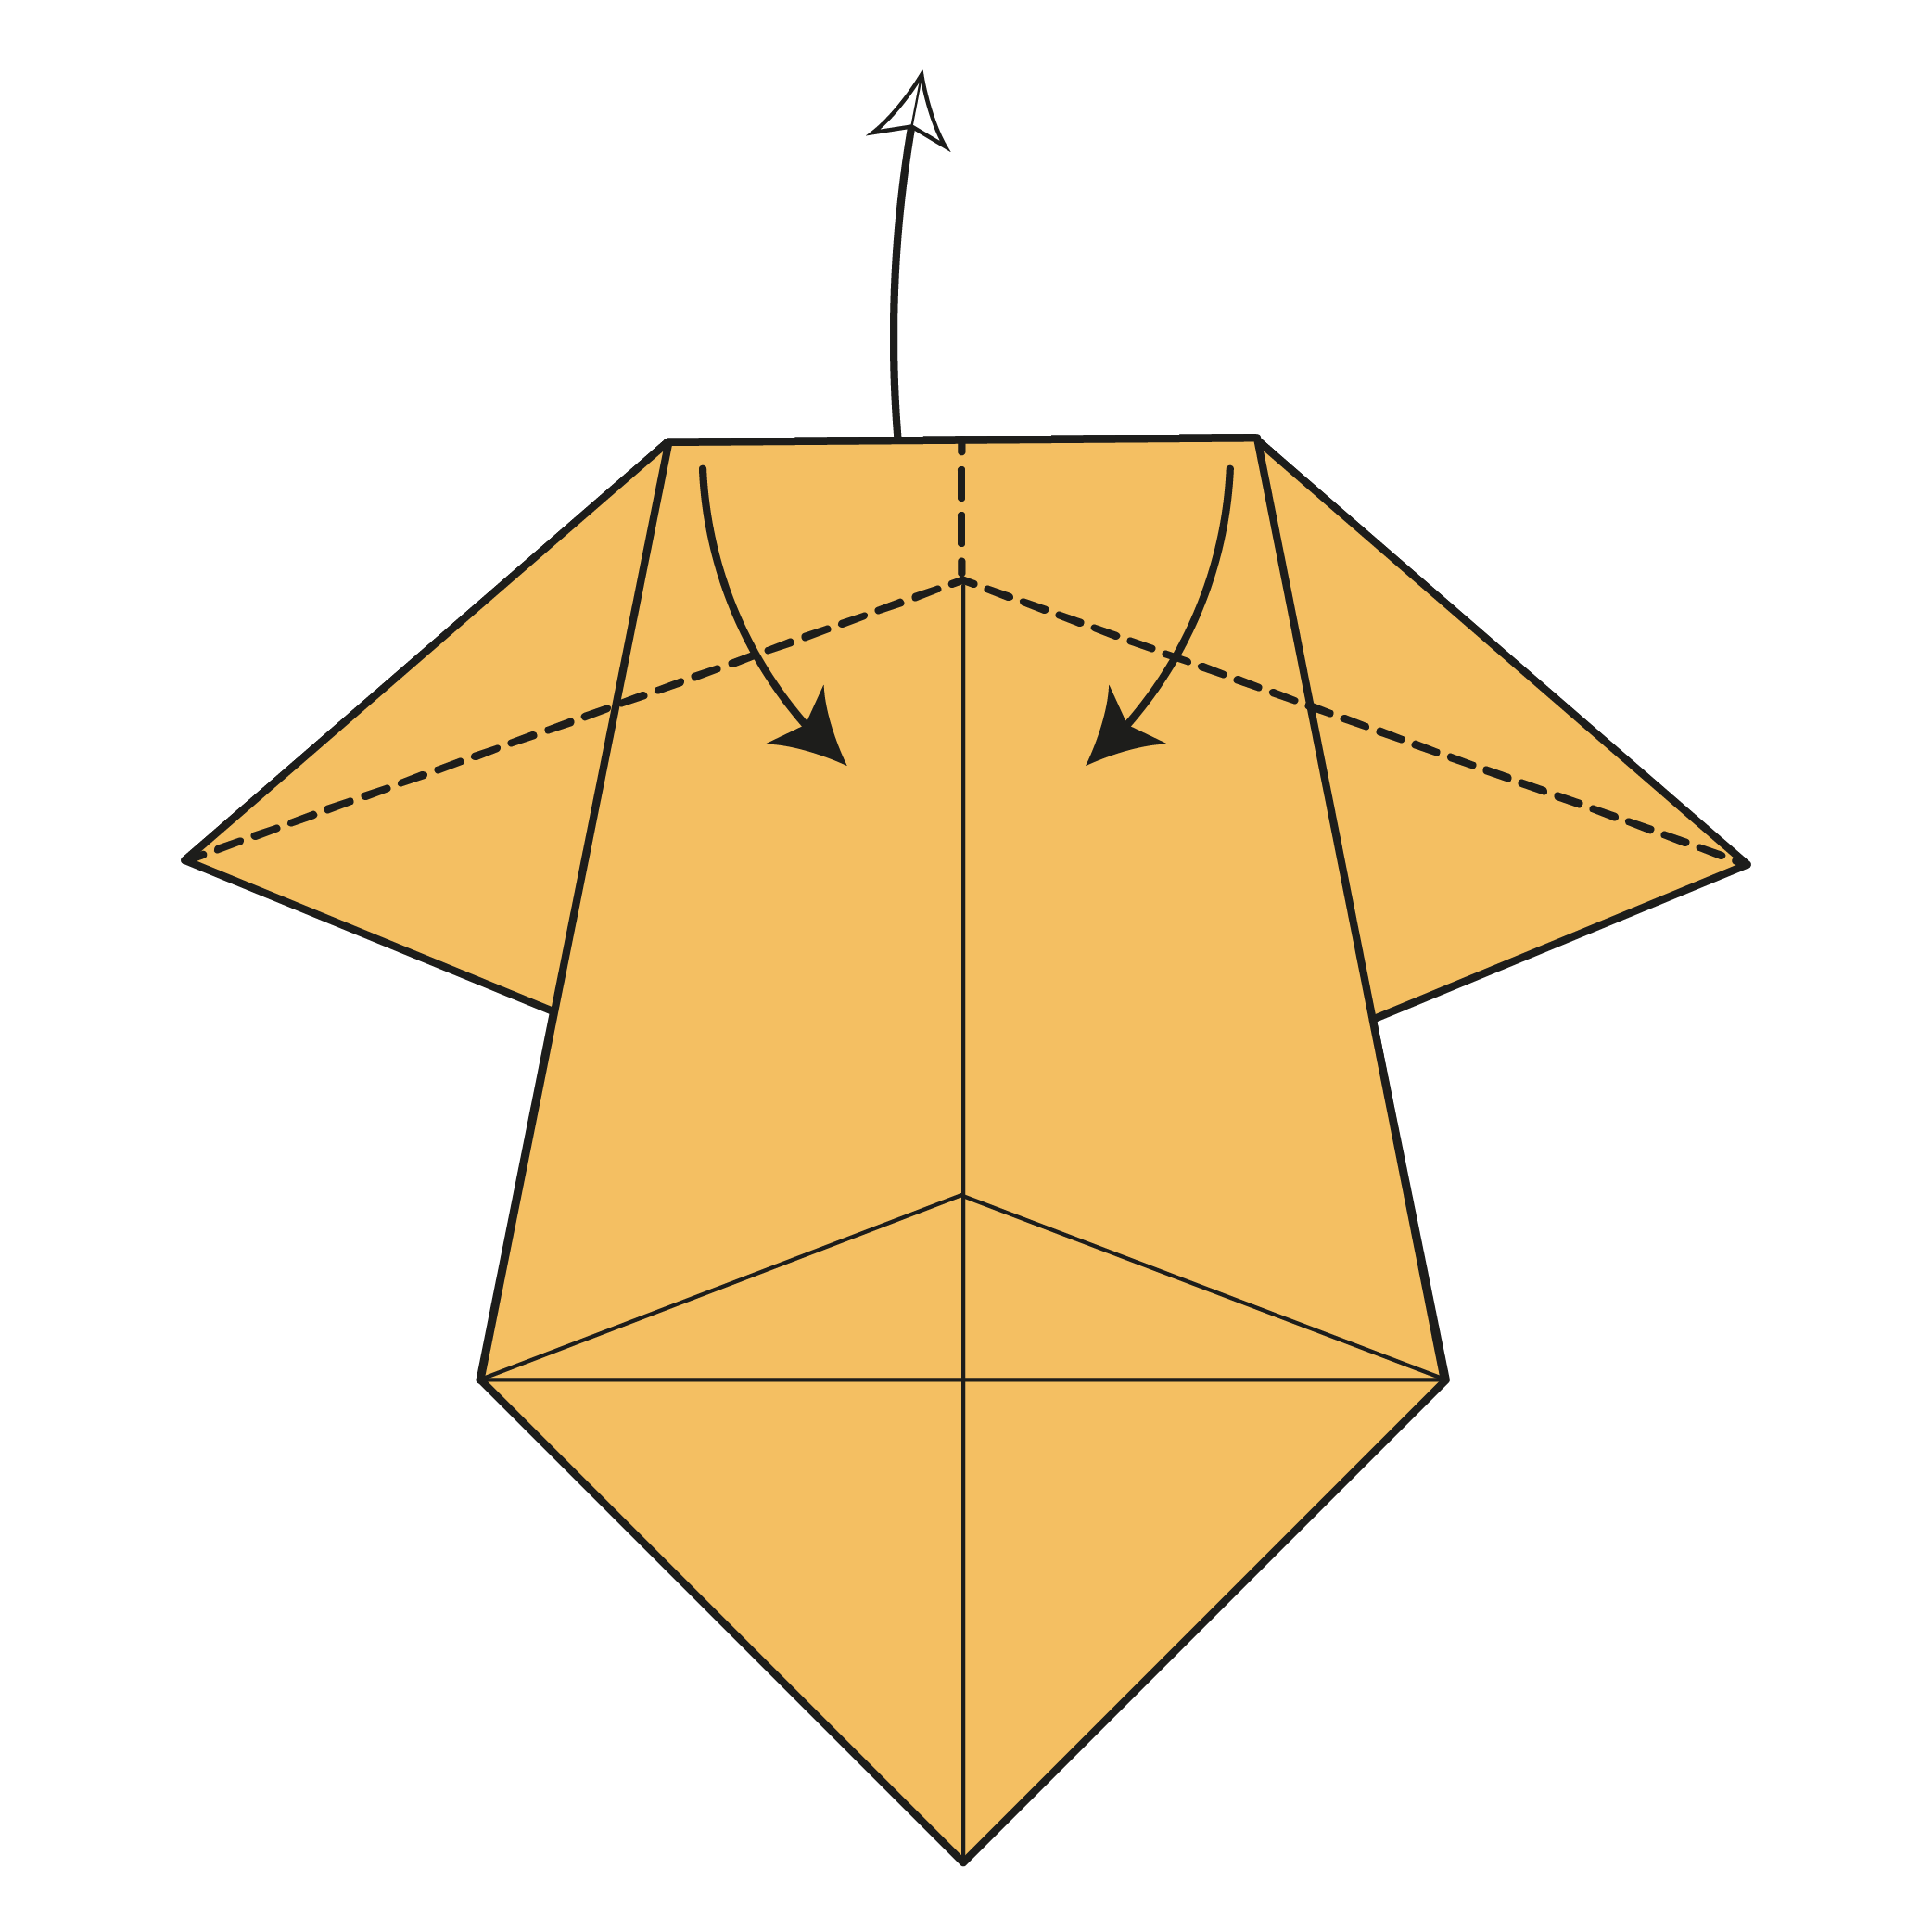
Bring the back flap up and fold along the existing creases. It won’t lie flat—don’t force it.
 17
17Step 17
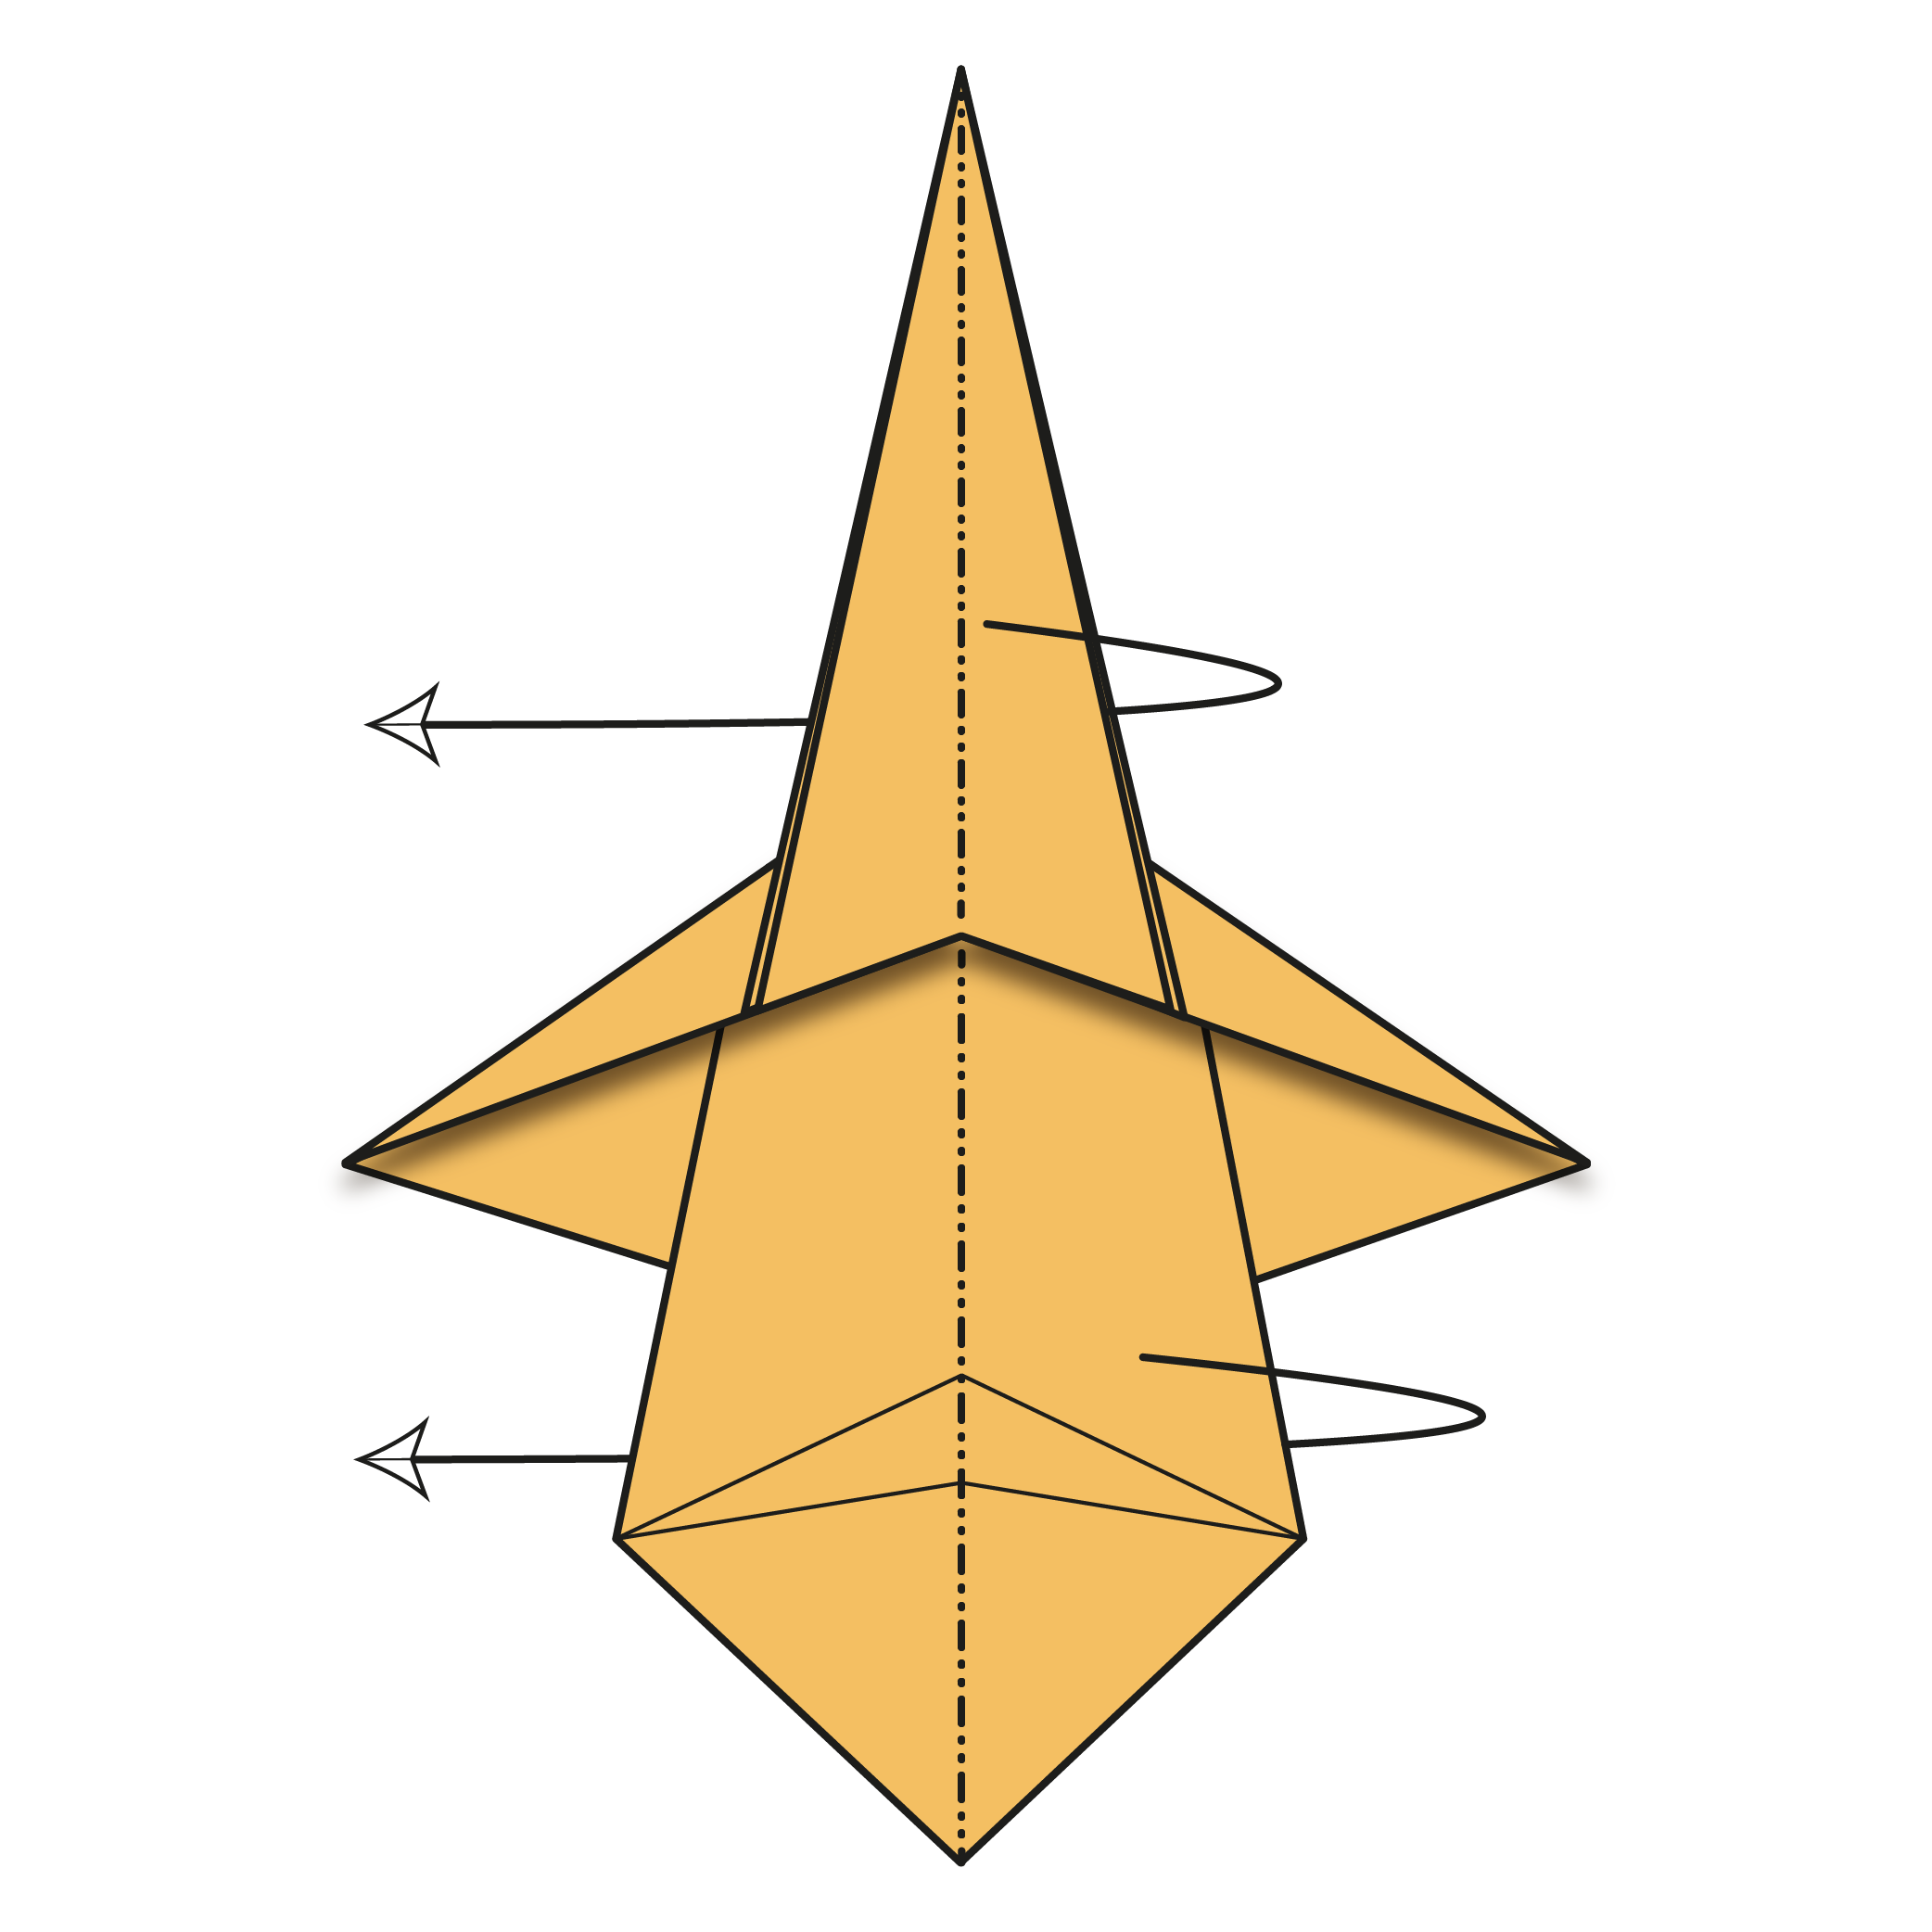
Fold the right side of the model to the back.
 18
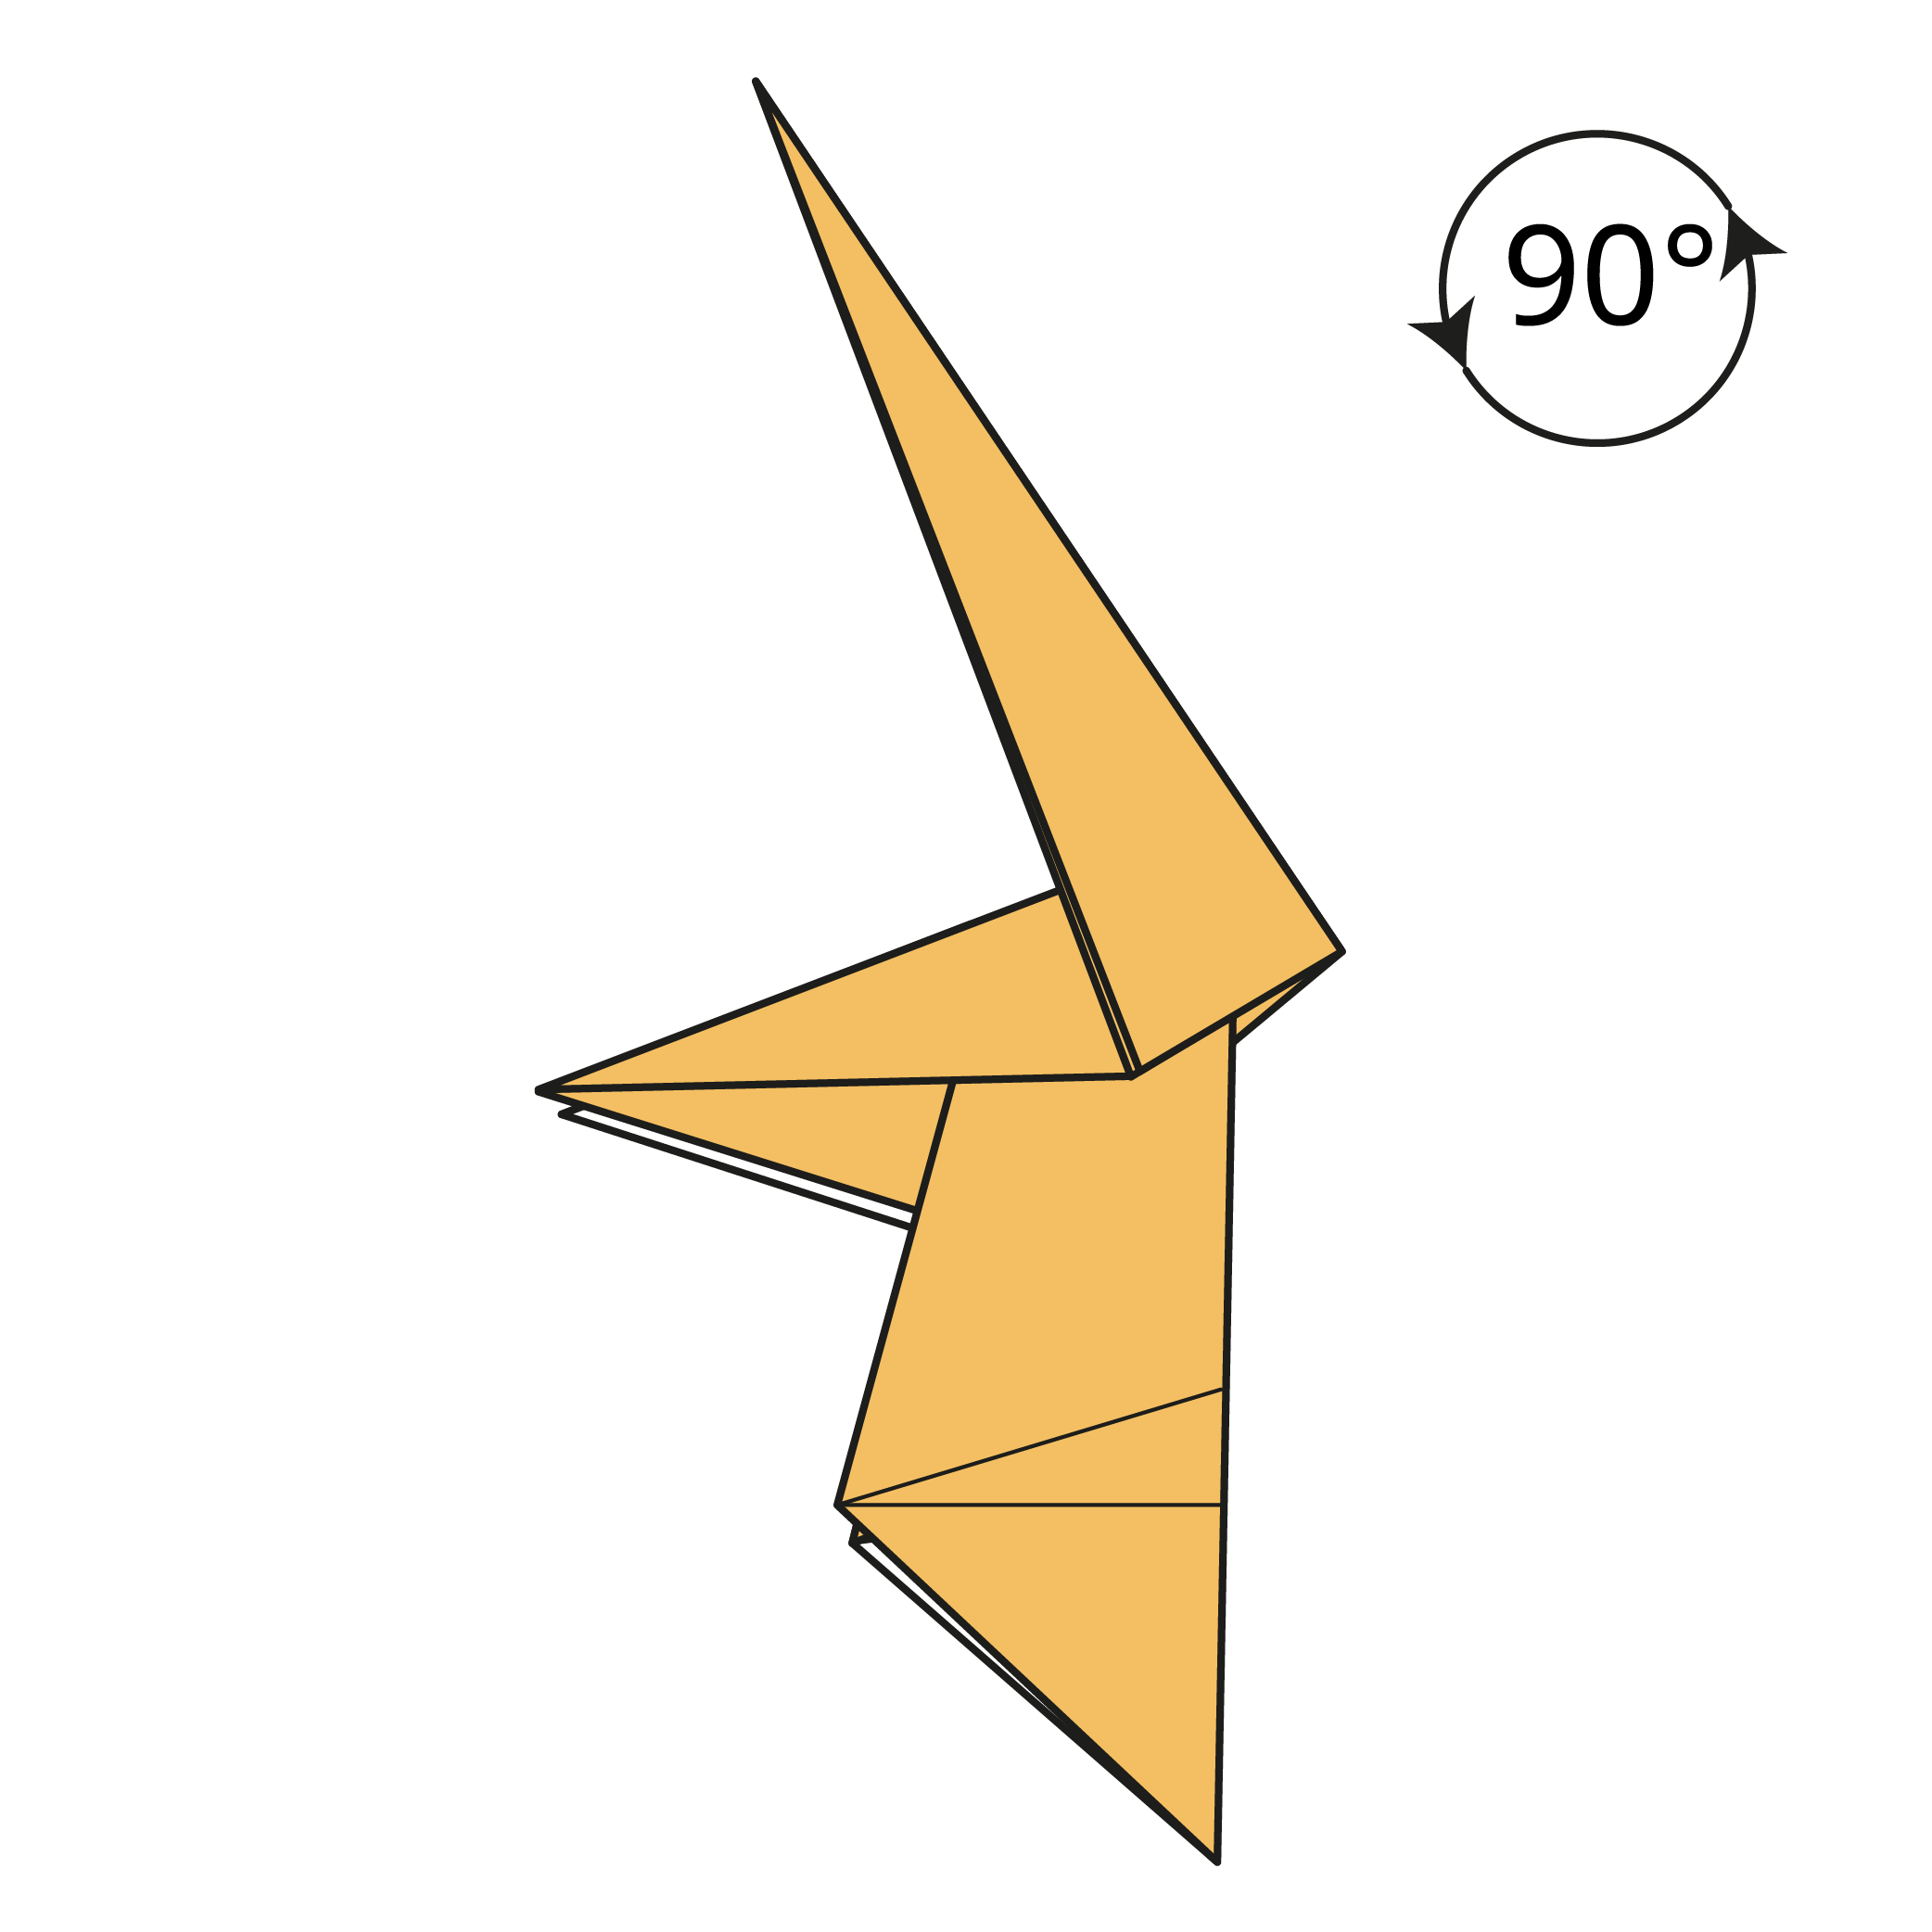
18Step 18
Rotate the model 90° counterclockwise.
 19
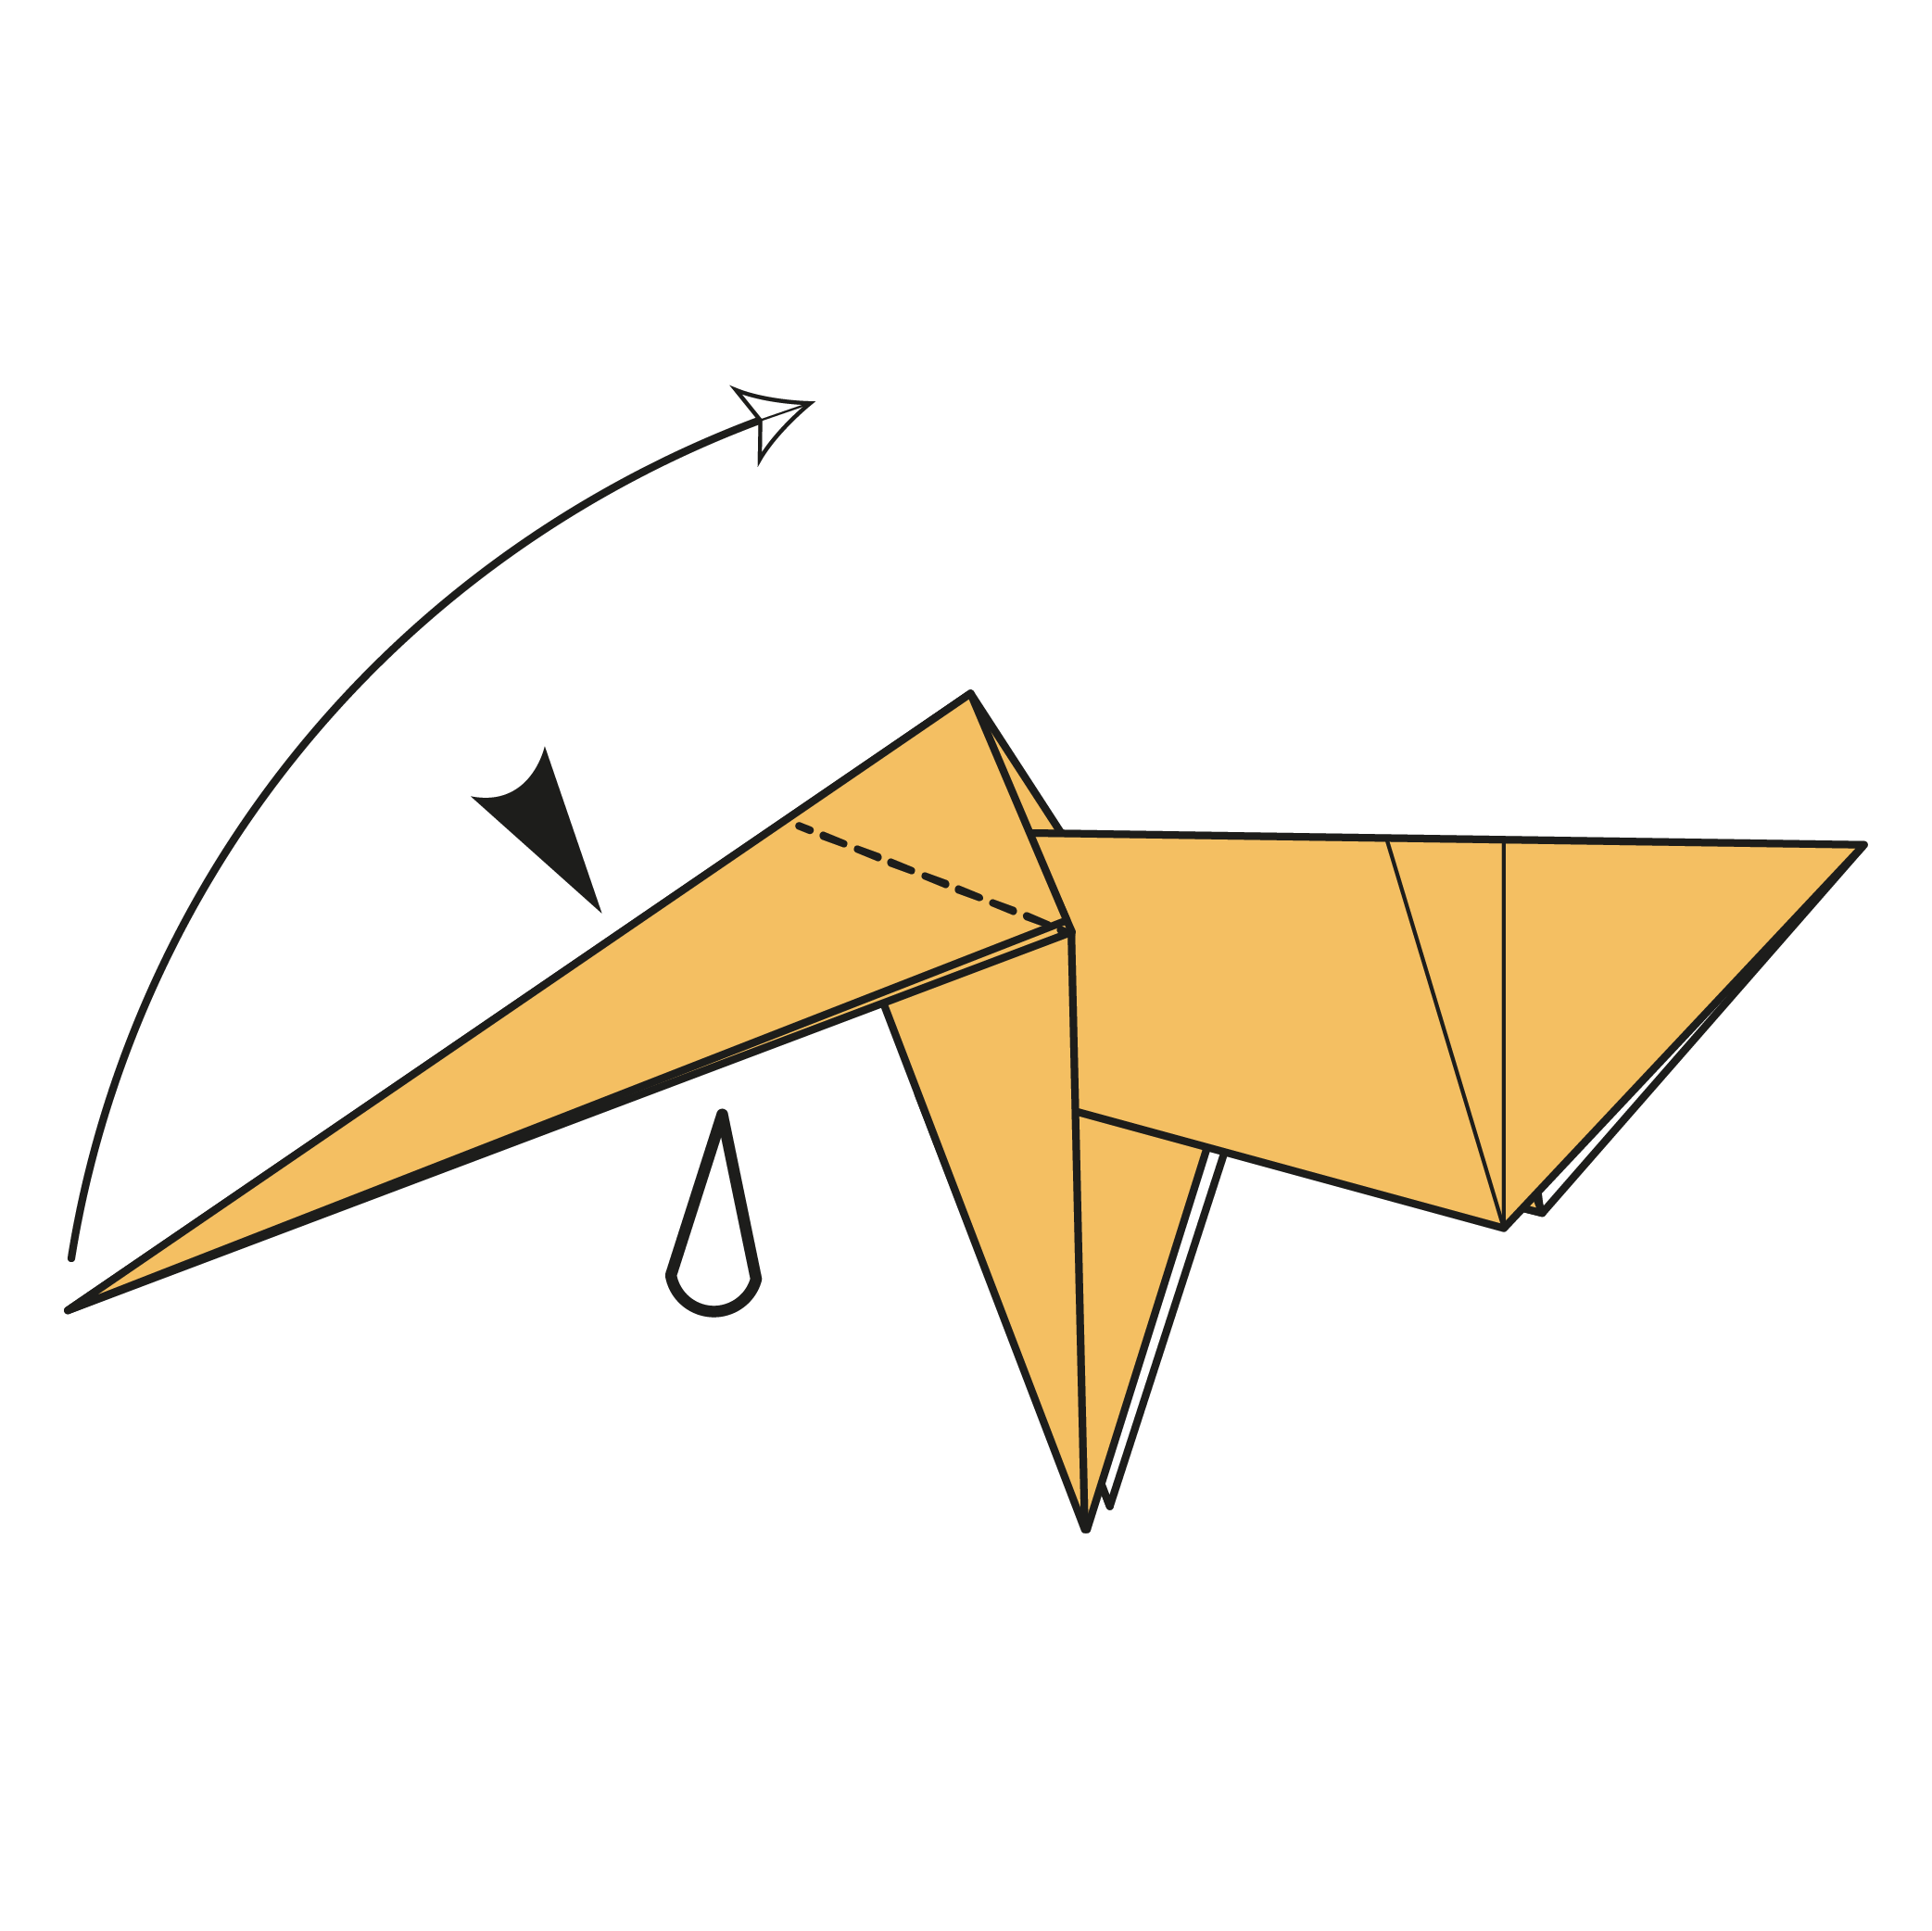
19Step 19
Open the left flaps and bring them up making an outside reverse fold.
 20
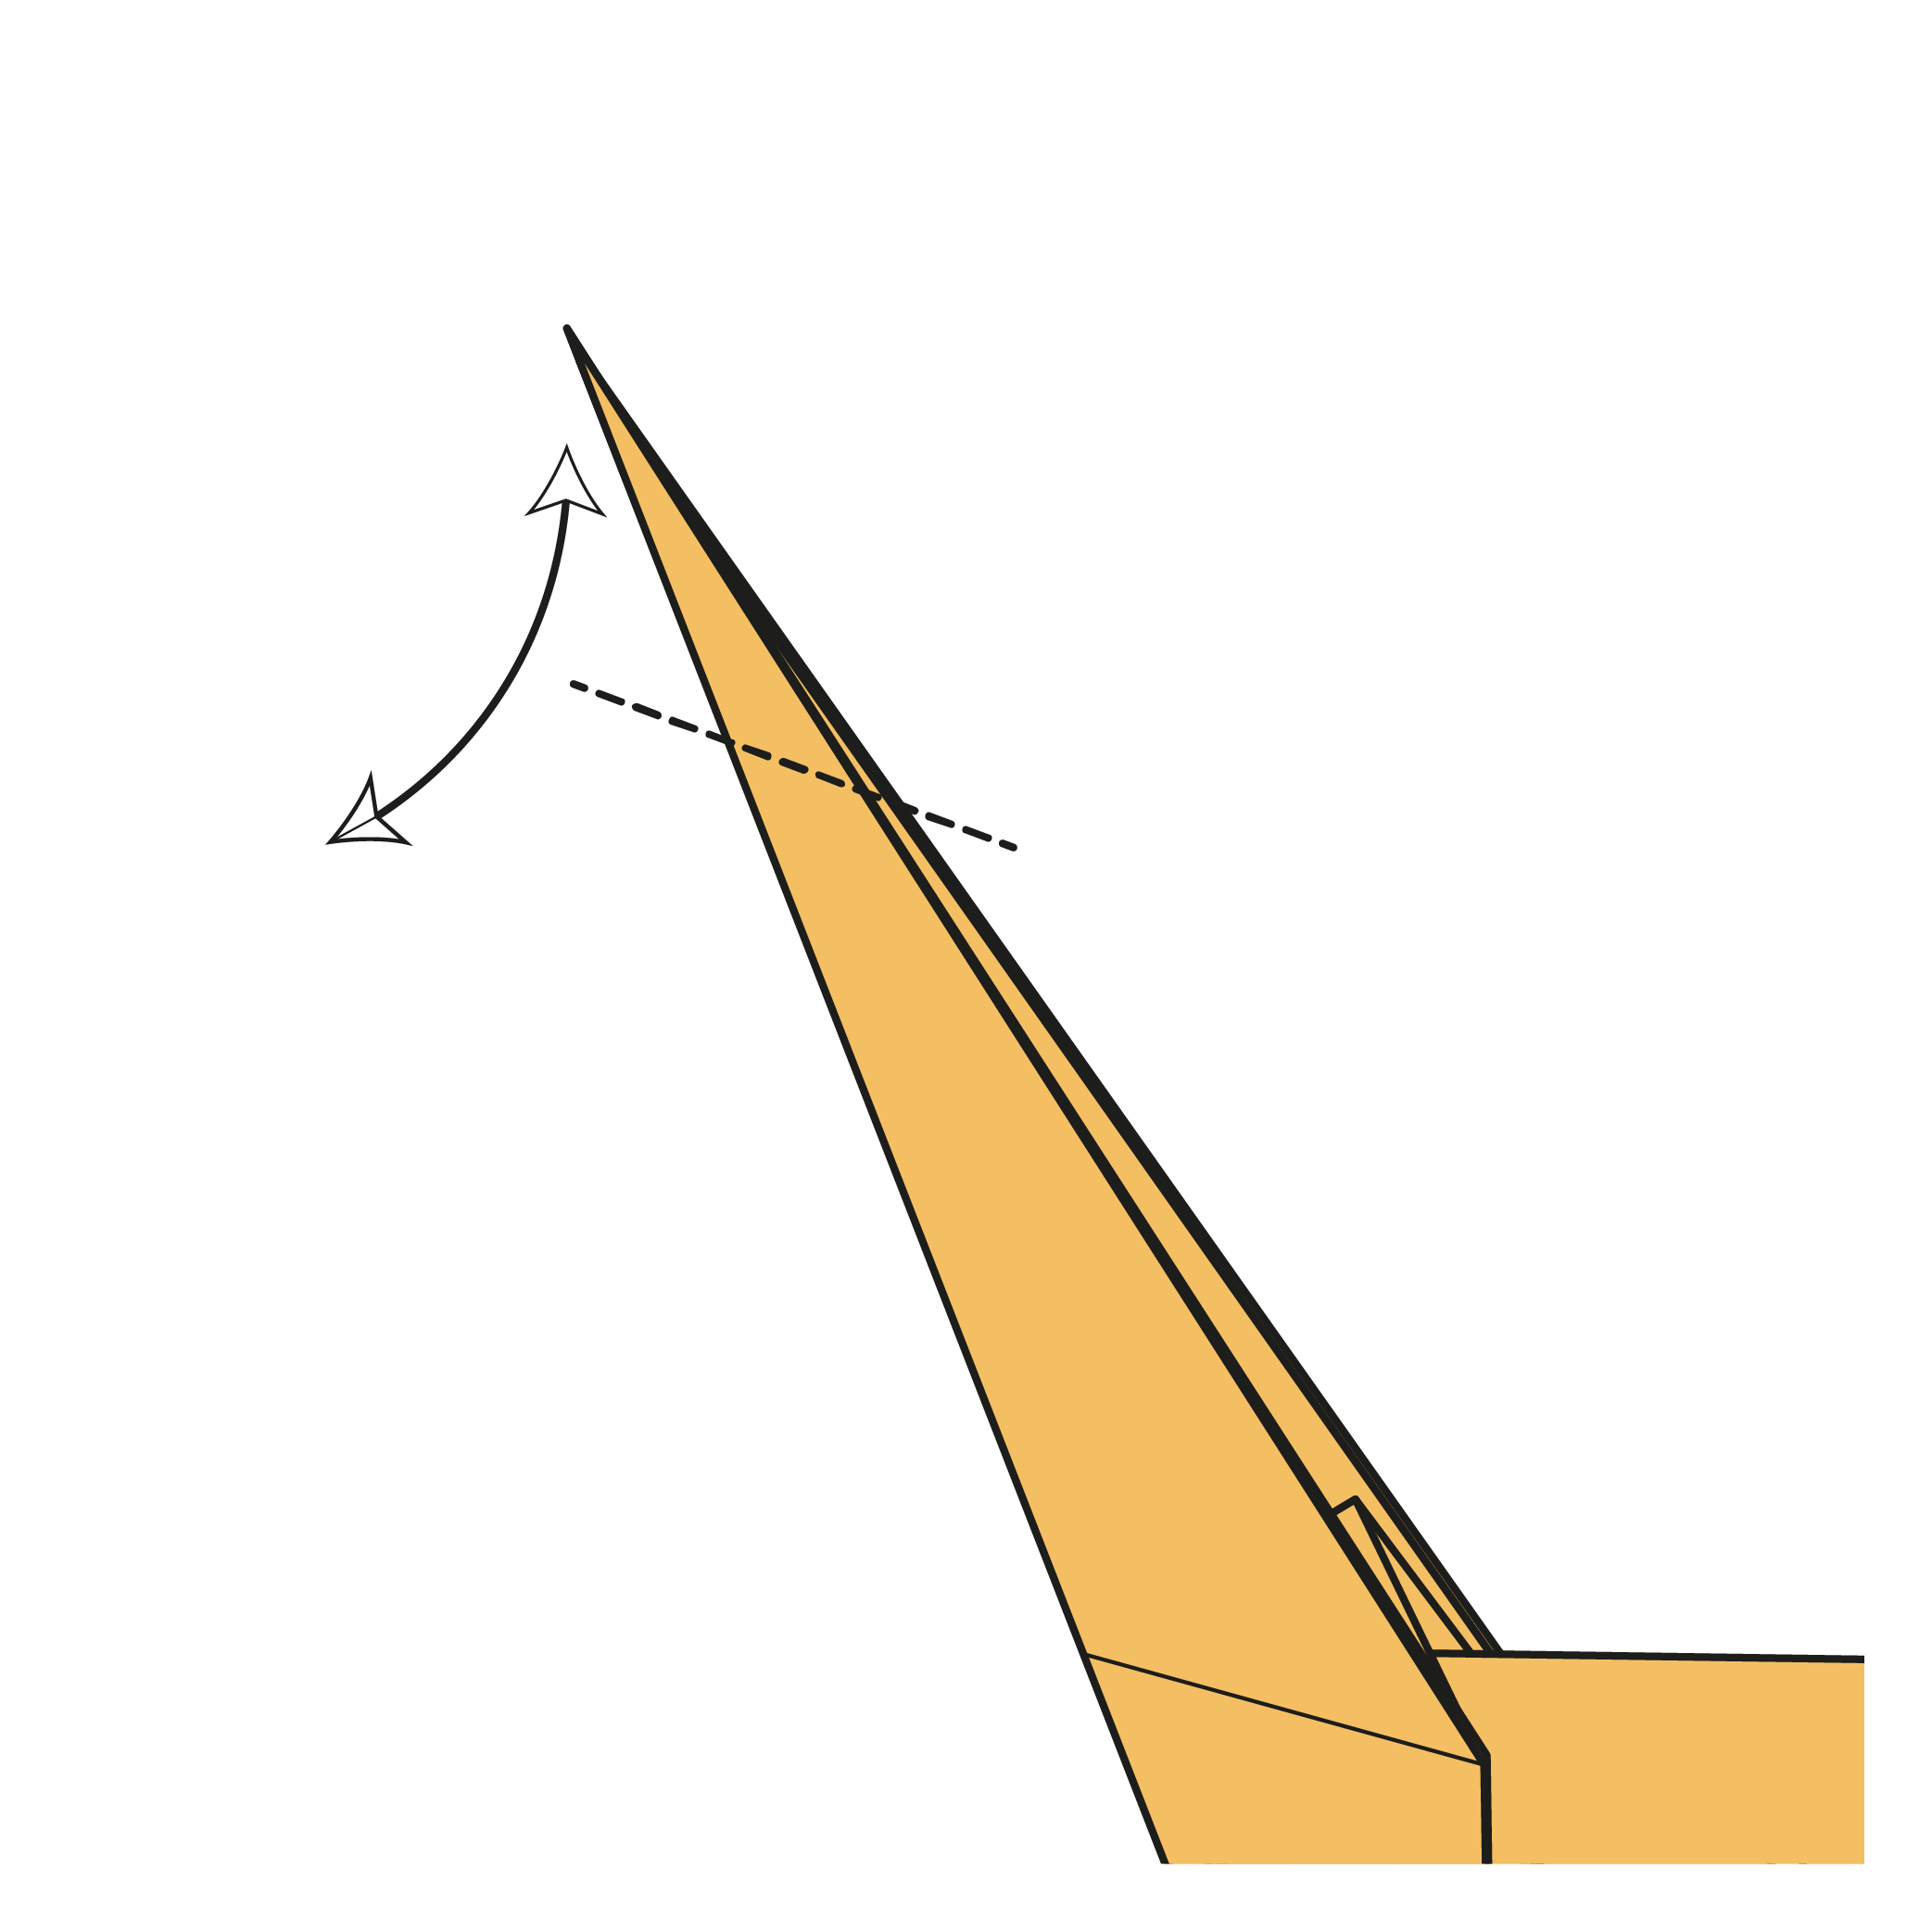
20Step 20
Fold down along the dotted line to pre-crease the head. Crease well, then unfold.
 21
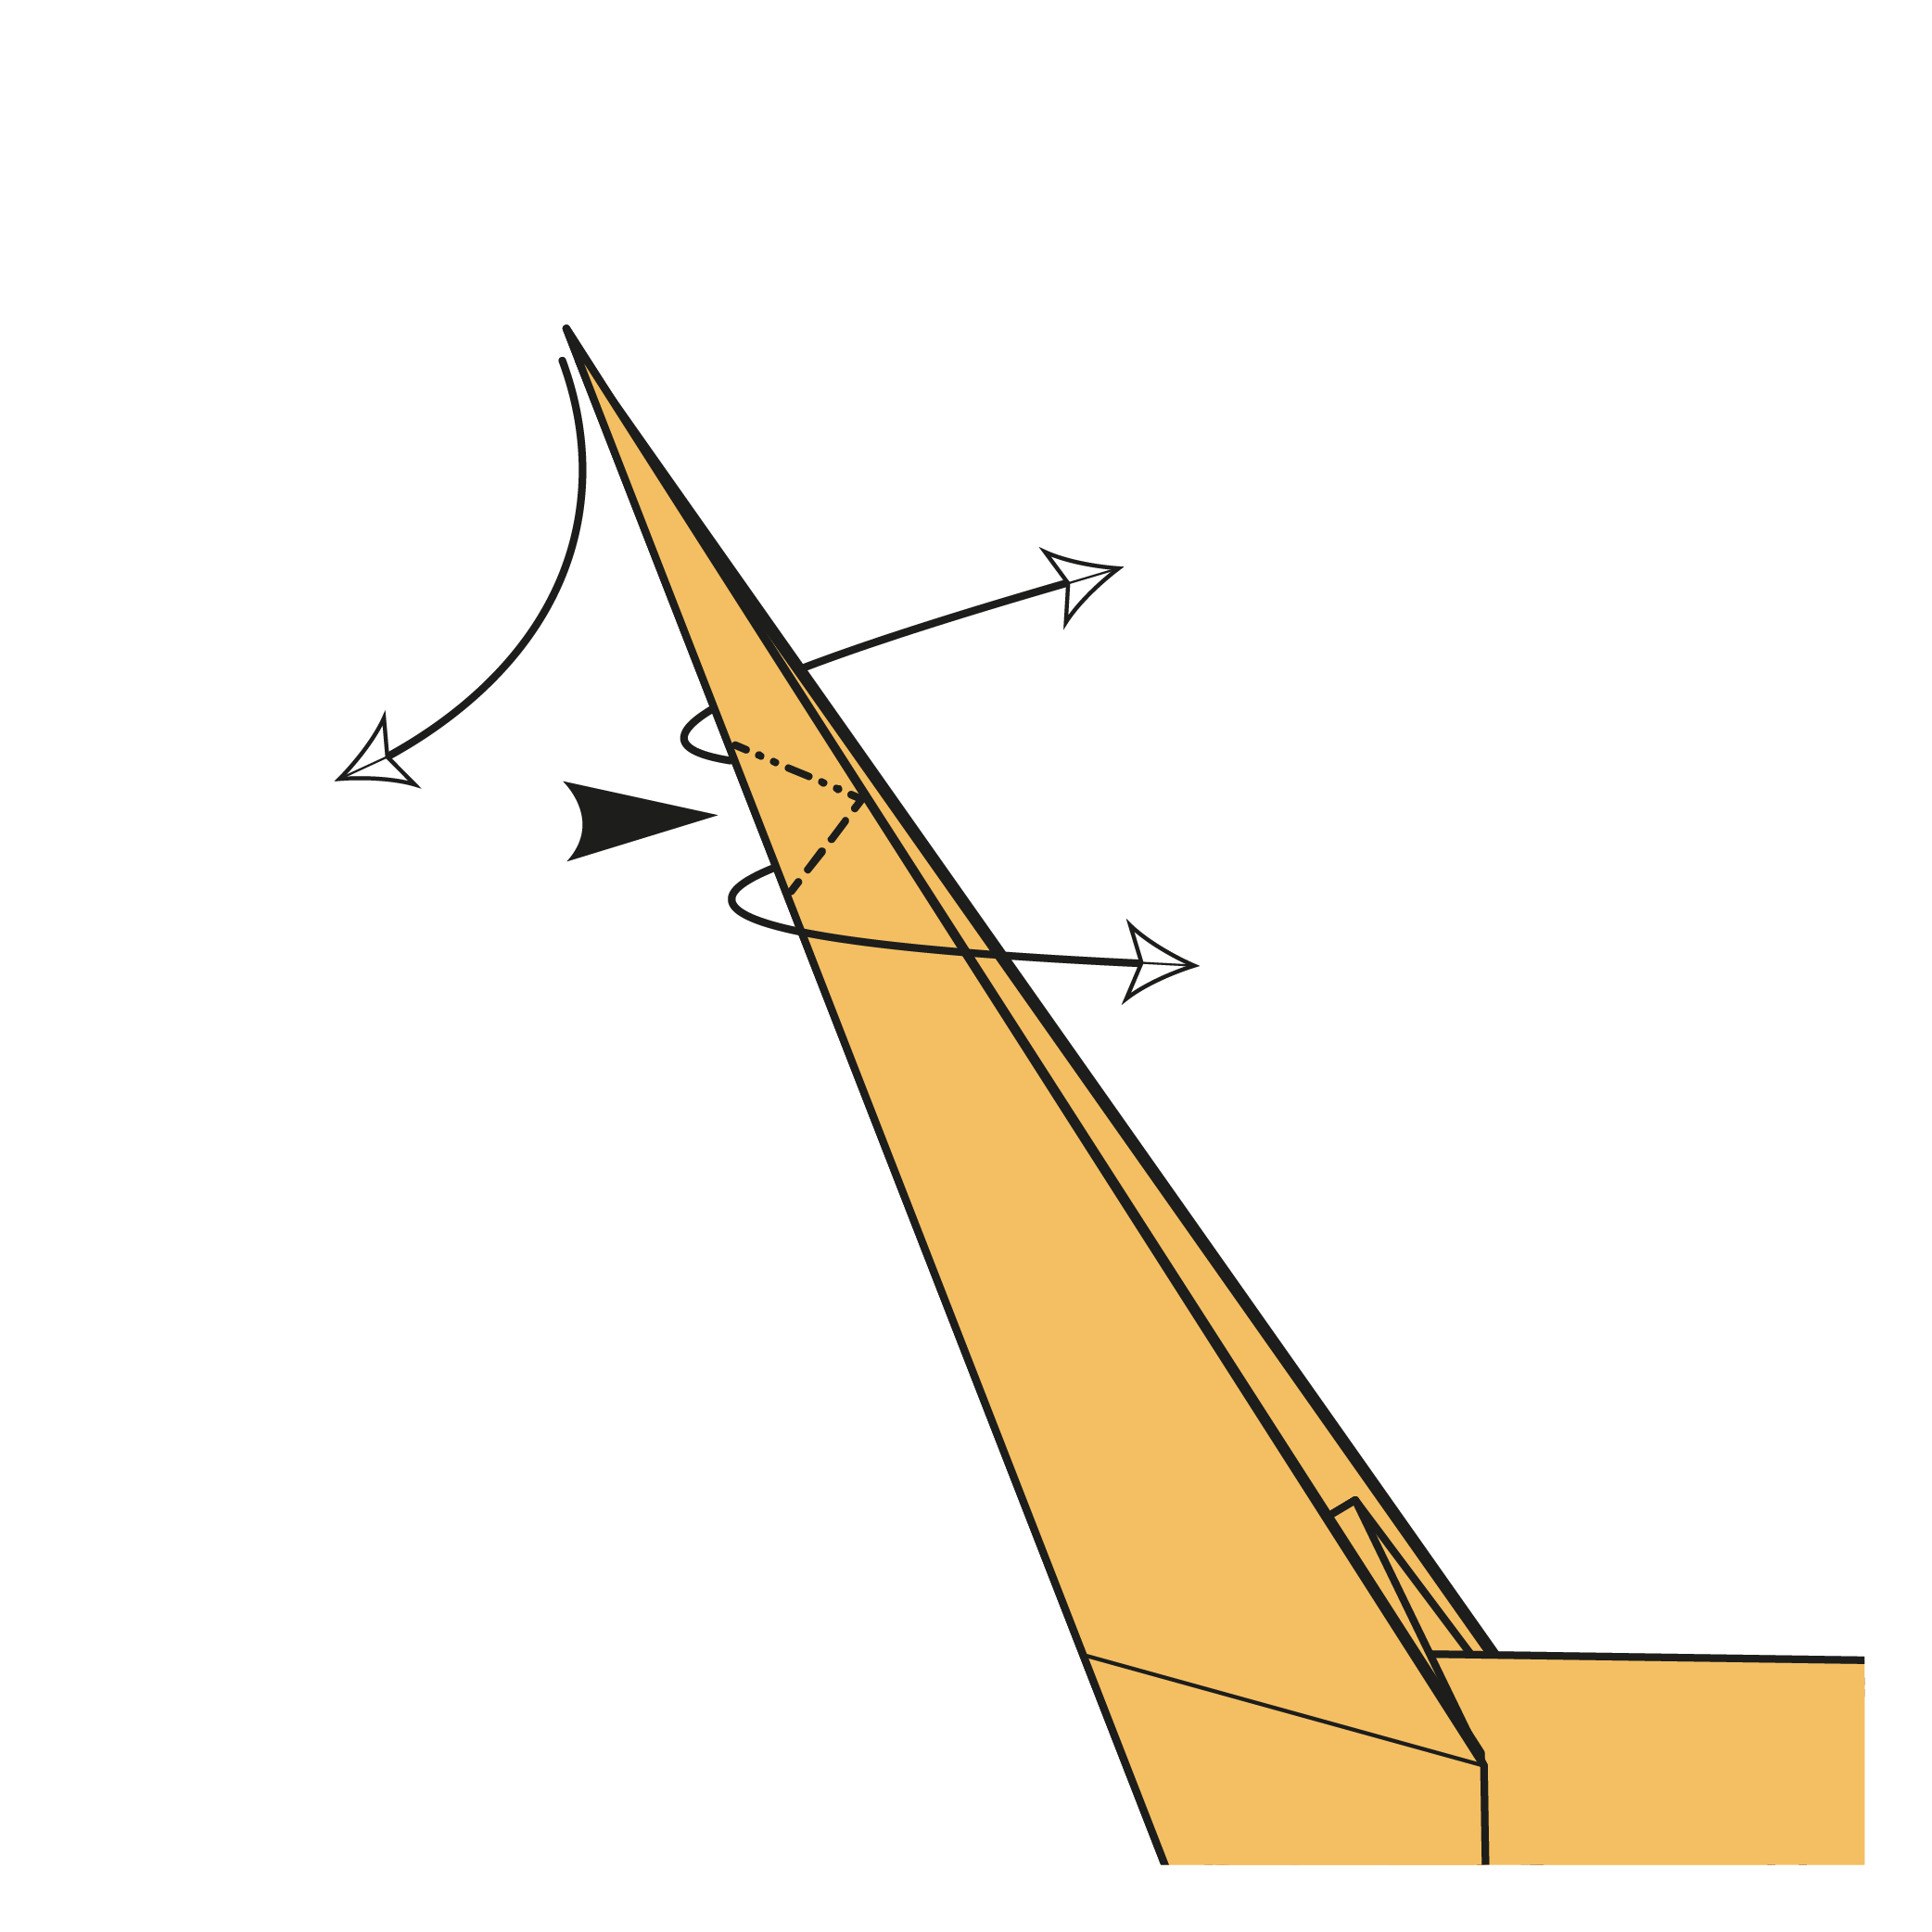
21Step 21
Open the outer flaps and make an outside reverse fold to form the head. The outer layers will form the bottom of the head.
 22
22Step 22
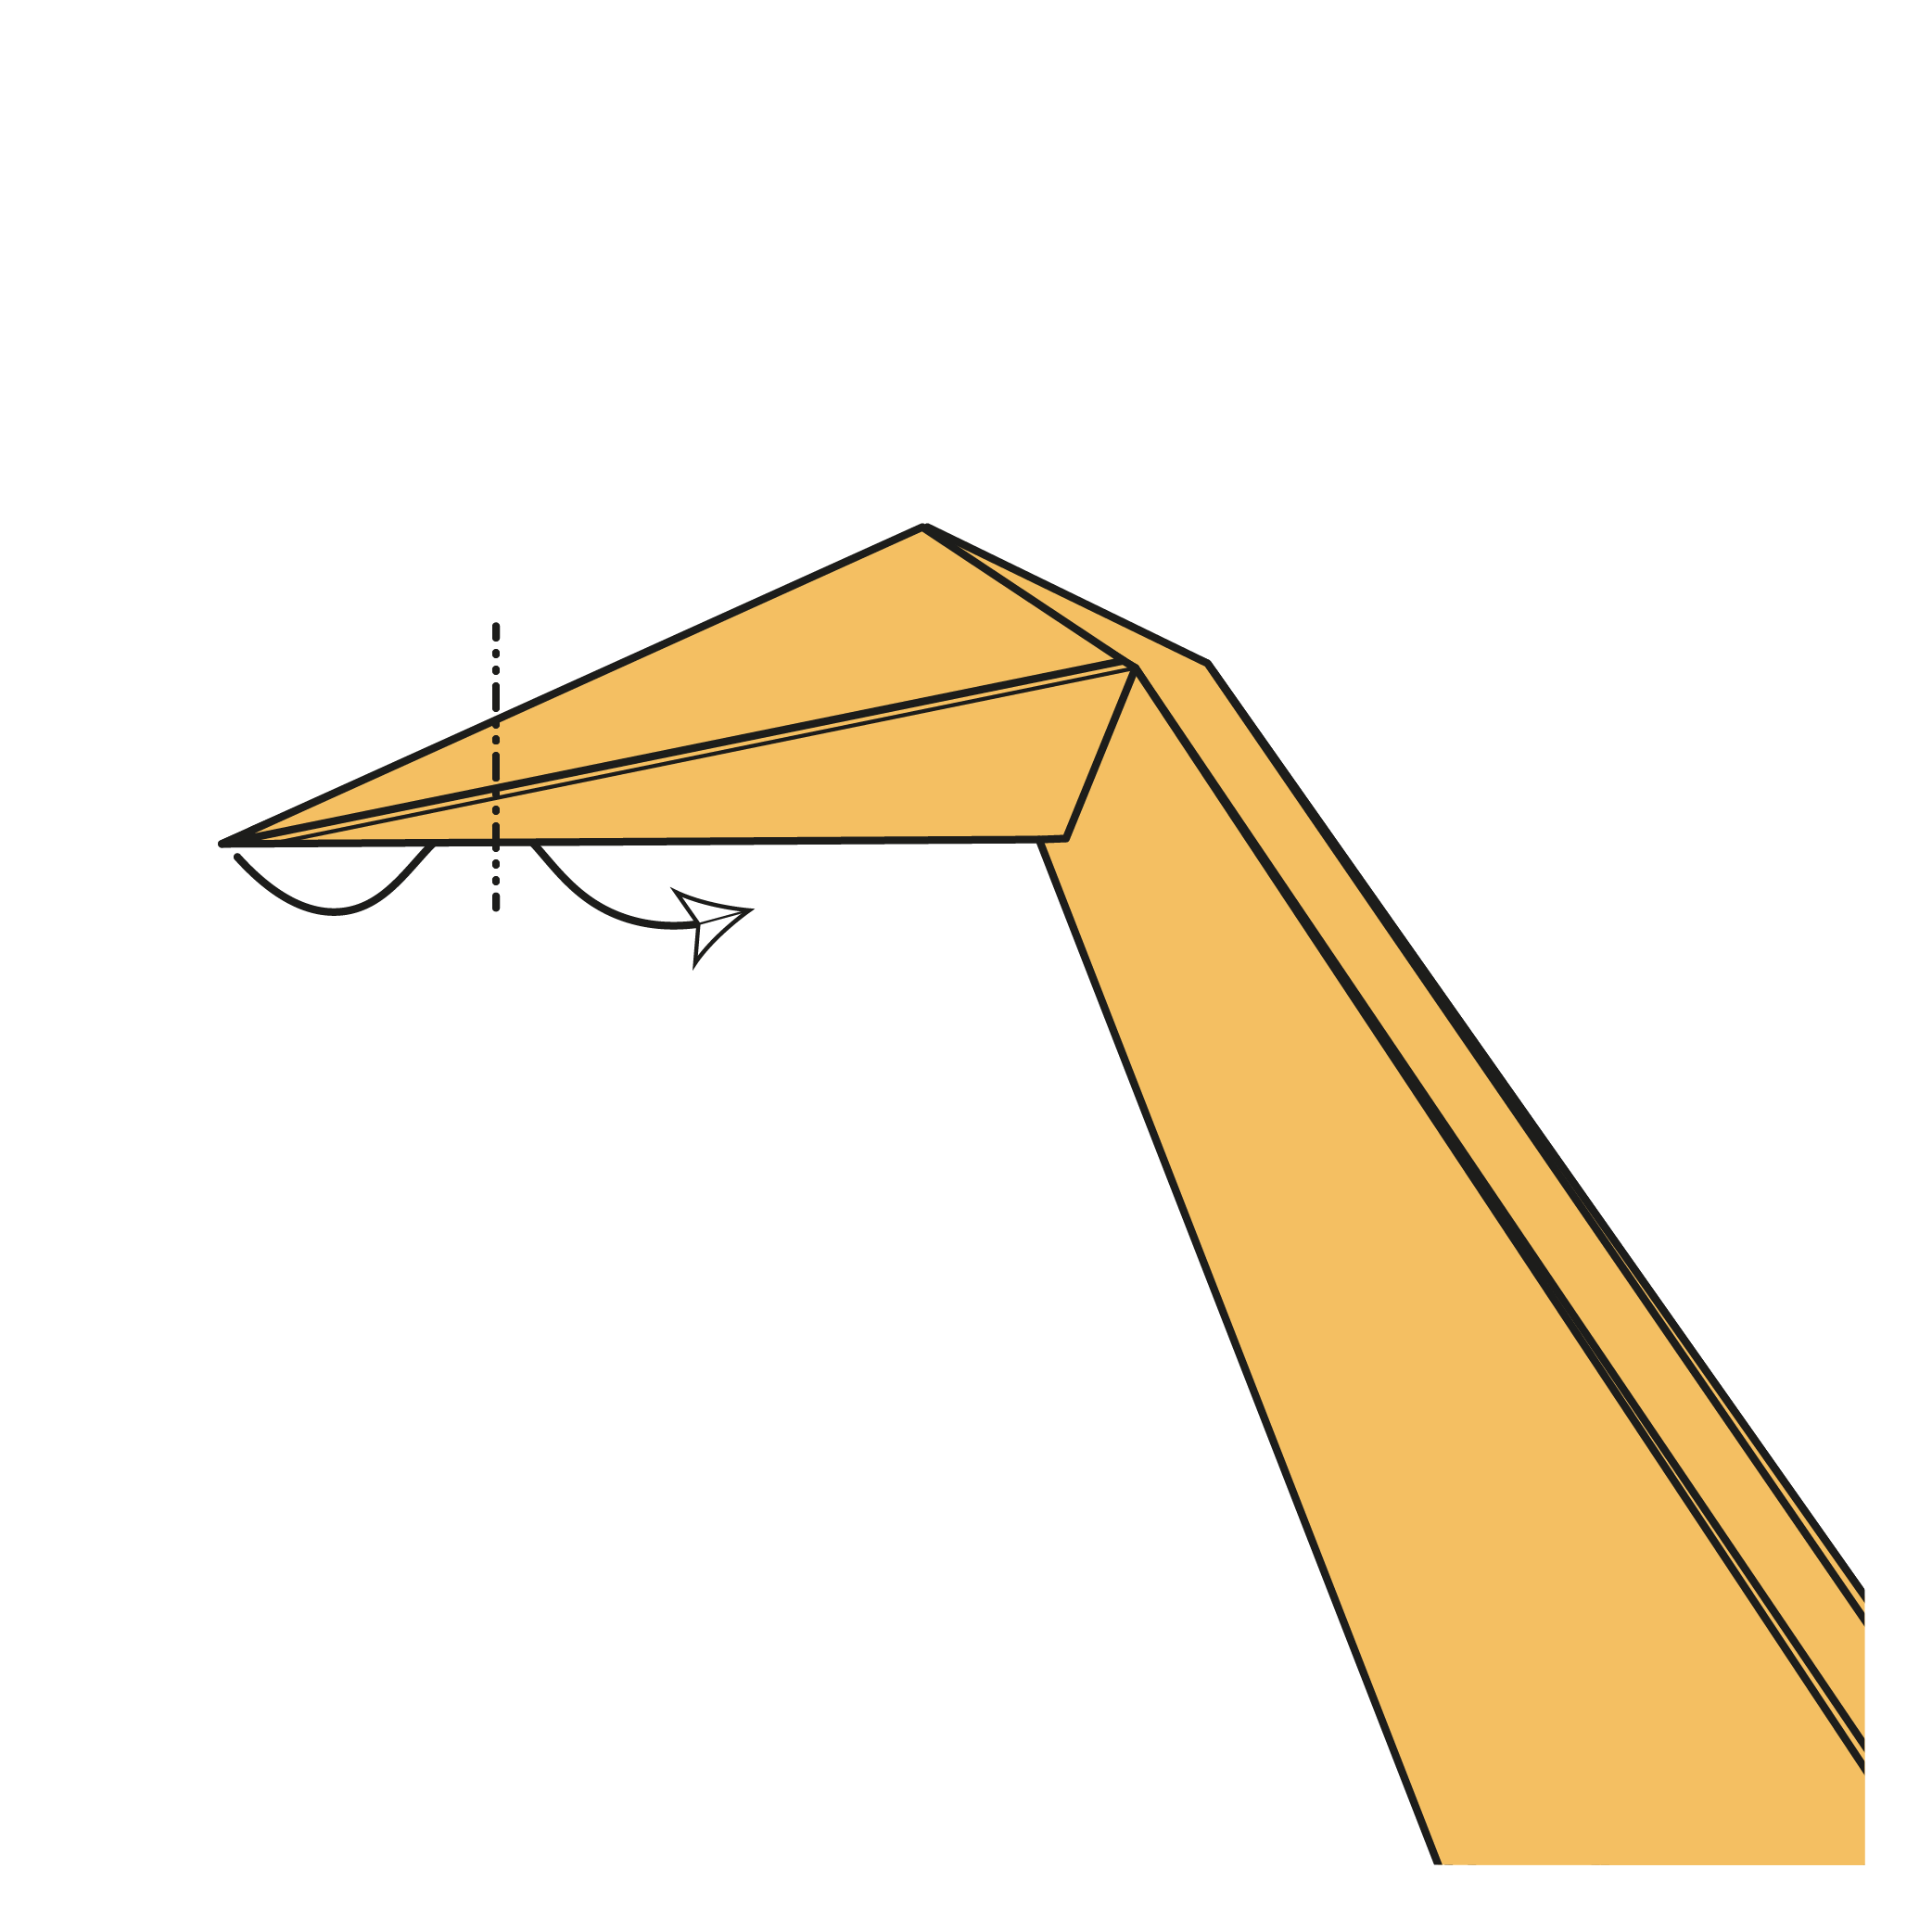
Inside reverse fold the tip of the head.
 23
23Step 23
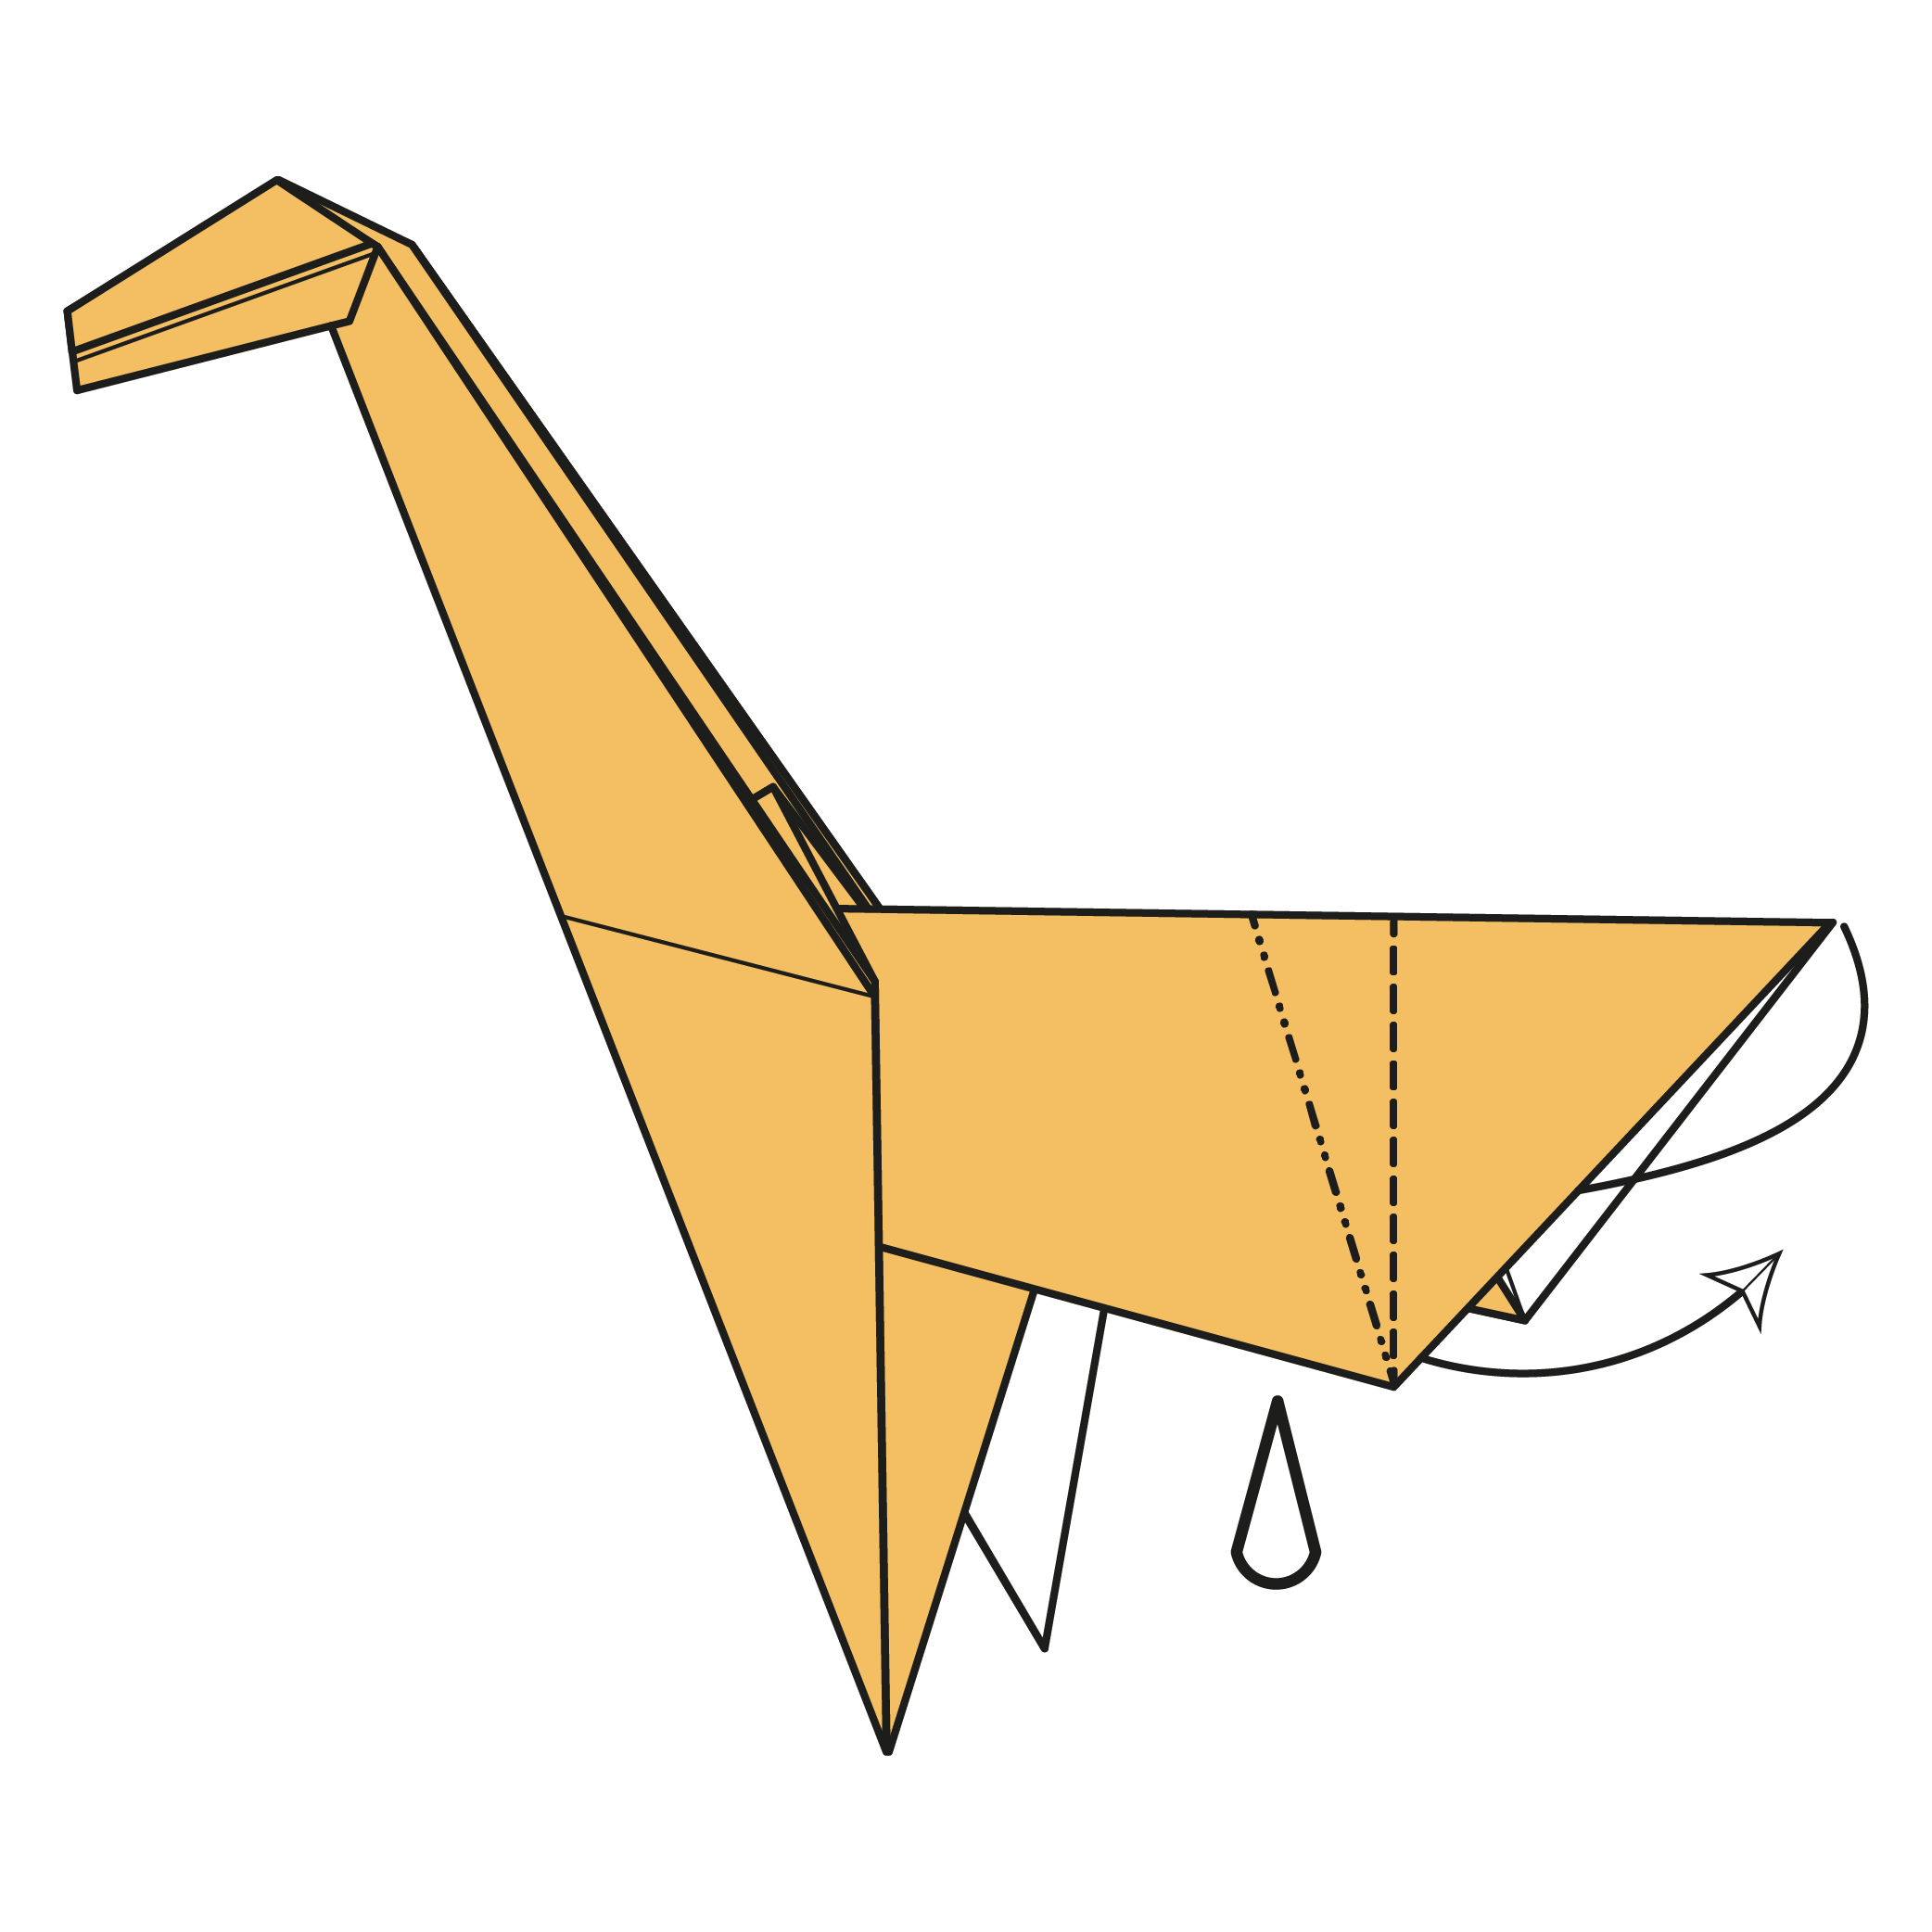
Bring the right corner inside the model and make a crimp fold along the existing creases.
 24
24Step 24
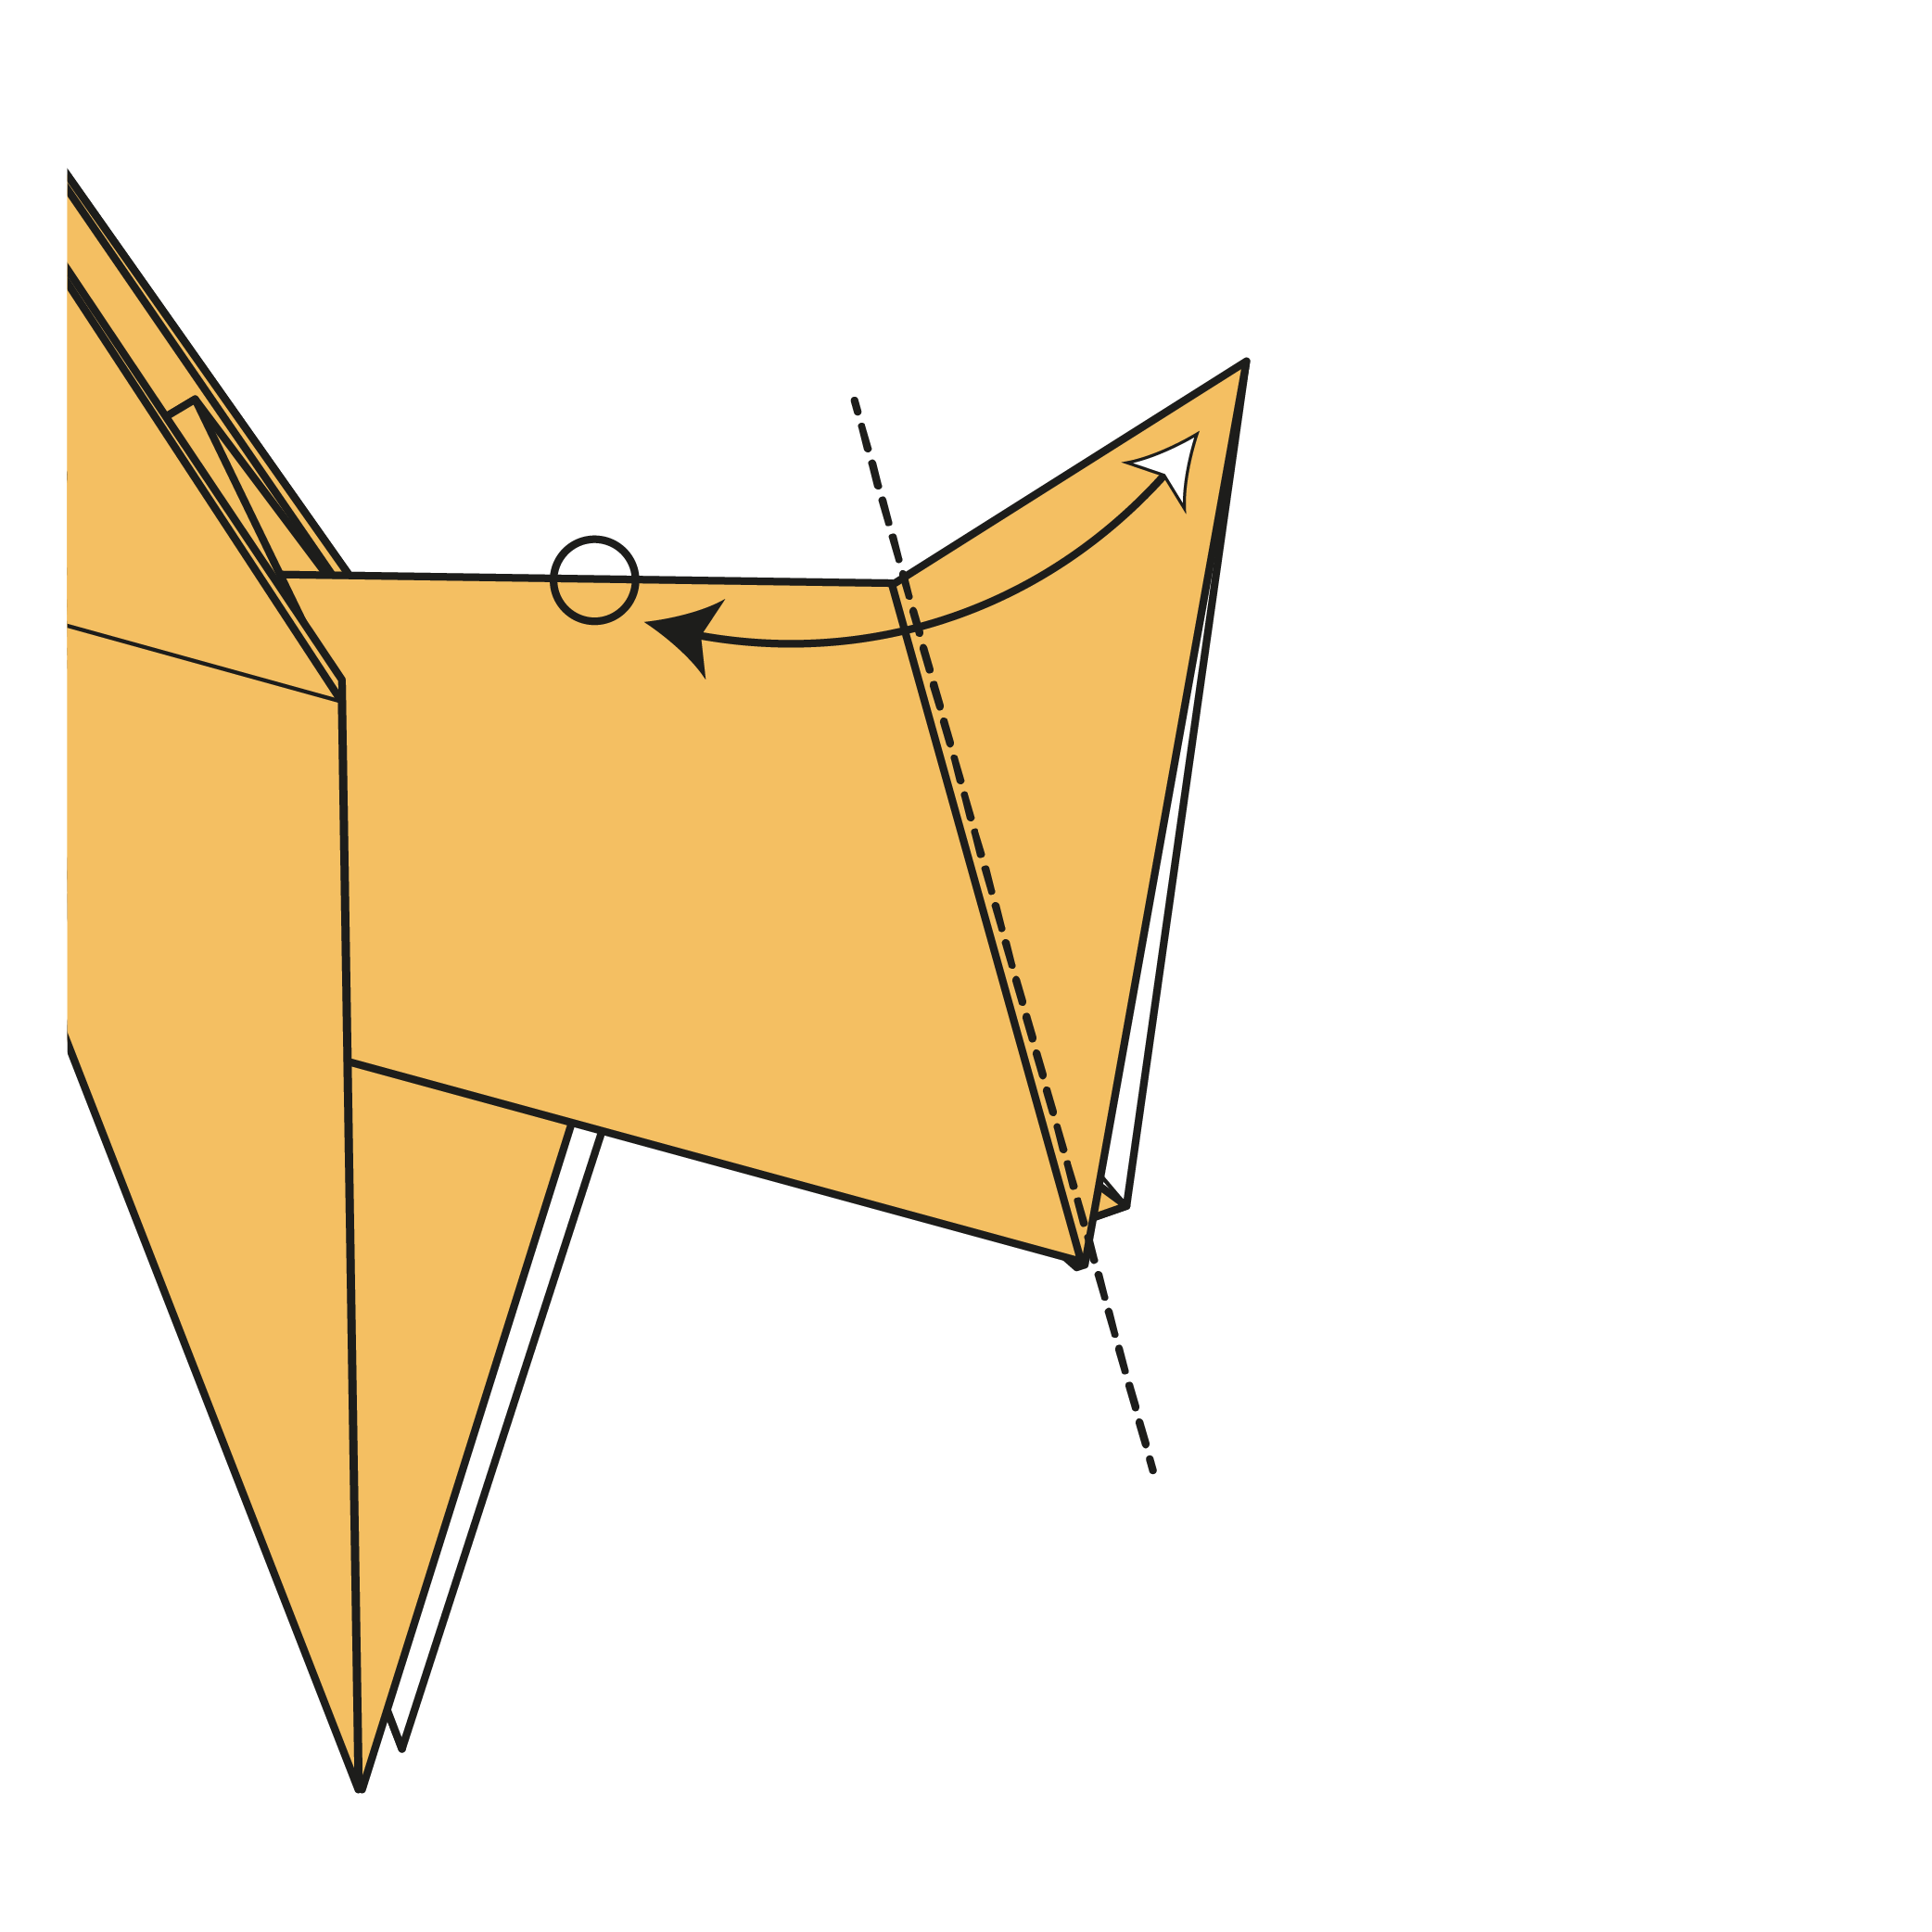
Fold the tail along the dotted line where the two layers meet. Then, unfold.
 25
25Finished Giraffe
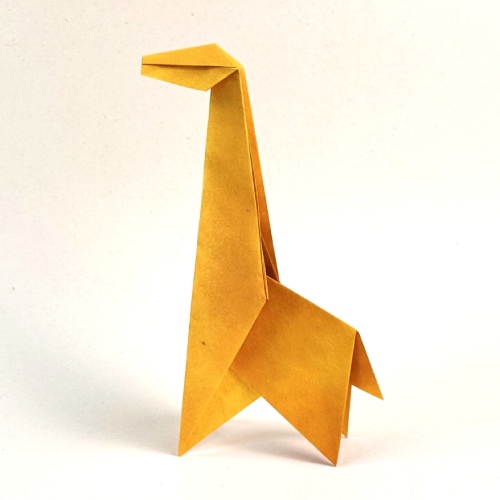
Crimp fold the tail using the crease from Step 24. Adjust the angle to your liking.
Finished Model
Congratulations!You've completed this tutorial.