

Fan
A traditional Japanese sensu fan, pleated and locked together for a piece that genuinely opens and closes.
Introduction
This tutorial walks you through folding a fanfrom a single square sheet of paper. Follow each step in order, take your time with the creases, and you'll have a finished fan in about 5-10 min.
Step by Step
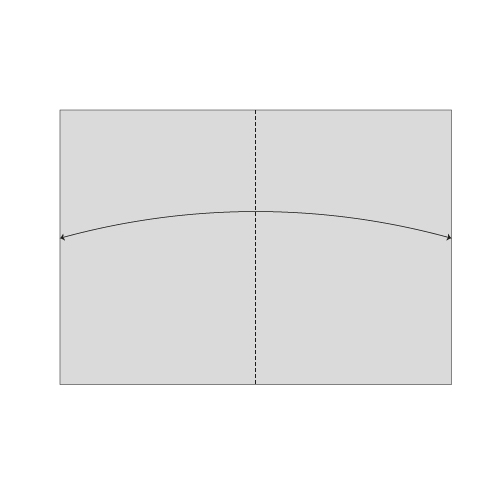 1
1Step 1
Start with a double-sided rectangular paper or square origami paper.Fold in half and unfold.
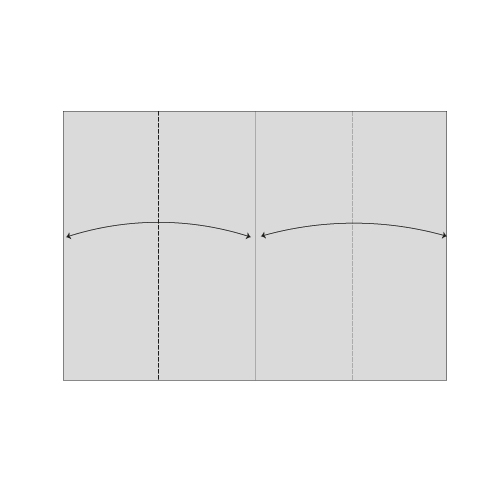 2
2Step 2
Fold each side in half to the center crease, and unfold.
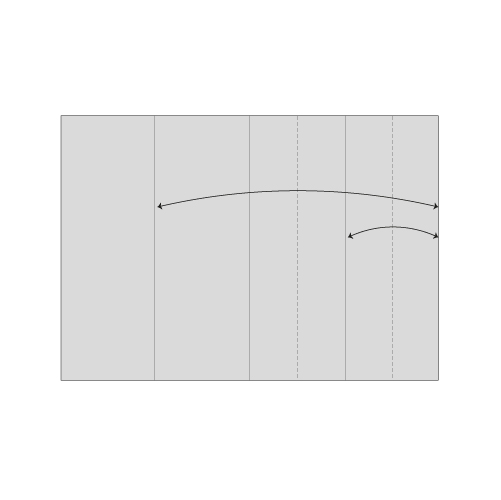 3
3Step 3
On the right side, fold each segment created in the previous step in half, and then unfold. Follow the diagram to see where to fold.
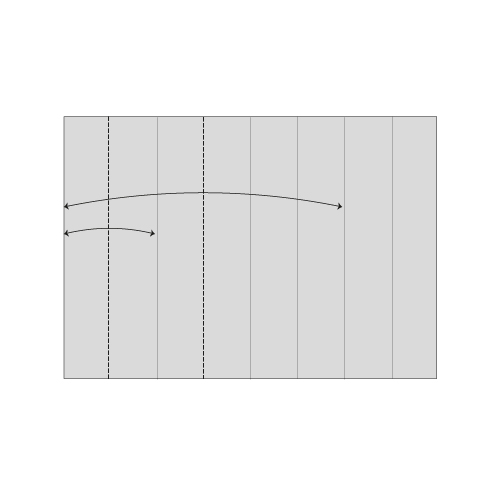 4
4Step 4
Repeat on the left side.
 5
5Step 5
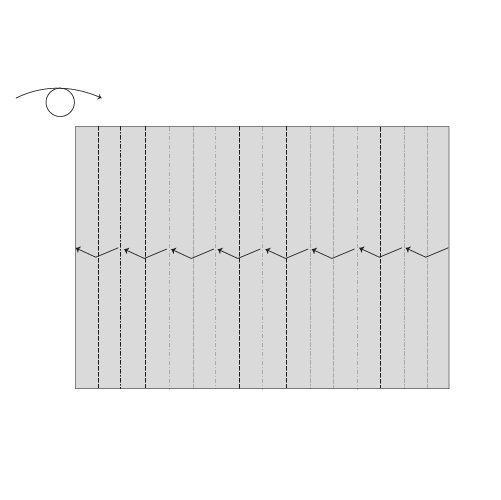
Turn the paper over and fold each segment in half.
 6
6Step 6
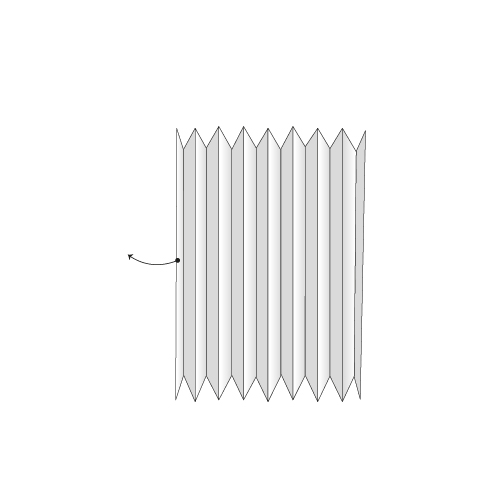
Collapse the model and open the left flap.
 7
7Step 7
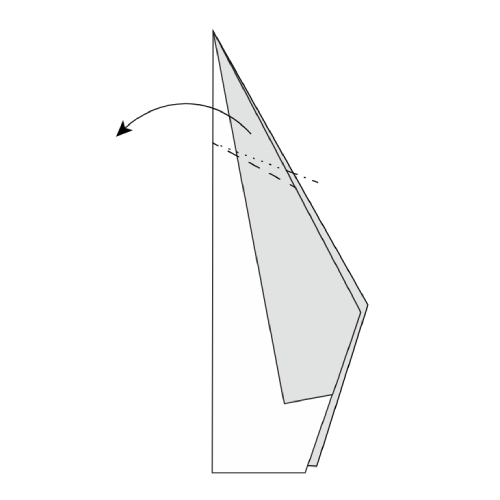
With the left flap open, fold the model in half from bottom to top, keeping the left flap. We’ll use it to attach both sides together.
 8
8Step 8
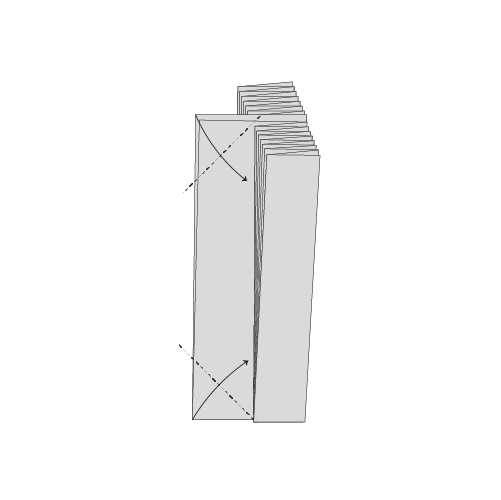
Fold both corners to the center line, simultaneously folding the two layers.
 9
9Step 9
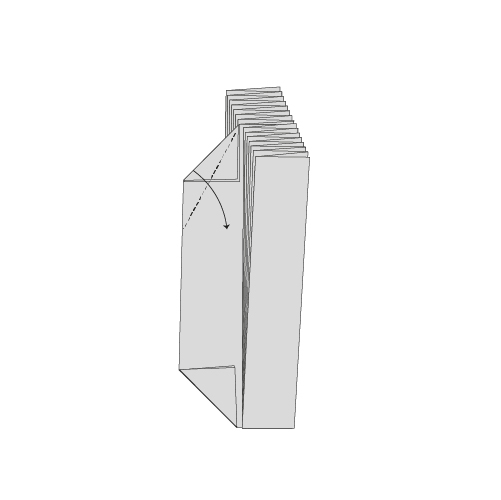
Fold the top corner down once more. The angle is not important.This fold is to secure the previous fold made in step 8.
 10
10Step 10
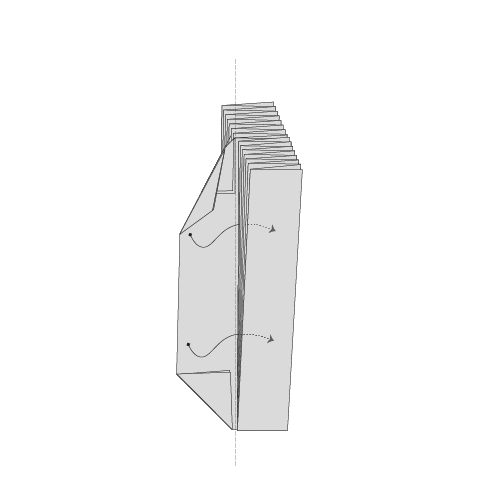
Close the left flap towards the center of the fan to lock both sides together. Use the existing crease.
 11
11Step 11
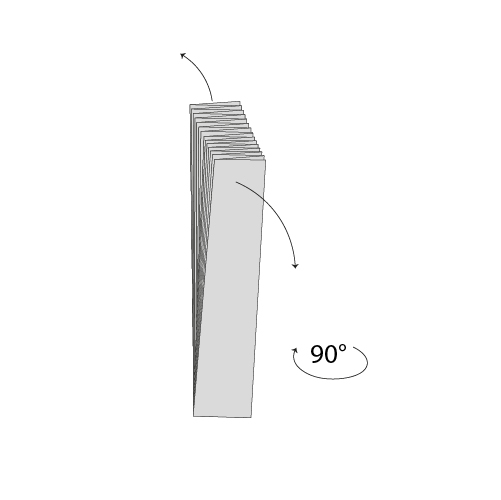
Open the fan and rotate the model towards you.
Finished Model
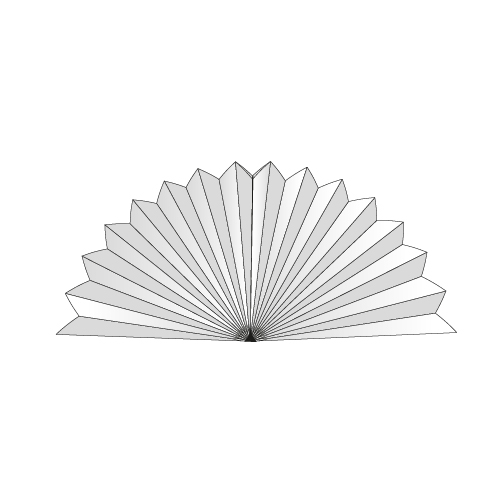
Congratulations!You've completed this tutorial.